15 Christmas Driveway Marker Ideas for a Welcoming Path (Safe and Simple)
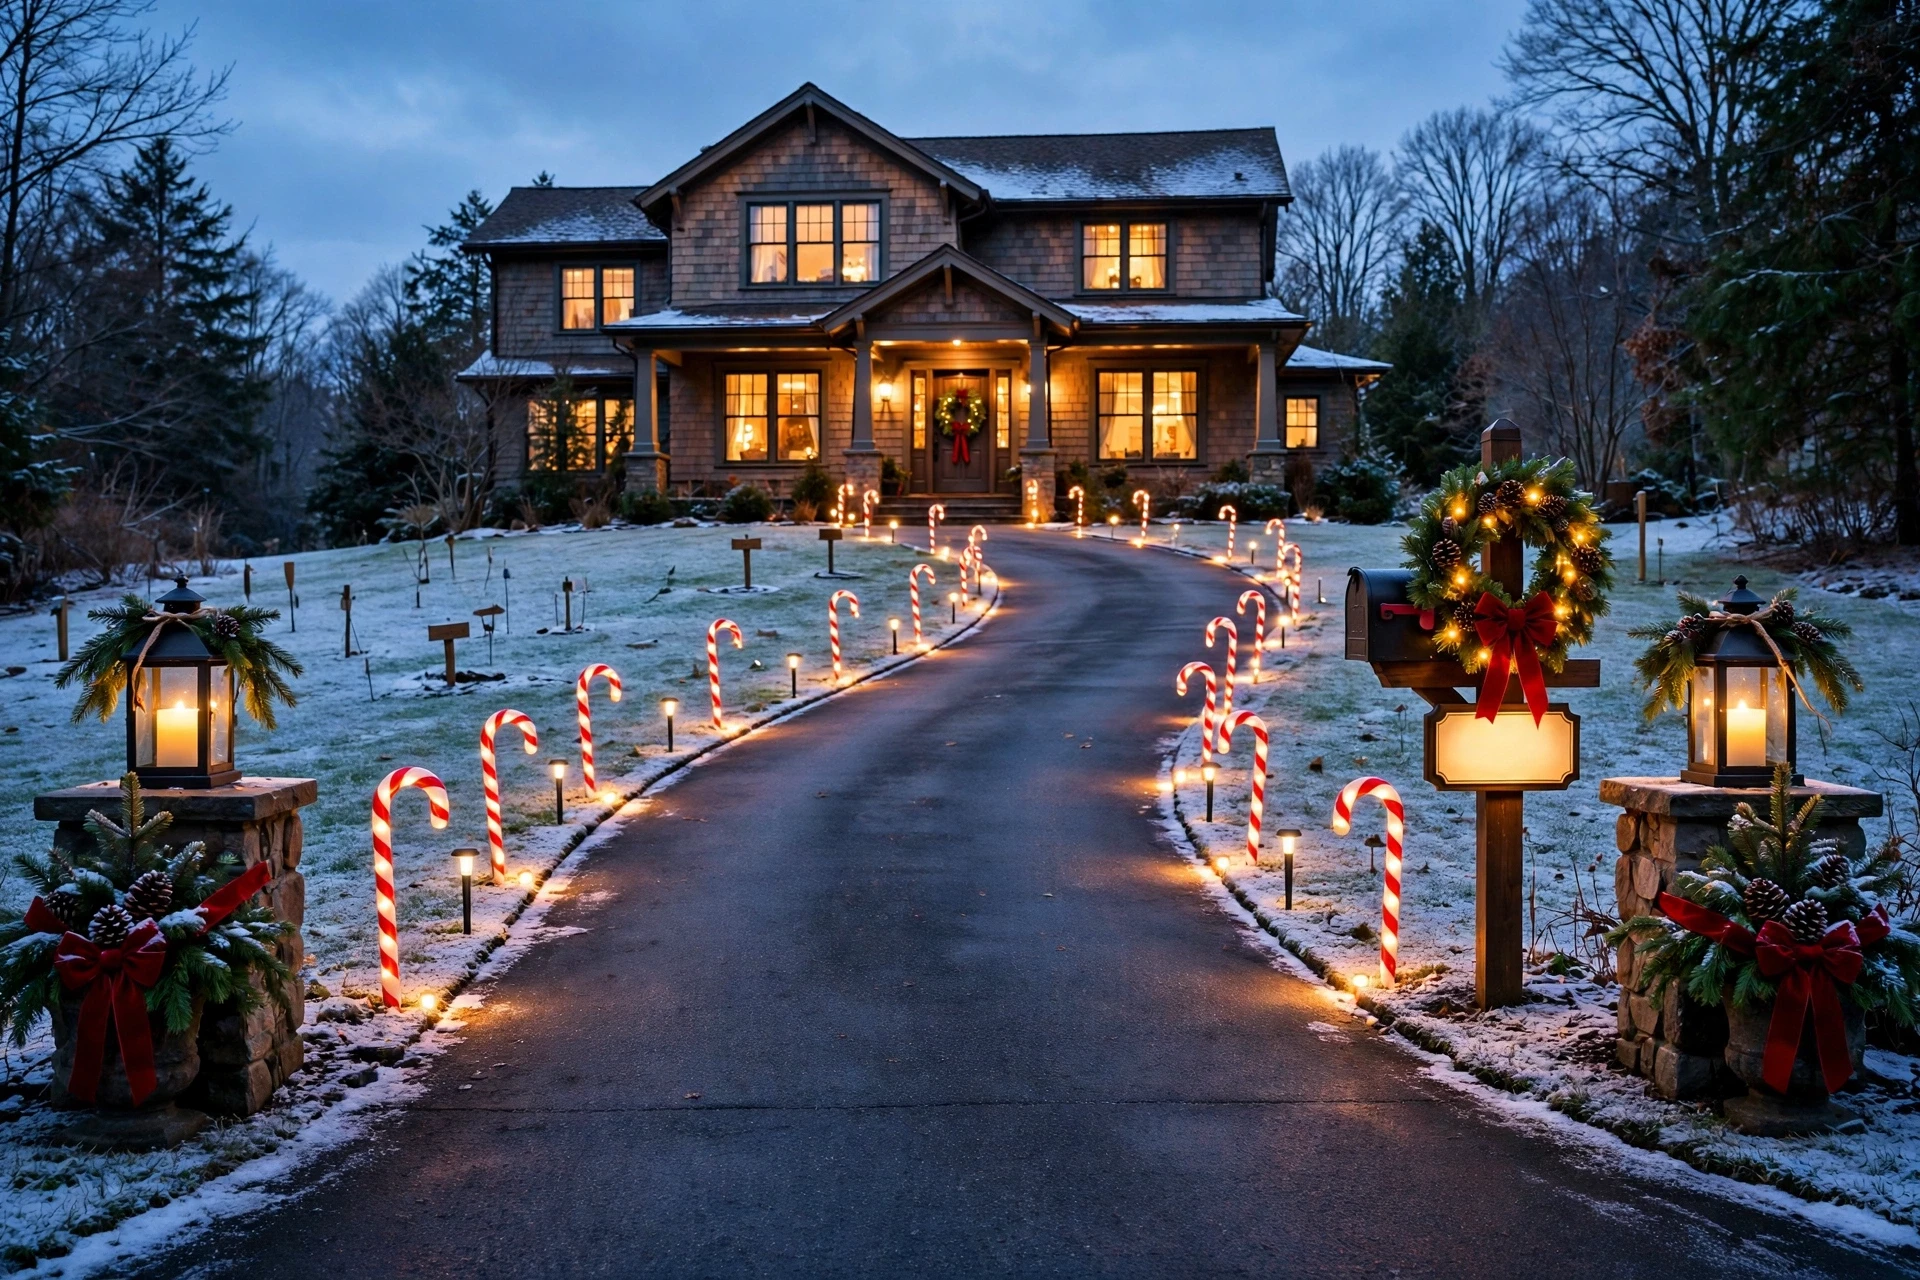
Picture this. It’s a dark December evening, and a car turns slowly onto your street. The driver squints at house numbers, unsure which driveway is yours.
Then they see it. A soft line of warm lights, curving gently up to a wreath on your door.
That’s the quiet magic of Christmas driveway markers. They don’t just look pretty. They guide, they welcome, and they tell people they’re in the right place.
But driveways aren’t like porches. Cars roll over things. Snow plows push things. Rain, ice, and wind test everything. A pretty display can turn into a tangled mess by the second week.
So this guide does both. You’ll find 15 Christmas driveway marker ideas for a welcoming path, plus a driveway type guide, a power comparison, a spacing plan, and a safety checklist. Many people put up lights around Thanksgiving weekend, so you have time to plan and shop. Grab a coat and walk your driveway first.
Quick Answer: How Do You Decorate a Driveway for Christmas?
Line the edges with stake lights, lanterns, or evergreen accents, spaced evenly and set back from where tires, plows, and shovels travel. Use outdoor-rated lights, choose stakes tall enough to stay visible above snow, and pick a power plan that fits your driveway, such as solar, battery, or a plug-in set with an outdoor-rated cord. Add a few welcome touches at the entrance and the door, put everything on a timer, and keep house numbers visible.
Before You Start: Driveway Marker Rules
- Check your HOA and local rules. Some neighborhoods limit lighting style, brightness, or the hours decor can be on.
- Stay on your own property. Don’t place decor in the street, on a public sidewalk, or in a shared easement.
- Keep sightlines clear. Don’t put tall decor where it blocks a driver’s view at the street.
- Walk the driveway first. Note curves, slopes, drains, and where cars turn.
- Plan for plows and shovels. Set markers back from the edge, and use taller stakes if you get snow.
- Know your power source. Find the nearest outdoor outlet, and decide if you need a cord, solar, or batteries.
- Keep the house number visible. Guests, delivery drivers, and emergency services need to find you easily.
Rules vary by town and neighborhood, so follow your own HOA guidelines and local codes.
Which Driveway Do You Have?
| Driveway type | Best approach | Watch out for |
|---|---|---|
| Short and straight | A neat row of matching stakes on both sides | Too many markers can look cluttered |
| Long or rural | Solar or battery stakes, spaced evenly, plus lanterns at the entrance | Power distance and long cords |
| Curved | Closer spacing on the curve, with brighter markers at the bend | Cars cutting the corner and hitting markers |
| Sloped | Weighted lanterns or stakes pushed in deeper | Markers sliding or tipping |
| Gravel | Stakes with long spikes, and lanterns set on flat stones | Stakes loosening in loose soil |
| Concrete or asphalt | Weighted bases, planters, or lanterns set beside the edge, not on the driveway | No place to push a stake |
| Shared or townhome drive | Decor on your own walkway and entry only | Rules about common areas |
Power Options Compared
| Power type | Pros | Cons | Best for |
|---|---|---|---|
| Solar stakes | No cord, easy to place | Dim on cloudy days, some are rated only for mild temperatures, and short run time in winter | Sunny, mild areas |
| Battery stakes and lanterns | Flexible, no cord, steady light | Batteries need changing, and cold can shorten life | Short runs and lanterns |
| Plug-in stakes | Bright and steady for the whole month | Needs an outdoor outlet and a safe cord path | Longer driveways with power nearby |
| Low-voltage kit | Safer low voltage, covers long runs | Costs more, needs a transformer | Long driveways and permanent setups |
Check the temperature rating on any solar or battery light, since some are made only for mild weather.
Marker Types at a Glance
| Marker | Look | Snow-friendly | Typical cost level |
|---|---|---|---|
| Candy cane stakes | Playful and classic | Good if tall | Low to medium |
| C9 bulb stakes | Vintage and bright | Good | Low to medium |
| Branch-spray markers | Natural and soft | Good | Medium |
| Snowflake and star stakes | Frosty and modern | Good | Low to medium |
| LED jar luminaries | Cozy and handmade | Fair, set on flat ground | Low |
| Lanterns | Elegant | Fair, can be weighted | Low to high |
| Ice luminaries | Magical in cold climates | Cold climates only | Very low |
Safety Rules for Driveway Christmas Decor
- Use outdoor-rated, UL-listed lights and cords. Indoor products aren’t built for rain, snow, or cold.
- Plug into a GFCI-protected outlet when you can. Keep connections off wet ground and above puddle level.
- Keep cords out of tire paths. Don’t run cords across the driveway where cars drive, and cover or route them safely.
- Set markers back from the edge. Plows, shovels, and tires can crush or throw markers.
- Skip open flames. Real candles in paper bags, jars, or lanterns can tip, burn, or ignite dry leaves. Use LED candles.
- Avoid blinding or distracting drivers. Skip flashing lights aimed at the street.
- Keep walkways clear. Don’t place decor where people step out of cars or carry packages.
- Watch for ice. Markers and cords can become hidden tripping hazards under snow.
- Keep your house number visible. Don’t hide it behind decor.
- Turn lights off when you’re away. Use a timer for hands-free control.
Christmas Driveway Color Palettes
| Palette | Colors | Mood | Best for |
|---|---|---|---|
| Classic candy | Red, white, evergreen, warm white lights | Cheerful and traditional | Most homes |
| Winter white | Clear and warm white, silver, pale blue | Elegant and calm | Modern homes |
| Natural glow | Warm amber, wood, pinecones, deep green | Soft and rustic | Farmhouse and cabin homes |
Part One: Classic Stake Markers
1. Candy Cane Stake Lights
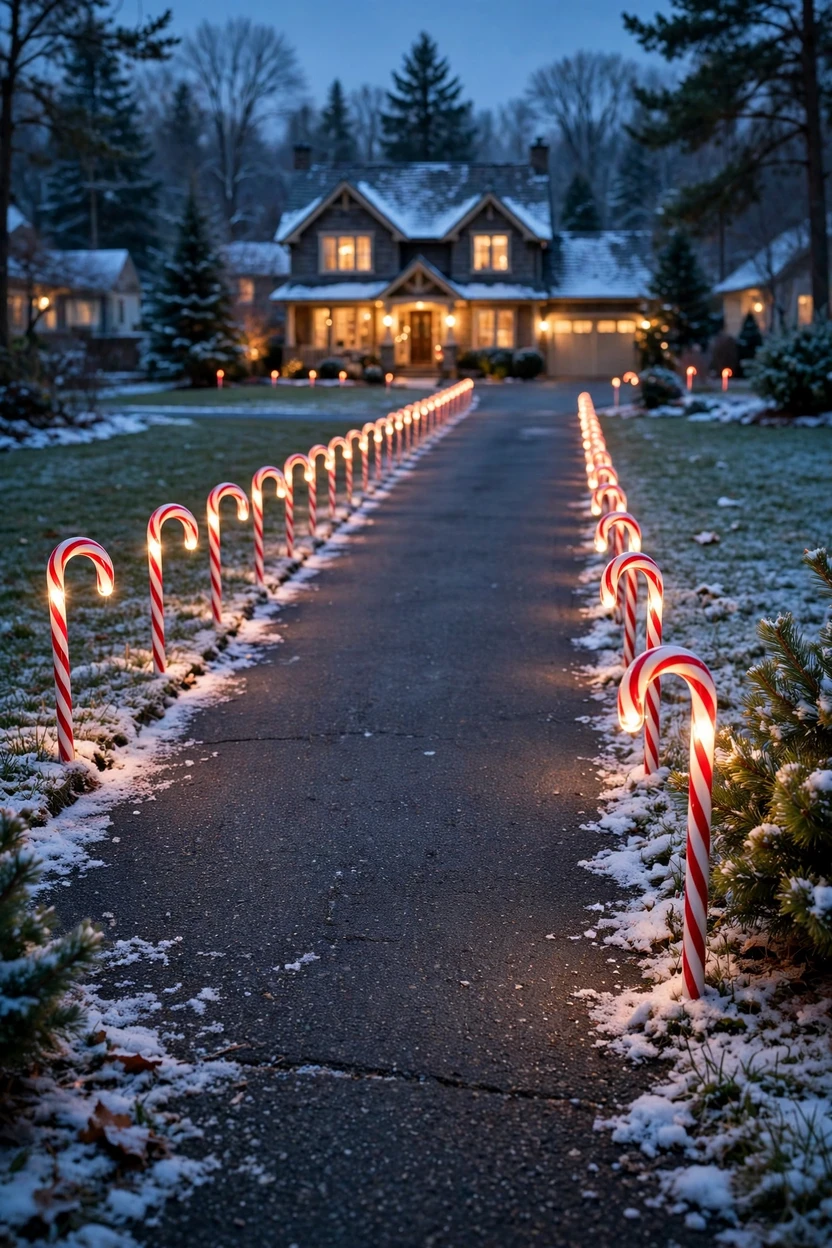
Marker check: Power: solar, battery, or plug-in | Snow-smart: choose tall stakes | Cost: low to medium | Difficulty: easy
Candy cane stakes are the happiest way to line a driveway. Choose a set with sturdy stakes and a size that suits your driveway, such as about 20 to 30 inches tall if you get snow, so the tops still show above a few inches of it. Space them evenly along both sides, or alternate sides for a zigzag look on a wide driveway. Warm white lights look softer and more elegant than multicolor ones, but red and white striped canes are classic. Push stakes straight into the ground, set them back from the edge, and check that each one is firm.
2. C9 Bulb Stake Markers
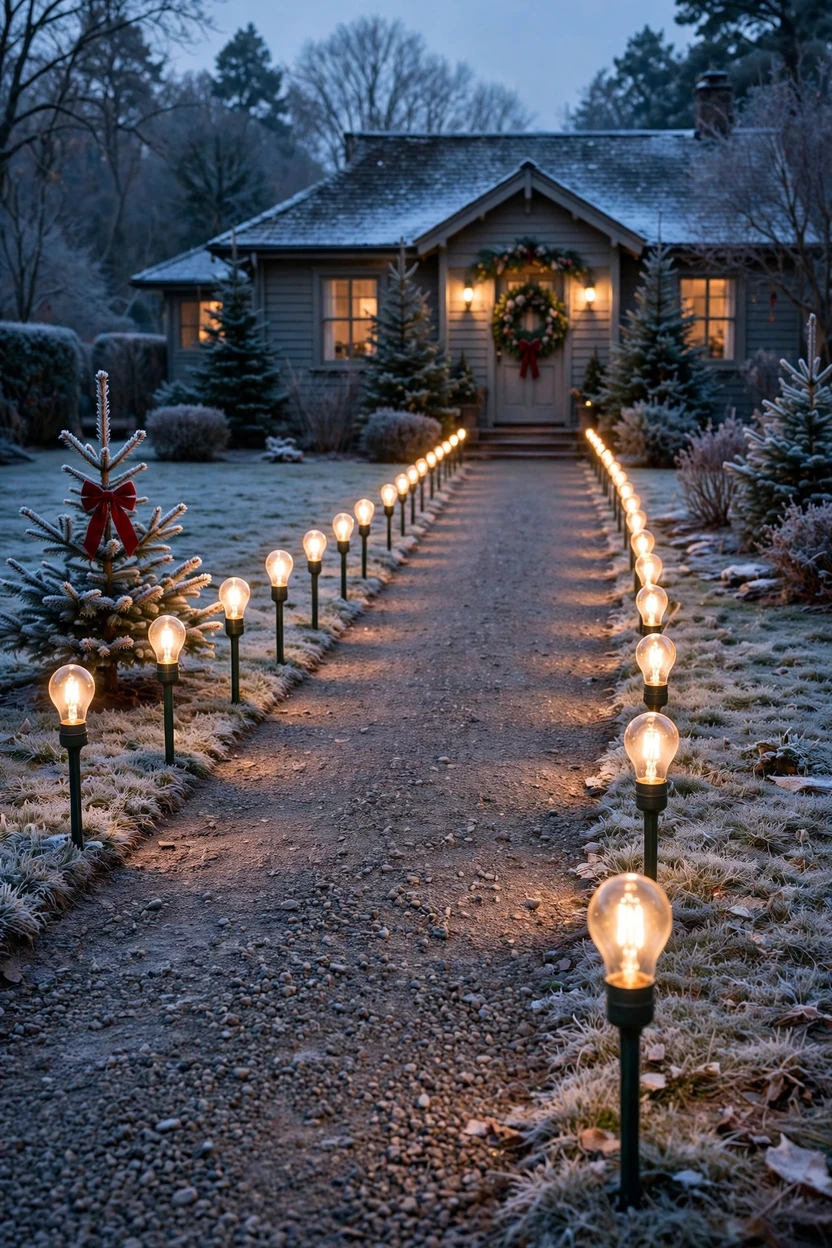
Marker check: Power: plug-in or solar | Snow-smart: good | Cost: low to medium | Difficulty: easy
C9 bulb stake markers give a vintage, glowing look, like old-fashioned Christmas lights standing in a row. Choose clear or warm white bulbs for a soft look, or classic multicolor for a playful one. Plug-in sets are the brightest and most reliable, and they connect end-to-end so you can cover a long drive. Check that the set is rated for outdoor use, and follow the package guidance on how many sets can connect. Run the cord along the edge of the driveway where cars won’t drive, and keep connections off the ground.
3. Branch-Spray Pathway Markers
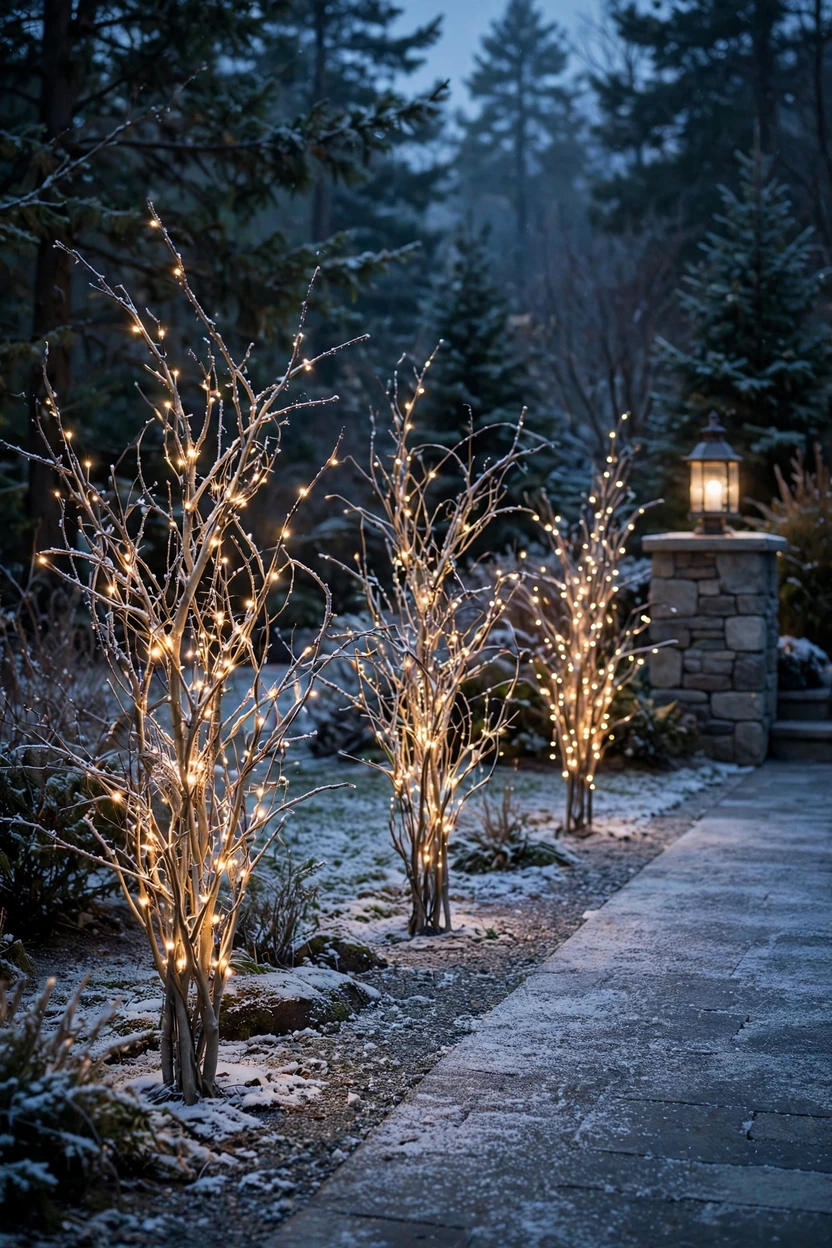
Marker check: Power: plug-in or battery | Snow-smart: good | Cost: medium | Difficulty: easy
Branch-spray markers look like glowing winter twigs growing out of the ground. They bring a natural, soft feel that suits farmhouse, cabin, and modern homes. Each stake fans out into a spray of lit branches that catch the light from many angles. Place them in groups of three at corners, at the entrance, and along the path for a layered look. These can be fragile, so set them back from the edge and away from plows and tires. Warm white lights look best against dark evergreens and snow.
4. Snowflake and Star Stakes
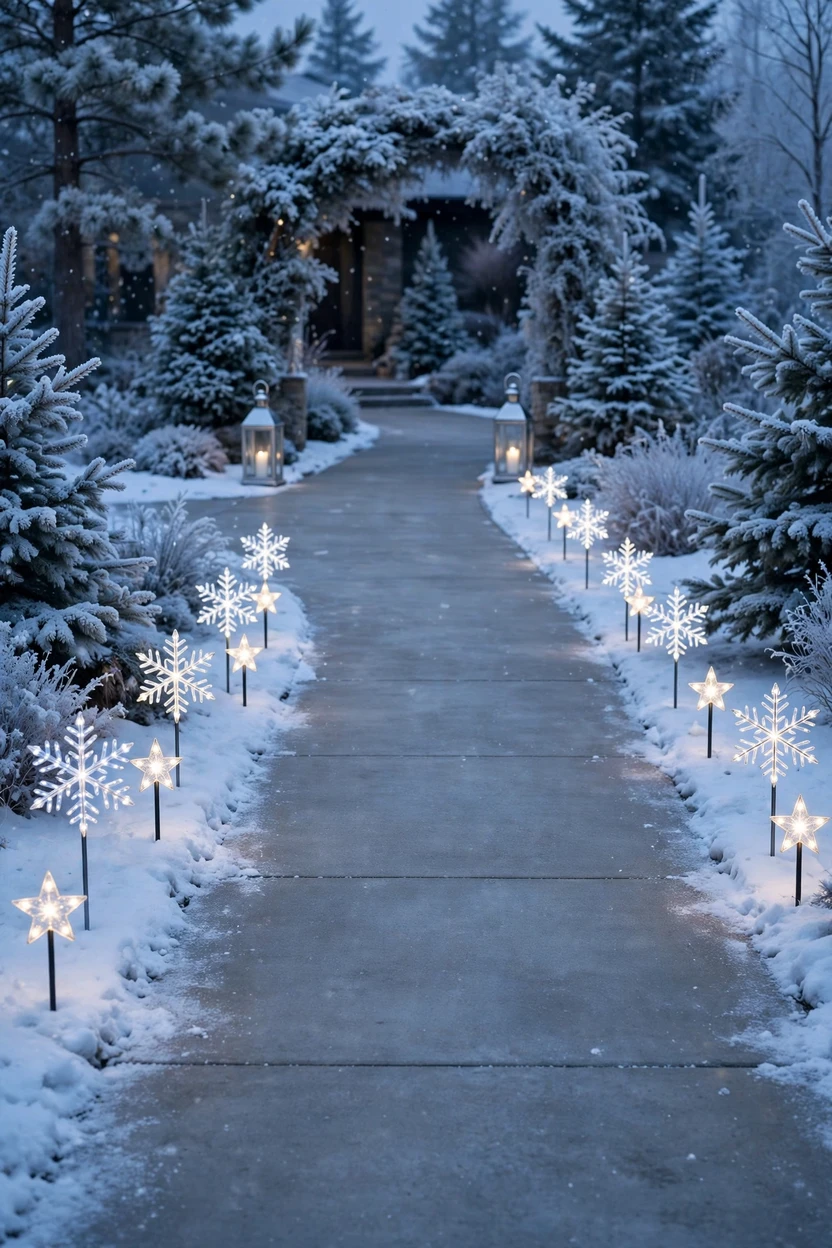
Marker check: Power: solar or plug-in | Snow-smart: good | Cost: low to medium | Difficulty: easy
Snowflake and star stakes give a frosty, modern look. Choose clear or cool white lights in a simple design, and pair them with warm lanterns for contrast. Place them at regular intervals along the driveway edge, and add a few larger ones at the entrance and near the door. If you pick solar stakes, check the temperature rating and place them where they get daylight. Keep the design simple, since too many shapes can look busy. Silver and white work well with winter white decor.
Part Two: Lanterns and Luminaries
5. LED Jar Luminaries
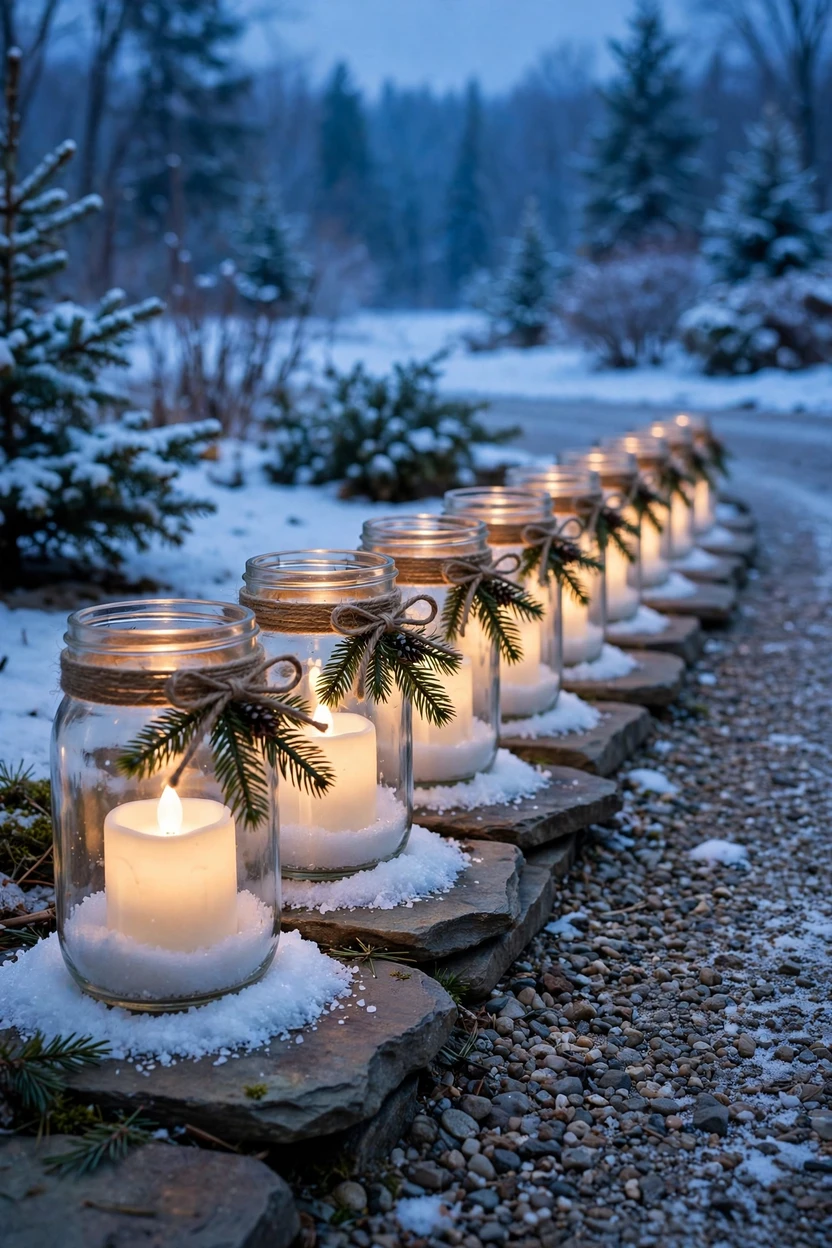
Marker check: Power: battery | Snow-smart: set on flat ground | Cost: low | Difficulty: easy
Jar luminaries give a handmade glow that feels like a village at Christmas. Fill clear glass jars with a warm white LED candle or a small string of battery lights, and spoon a little Epsom salt or faux snow around the base for a frosty look. Tie a bit of twine and a sprig of evergreen around the neck of each jar. Line them along a walkway edge or set them in a row beside the path. Use LED lights, not real candles, so wind and snow can’t tip a flame onto leaves. Check the battery pack and seal against moisture, and bring jars in if heavy rain or hard freezes are forecast.
6. Lantern Pairs at the Driveway Entrance
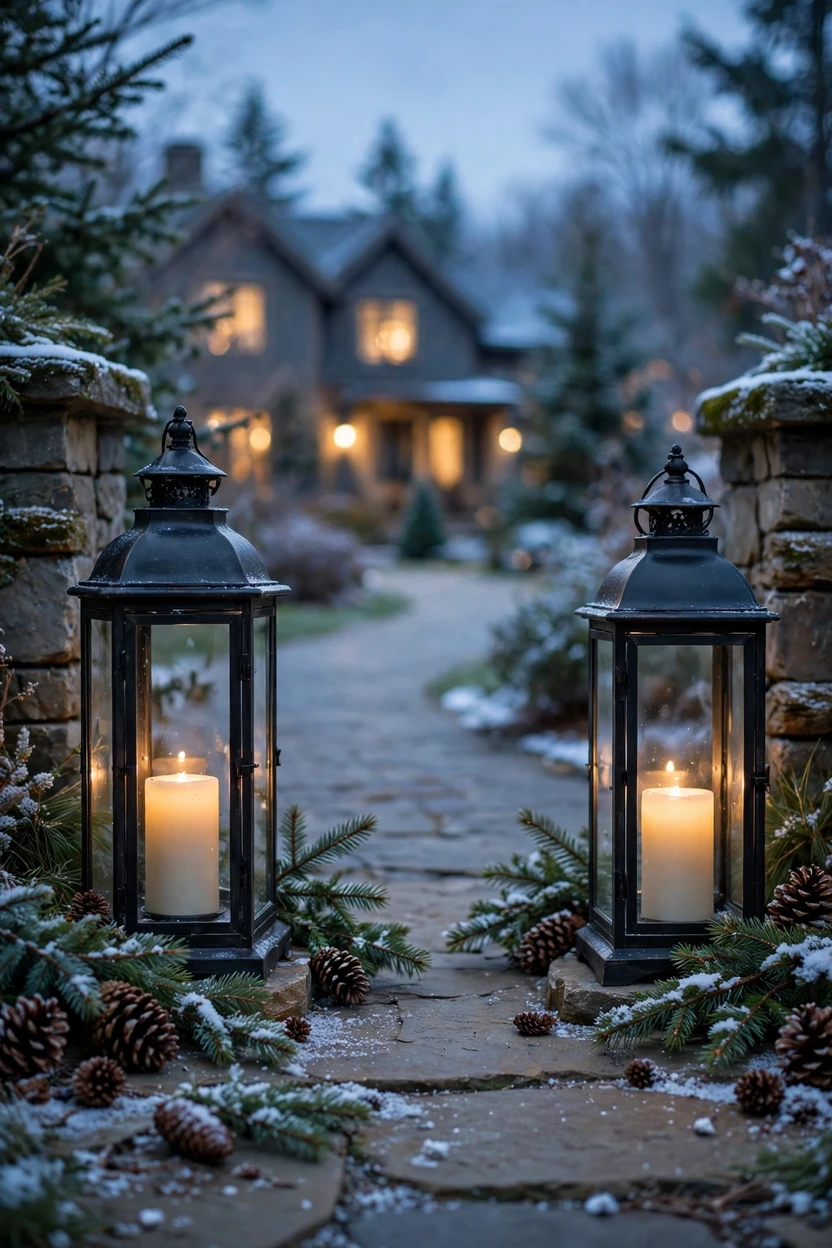
Marker check: Power: battery or solar | Snow-smart: weigh the base | Cost: low to high | Difficulty: easy
A pair of lanterns at the driveway entrance says welcome before anyone reaches the door. Choose two matching lanterns in black metal, galvanized, or wood, and place one on each side of the opening. Fill each with a flameless candle on a timer, and add fresh evergreen sprigs and pinecones around the base. Set them on a flat paver or a small stone slab, and weigh them with a few stones inside the base so wind can’t tip them. Keep them out of the path of tires and plows. Taller lanterns stand out better in snow.
7. Ice Luminaries With LED Lights
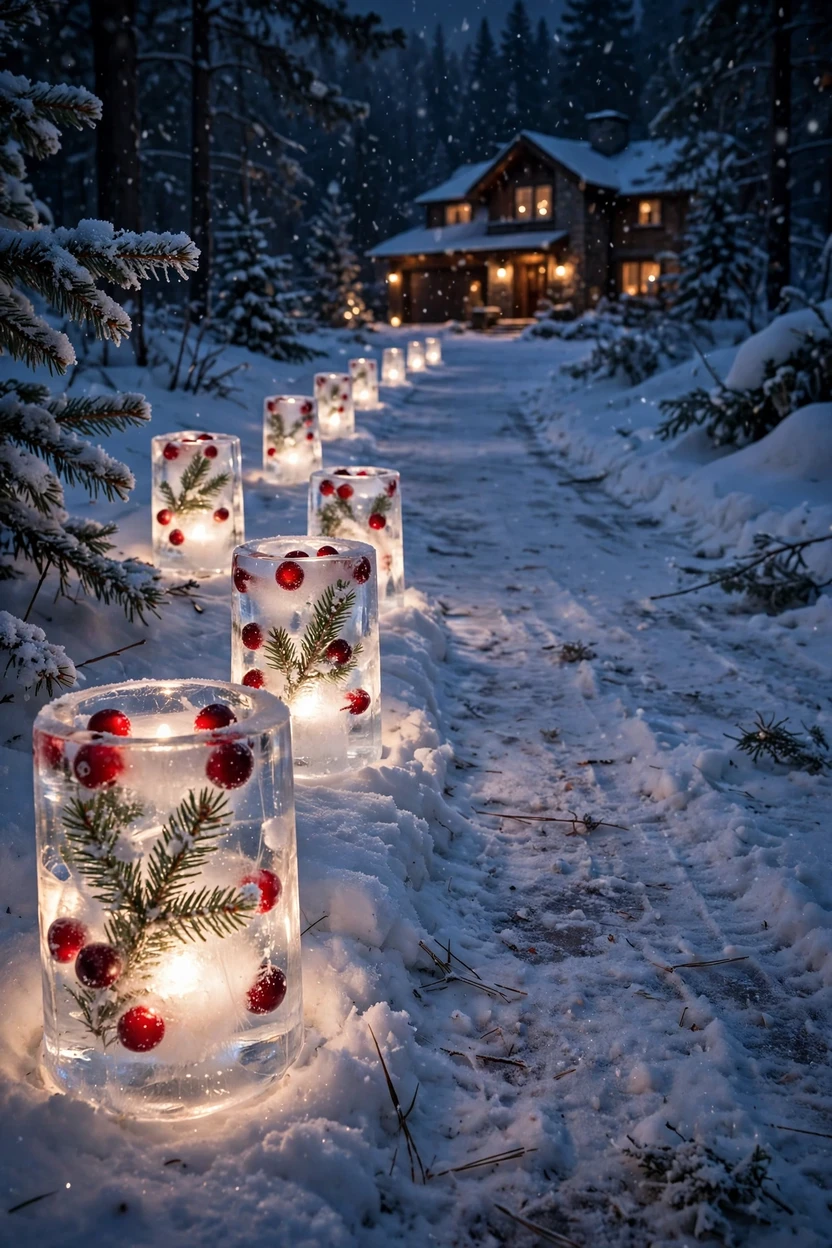
Marker check: Power: battery LED | Snow-smart: cold climates only | Cost: very low | Difficulty: easy
If your winters stay below freezing, ice luminaries cost almost nothing and look magical. Freeze water in a bucket or a bowl with a smaller container pushed in the center, then pop out the block and place it where the candle goes. Set a battery LED light inside the hollow, and line the luminaries along the path. Add a few cranberries or evergreen sprigs to the water before freezing for a pretty detail. Use LED lights, not real candles, so melting ice and wind don’t cause trouble. Place them on a stable surface, and keep walkways clear of drips that could freeze.
8. Kraft Bag Luminaries With LED Tea Lights
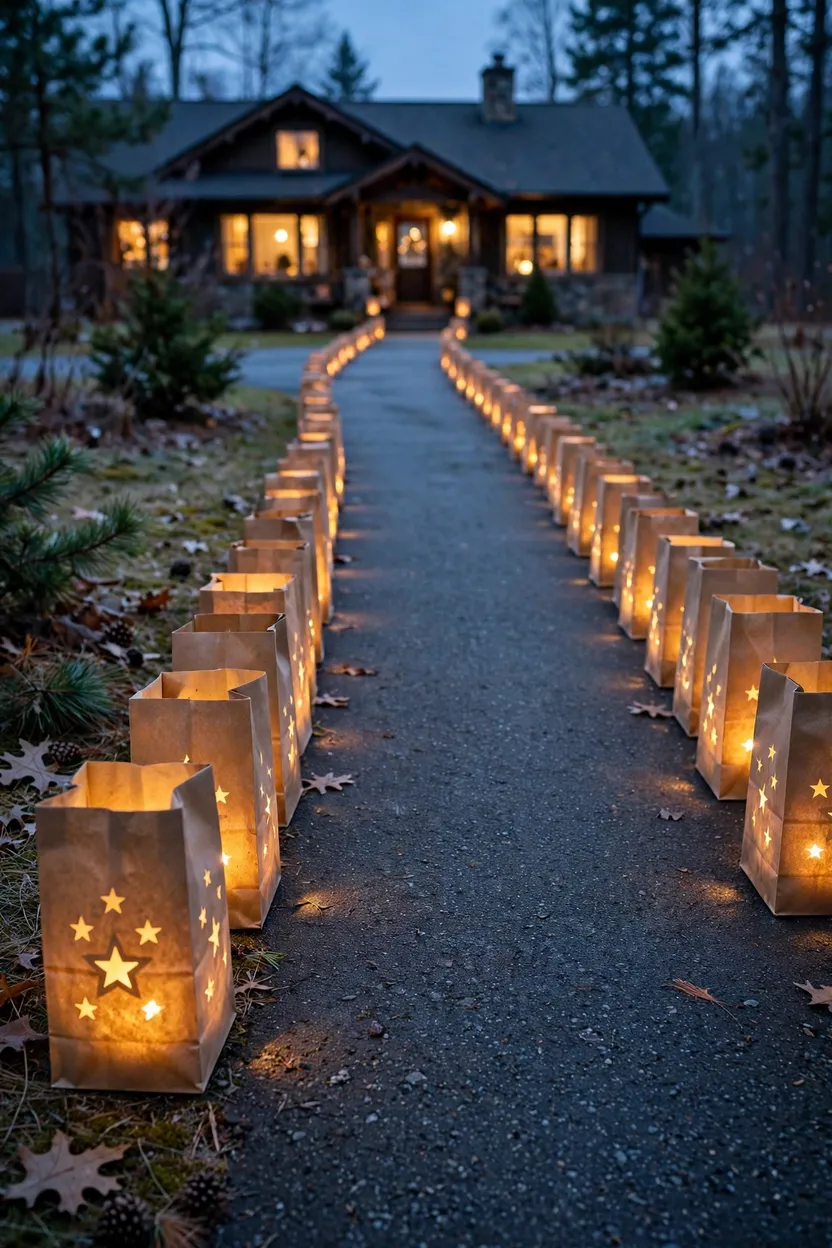
Marker check: Power: battery | Snow-smart: dry nights only | Cost: very low | Difficulty: easy
Kraft bag luminaries are a classic neighborhood tradition. Fill small paper bags with a few inches of sand or kitty litter for weight, set a battery LED tea light in each, and fold the top down to make a cuff. Stamp a star or cut a small pattern in the front for a pretty glow. Use LED lights, since flames inside paper bags can catch fire in wind. These work best on dry nights, since moisture breaks down paper, so bring them in if rain or snow is coming. Line them along a walkway or the edge of a driveway.
Part Three: Greenery and Natural Touches
9. Evergreen Planters at the Entrance
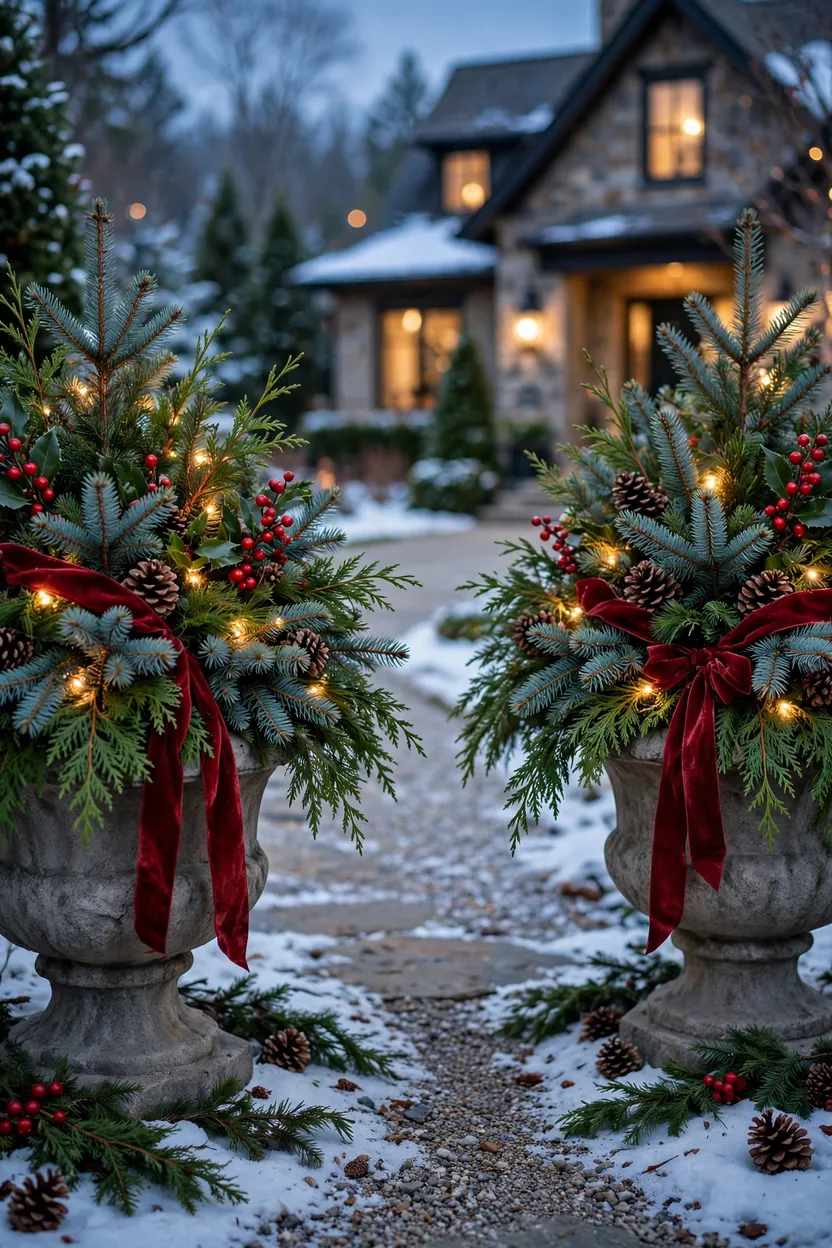
Marker check: Power: optional battery lights | Snow-smart: very good | Cost: medium | Difficulty: easy
Planters give your driveway entrance weight and a lush look. Use two large pots or stone urns and fill them with fresh spruce tips, cedar, pine, and a few berry stems, packed tightly so they look full. Add pinecones, a red ribbon, and a strand of battery lights for night glow. Because planters are heavy, they stay put in wind and make a strong marker for the driveway opening. Set them on the edge of the driveway, not in the tire path, and give them room for plows. Refresh the greens if they dry out, or use faux sprigs for a longer-lasting look.
10. Wreaths on Gateposts or a Lamp Post
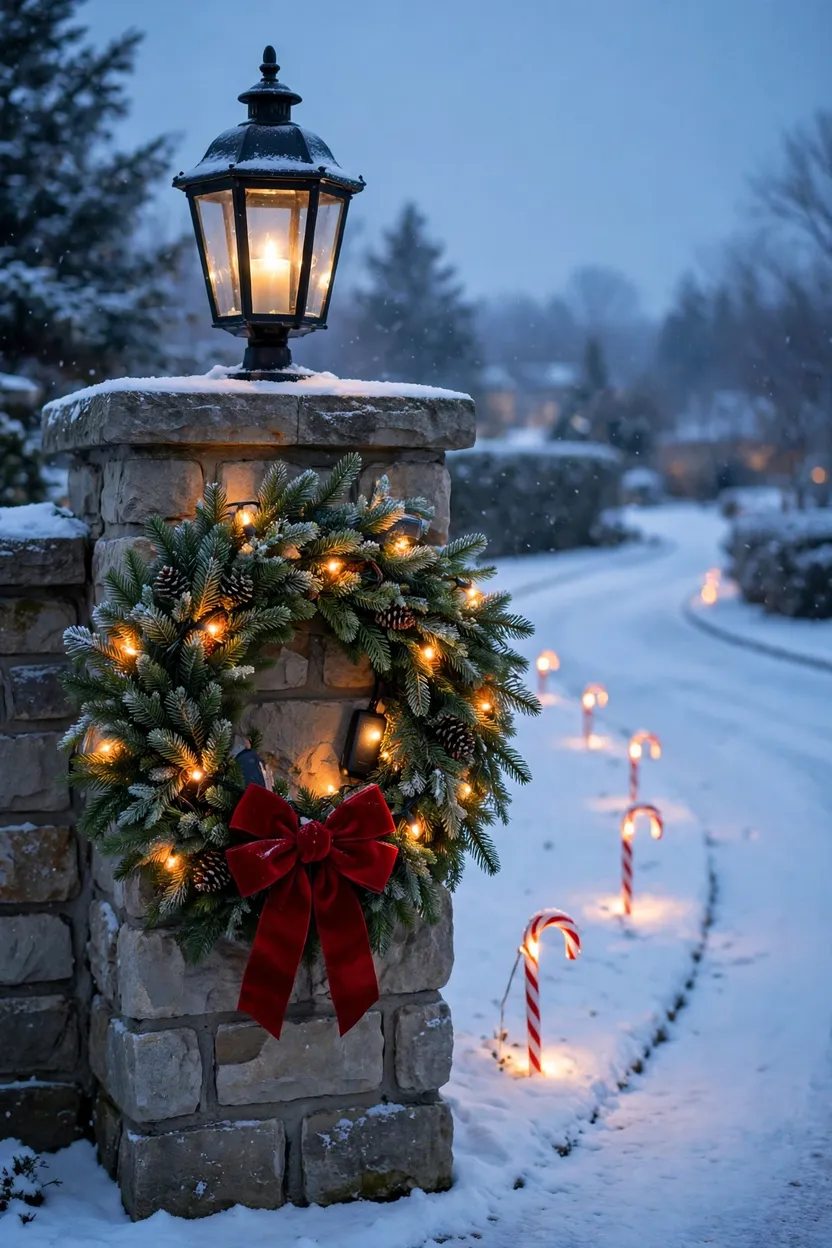
Marker check: Power: optional battery lights | Snow-smart: very good | Cost: low to medium | Difficulty: easy
A wreath on a gatepost or a lamp post turns a plain entrance into a greeting. Choose a simple evergreen wreath with a velvet ribbon, and hang it with a loop of wire or a strong ribbon, so it doesn’t scratch the post. Add a tiny battery light strand for glow, and a few pinecones or berries. Pick faux wreaths for exposed posts, since fresh greens dry out. Keep decor within your property, and don’t block the view of drivers at the street. Check the wreath after wind or snow to make sure it’s still secure.
11. Lit Birch or Twig Bundles in Planters
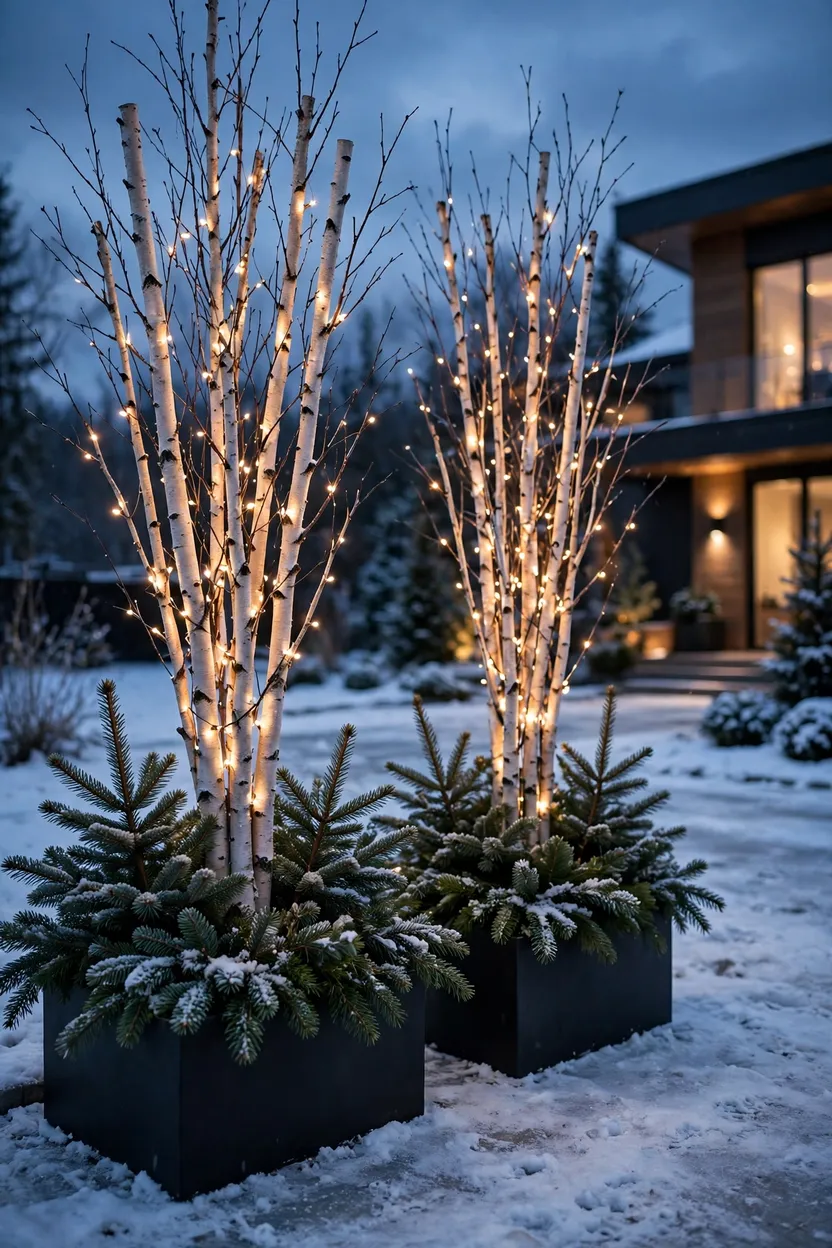
Marker check: Power: battery | Snow-smart: very good | Cost: low | Difficulty: easy
Birch and twig bundles look like glowing sculptures along a driveway. Gather white birch branches or bare twigs, set them in tall planters or buckets filled with stones for weight, and wrap them with warm white battery lights. Add a few evergreen sprigs at the base for color. This look is modern, quiet, and cheap, and it stands out well against snow and dark sky. Place the planters on either side of the driveway entrance or at the turn. Use battery lights, and keep the bundles away from open flames and the tire path.
Part Four: Welcome Details
12. A Lit House Number and Mailbox Welcome
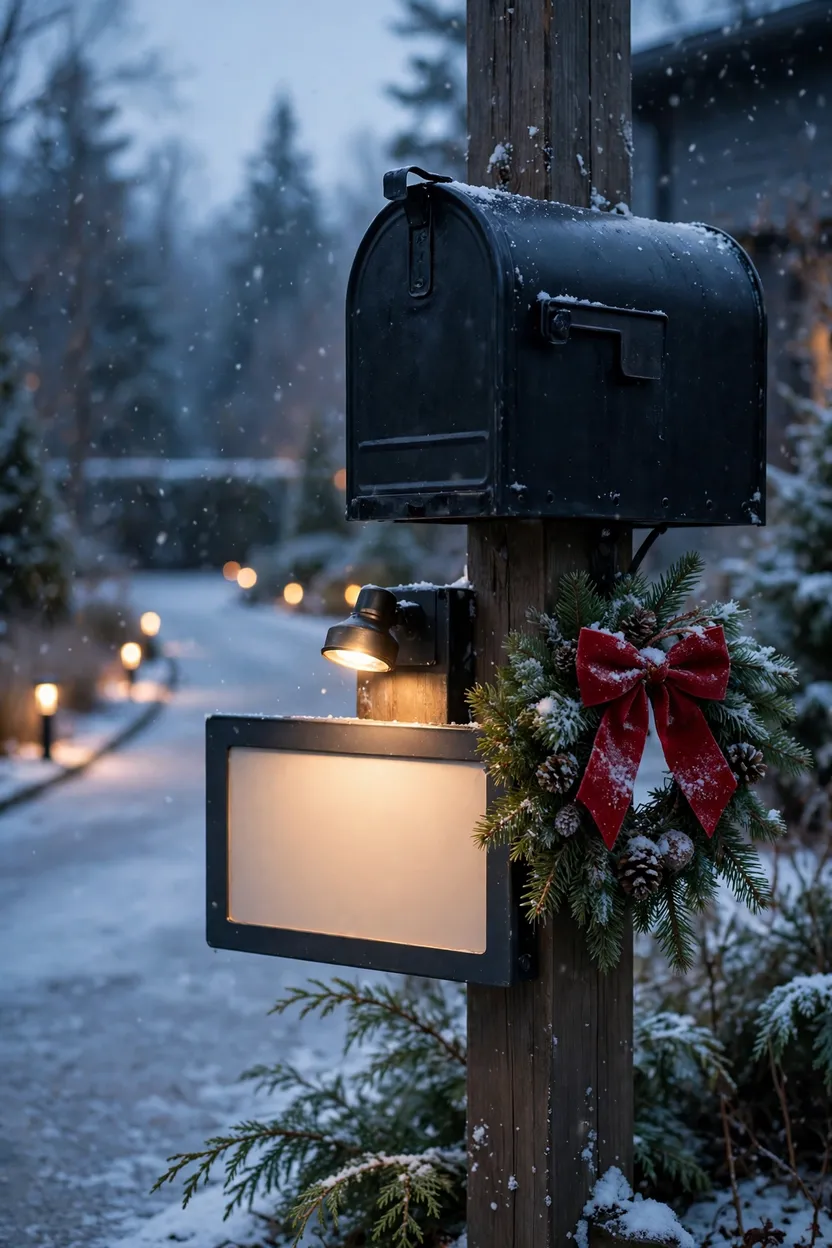
Marker check: Power: solar or battery | Snow-smart: good | Cost: low | Difficulty: easy
Guests need to find you, and so do deliveries and emergency services. Make sure your house number is large, clear, and lit, with a small solar or battery light aimed at it. Add a small wreath or a bit of garland to the mailbox post, tied with a bow, and keep the number visible above it. Choose a warm white light that doesn’t glare in drivers’ eyes. This is the most helpful welcome of all, because it tells people they’ve arrived. Keep the decor tidy, and check that it doesn’t block the mailbox door.
13. A Timer and Smart-Plug Plan
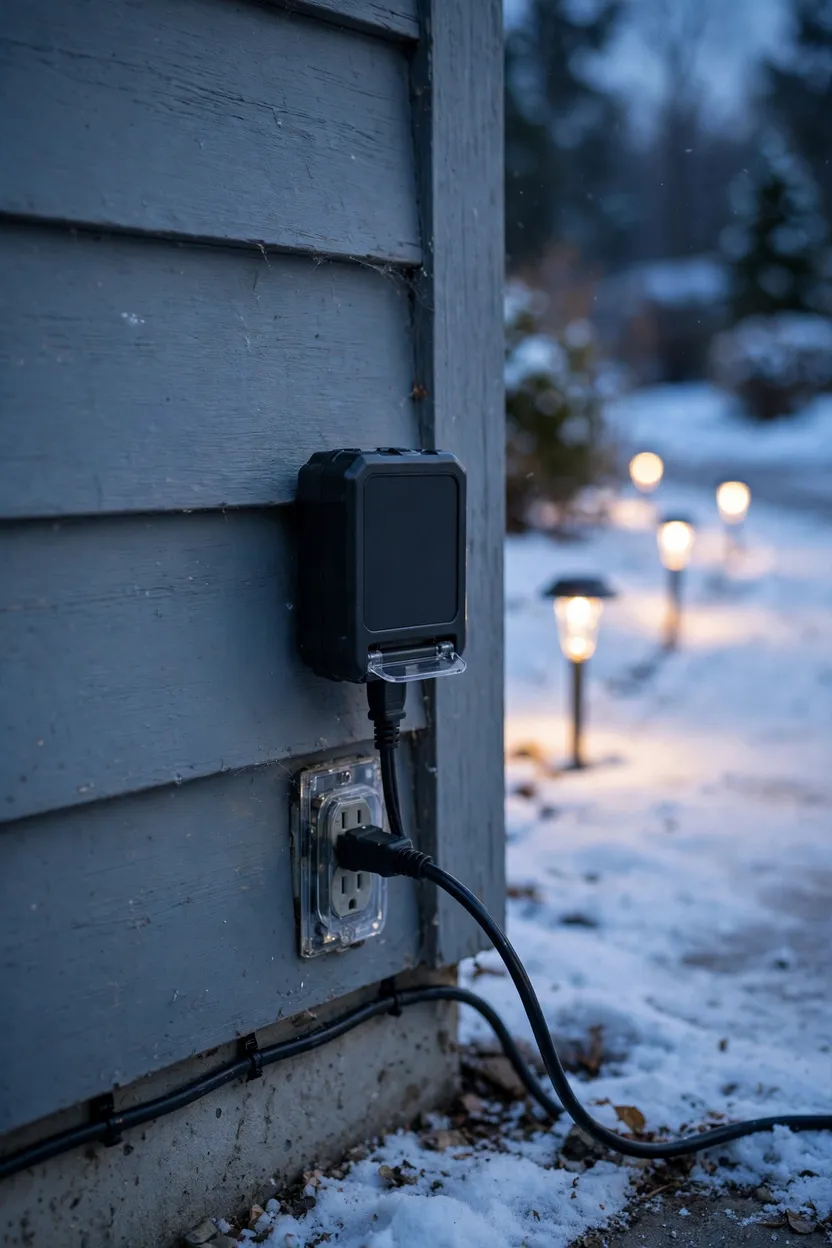
Marker check: Power: plug-in or smart plug | Snow-smart: not applicable | Cost: low | Difficulty: easy
A good display only works if you never have to think about it. Put plug-in sets on an outdoor-rated timer or a smart plug, so everything turns on at dusk and off at bedtime. Battery and solar sets often have built-in timers too. Group the plugs in a weatherproof box or a covered outlet, and keep connections off wet ground. This saves energy, protects the lights, and keeps your neighbors happy. Check the timer after snow or rain, and make sure it’s still working.
14. Mark the Curve and the Turnaround
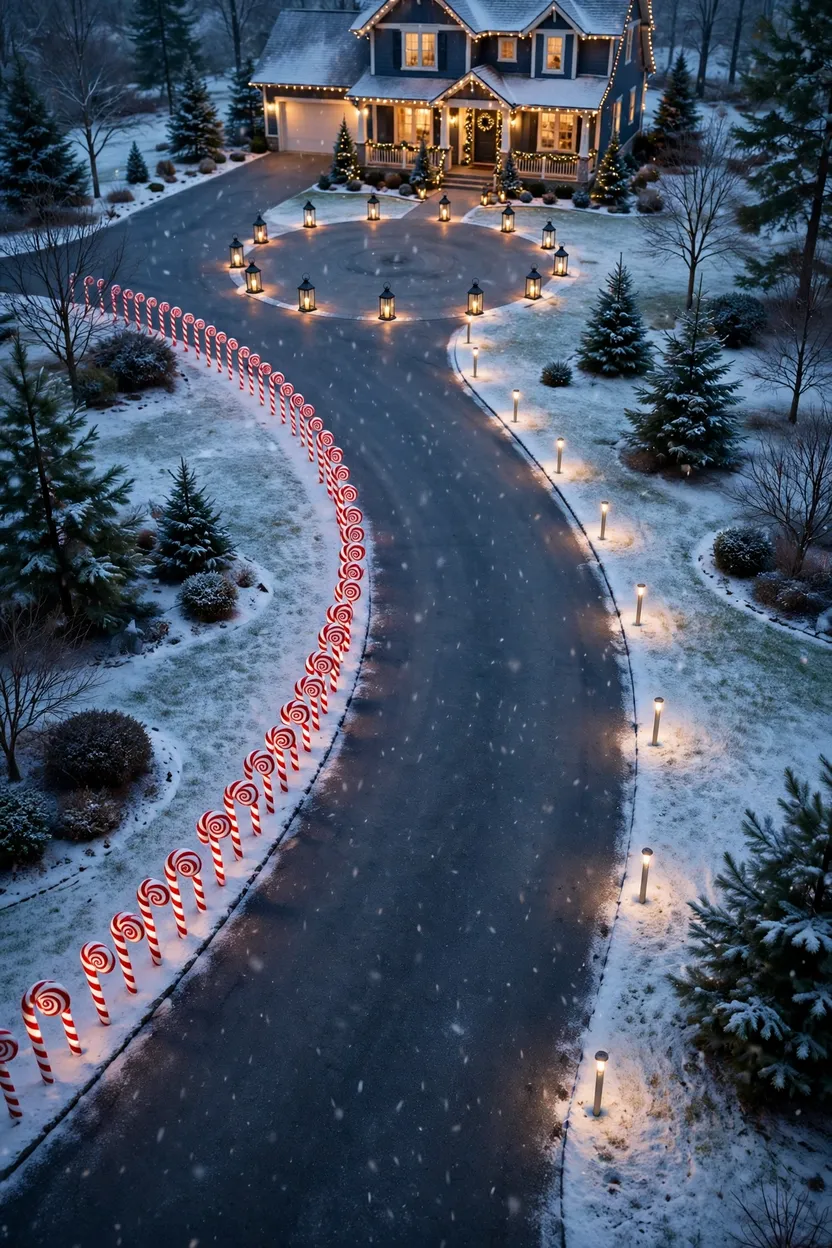
Marker check: Power: any | Snow-smart: choose tall stakes | Cost: low to medium | Difficulty: medium
A curve or a turnaround is where markers matter most. Place markers closer together on the bend so the shape of the driveway is clear, and use a different color or style, like red candy canes, at the curve and clear stakes along the straight sections. Mark the outer edge of a turnaround so drivers know where to stop. Keep markers back from the line where tires turn, so they don’t get crushed. Walk the driveway at night to see how it looks and adjust the spacing. This helps both style and safety.
15. A Warm Landing at the Door
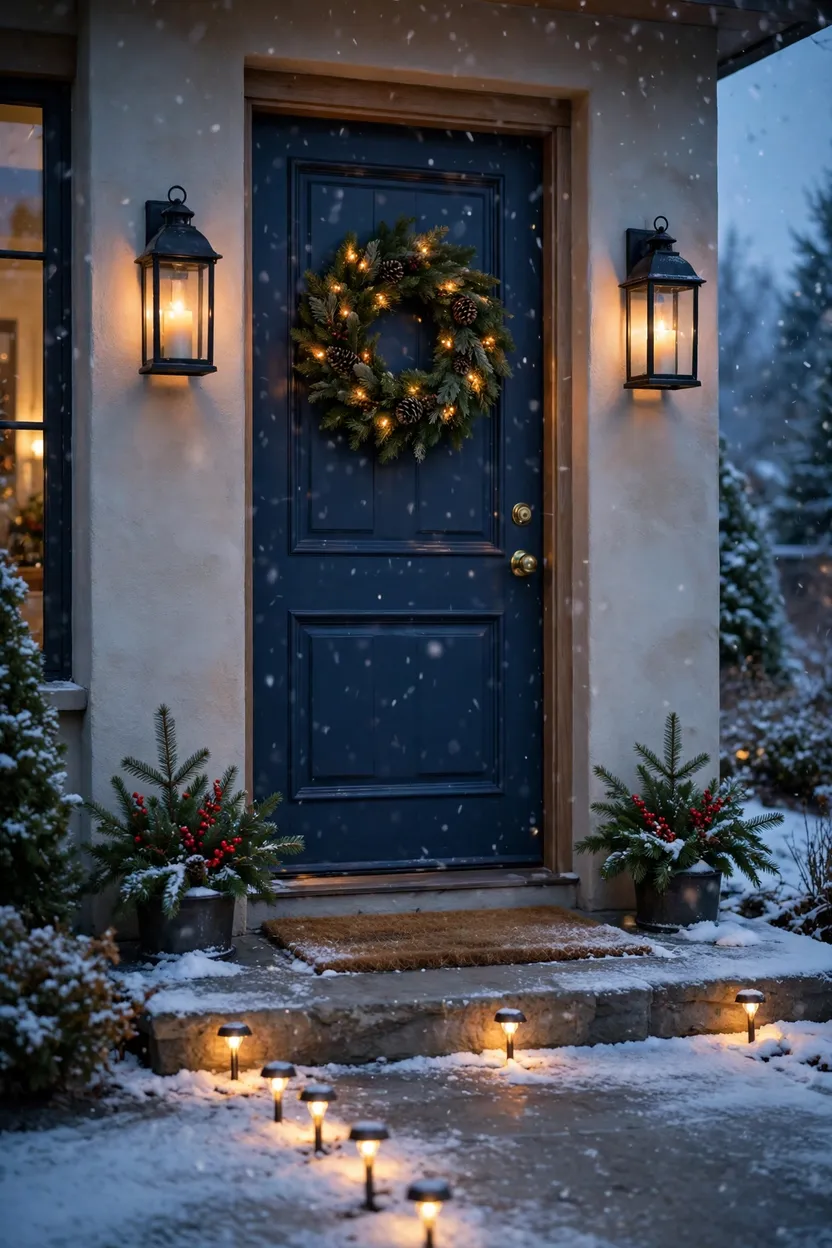
Marker check: Power: battery or plug-in | Snow-smart: good | Cost: low to medium | Difficulty: easy
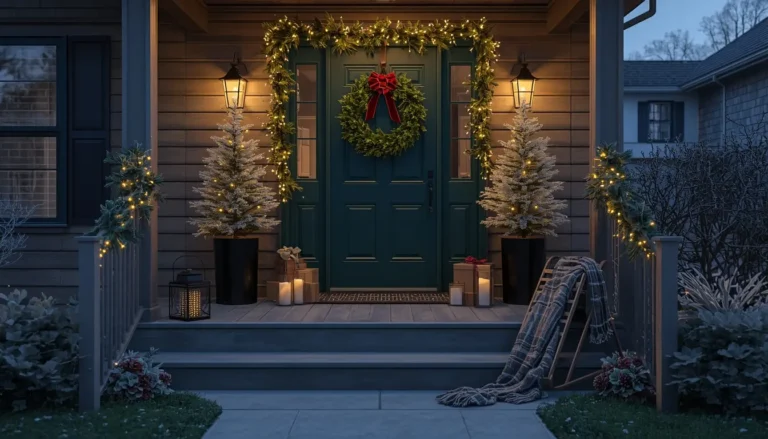
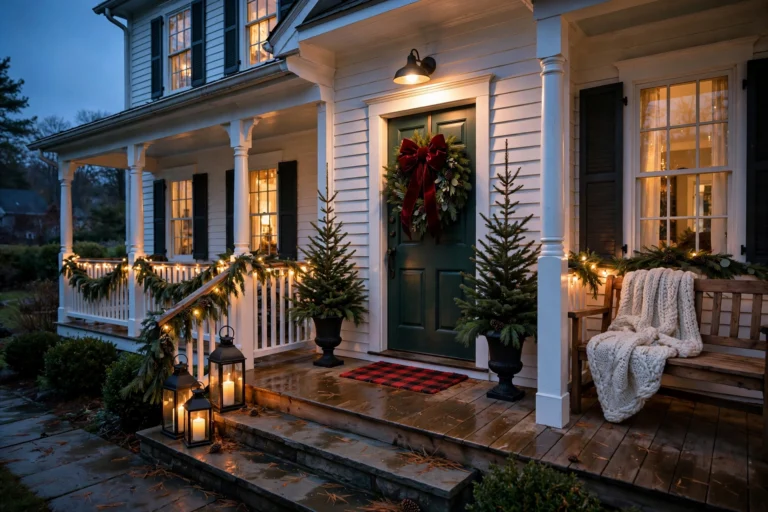
A good path ends in a good landing. Finish the route with a welcome mat, a lantern on each side of the door, a wreath, and a small pair of evergreen planters. Use warm white lights so the glow of the driveway matches the light at the door. Keep the steps clear and non-slip, and sprinkle ice melt if needed. Make sure the doorbell and house number stay visible. This final touch makes guests feel invited all the way in. Check that cords and decor don’t block the door swing.
Styling Tips
- Pick one color story. Red and white, warm white and green, or natural amber all look neat.
- Repeat one shape. Candy canes, stars, or lanterns look best in a steady rhythm.
- Use warm white lights. They look softer and more welcoming than cool white.
- Light in layers. Use ground lights, lantern height, and door glow for depth.
- Keep spacing even. Evenly spaced markers look planned and tidy.
- Match your house. Echo a color or material from your front door or porch.
- Edit before you add. A few good pieces look better than a crowded line.
A One-Weekend Driveway Plan
Saturday morning: Measure and plan.
- Walk the driveway and note curves, slopes, drains, and where cars turn.
- Measure the length of each edge, and mark the outlet location.
- Choose your marker type and power plan using the tables above.
Saturday afternoon: Test and stake.
- Test every light set indoors or on the lawn before you install it.
- Push in stakes at even spacing, set back from the edge, and check that they’re firm.
- Connect cords along the edge, and keep connections off the ground.
Sunday morning: Add the welcome.
- Place lanterns, planters, and wreaths at the entrance and the door.
- Light the house number and decorate the mailbox post.
- Set timers or smart plugs.
Sunday evening: Walk it at night.
- Walk from the street to the door and check brightness, spacing, and glare.
- Adjust any markers that look crooked or too close to the edge.
- Take photos for next year’s plan.
Spacing and Layout Guide
These are starting guidelines. Follow your product’s instructions and adjust by eye.
- Measure first. Divide each edge by your marker spacing to know how many you need.
- Start with the entrance. Mark the opening on both sides, then work toward the door.
- Use even spacing. Many people start with about 3 to 6 feet between stakes, depending on marker size and brightness, and place them closer on curves.
- Set them back. Keep markers about a foot or more from the driveway edge if you plow or shovel, and further from tire paths.
- Match both sides. Mirror the spacing on each side, or stagger it for a softer look on a wide drive.
- Choose stake height for snow. If you get deep snow, pick taller stakes, since short stakes disappear.
- Mark the ends. Use a lantern, a planter, or a larger marker at the start and end of the path.
- Check from the car. Drive in at night and see how the markers read from the driver’s seat.
Common Mistakes to Avoid
- Placing markers right at the edge. Tires, plows, and shovels can crush or throw them. Set markers back.
- Choosing stakes that are too short. A few inches of snow can bury them. Pick taller stakes if you get snow.
- Running cords across the tire path. Cars can crush cords and break connections. Route cords along the edge.
- Using indoor lights outside. They aren’t made for rain, snow, or cold. Use outdoor-rated products.
- Skipping the test. Test every set before you stake it, so you don’t have to dig it up later.
- Overlooking solar limits. Some solar lights are rated only for mild temperatures, and short winter days limit run time. Check the specs.
- Using real candles in paper or jars. Wind and snow can cause fires and a mess. Use LED candles.
- Making it too bright or flashing. Strobing lights can distract drivers and annoy neighbors. Keep it warm and steady.
- Blocking the house number. Guests and emergency services need to see it.
- Ignoring spacing. Uneven markers look messy. Measure and mark spots before you stake.
- Forgetting about the take-down. Plan where the lights will go in January, so they last for next year.
Small-Space Alternatives
No long driveway? Short drive? Townhome or condo? Try these.
- Mark just the entrance. A pair of lanterns or planters at the opening is enough for a short driveway.
- Use your walkway. Line the path from the parking spot to the door with a few stakes or jar luminaries.
- Decorate the step and the door. Lanterns, a wreath, and a lit mat create a warm landing.
- Use one hero. A pair of lit birch planters or a single large lantern can fill a small space.
- Check shared-area rules. In townhomes and condos, decor may be limited to your own entry and steps.
- Hang lights on a fence or a garage. If allowed, a small line of lights along a fence or a garage edge guides guests.
- Use battery lights. They avoid cords in shared spaces.
Budget-Friendly Alternatives
| Big idea | Lower-cost swap |
|---|---|
| Large sets of lighted stakes | A few stakes at the entrance and the curve, with jar luminaries in between |
| Lantern pairs | Thrifted lanterns or jars with LED candles |
| Stone urns | Buckets or crates wrapped in burlap |
| Fresh greens | Cuttings from your yard or a tree lot’s trimming pile |
| Branch-spray markers | Branches from your yard wrapped with battery lights |
| Ice luminaries | Free, if you live where it freezes |
| New timers | A single outdoor timer for all plug-in sets |
Spend on outdoor-rated lights, good stakes, and a timer, since you’ll use them every year. Save on lanterns, jars, and greenery, which are easy to find or make.
Storage and Take-Down Tips
- Unplug and dry everything. Let lights and cords dry fully before packing.
- Pull stakes carefully. Wiggle them loose and avoid pulling on the wires.
- Wrap cords loosely. Coil them around a piece of cardboard or a reel to avoid tangles.
- Test and note problems. Mark any broken sets so you can replace them next year.
- Remove batteries. Take them out of lights and lanterns to prevent leaks.
- Clean stakes and lanterns. Wipe off mud and salt before storing.
- Store in labeled bins. Mark them Driveway Christmas, and keep a small list of how many stakes you used and where they went.
- Compost fresh greens. Replace faux pieces that look worn.
Pro Styling Recommendations
- Plan from the street. Walk to the street and look at the driveway the way a guest would.
- Start with the ends. Strong markers at the entrance and the door make the whole path feel planned.
- Keep the colors few. One or two colors look neat, and more can look noisy.
- Mix light heights. Use low stakes, mid lanterns, and taller planters or birch bundles for depth.
- Match the porch. Repeat a color, a wreath style, or a lantern from the front door.
- Choose steady light. Warm and steady lights look classic and avoid glare.
- Add one quiet surprise. A lit mailbox wreath or a small sign makes the path feel personal.
Easy Swaps by Style
| Your style | Driveway twist |
|---|---|
| Classic | Red and white candy canes with warm white lights |
| Farmhouse | Galvanized lanterns, buffalo check bows, and evergreen planters |
| Modern | Clear stakes, black lanterns, and lit birch bundles |
| Cottage | Jar luminaries, wreaths on posts, and a lit mailbox |
| Playful | Peppermint stakes, big bows, and colorful C9 bulbs |
Conclusion
A driveway marker does a simple job. It says you’re expected.
Start with the path. Walk it, measure it, and decide where cars turn and where the snow goes. Pick a marker you love, a power plan that works, and a few welcome touches at the entrance and the door. Keep everything outdoor-rated, steady, and set back from tires.
Then walk to the street at dusk and look up the drive. If it feels like a warm line guiding someone home, you did it right. A little glow on a cold night is a small gift, and the people who arrive will feel it the moment they turn in.