20 DIY Christmas Centerpiece Ideas for a Bougie Holiday Look
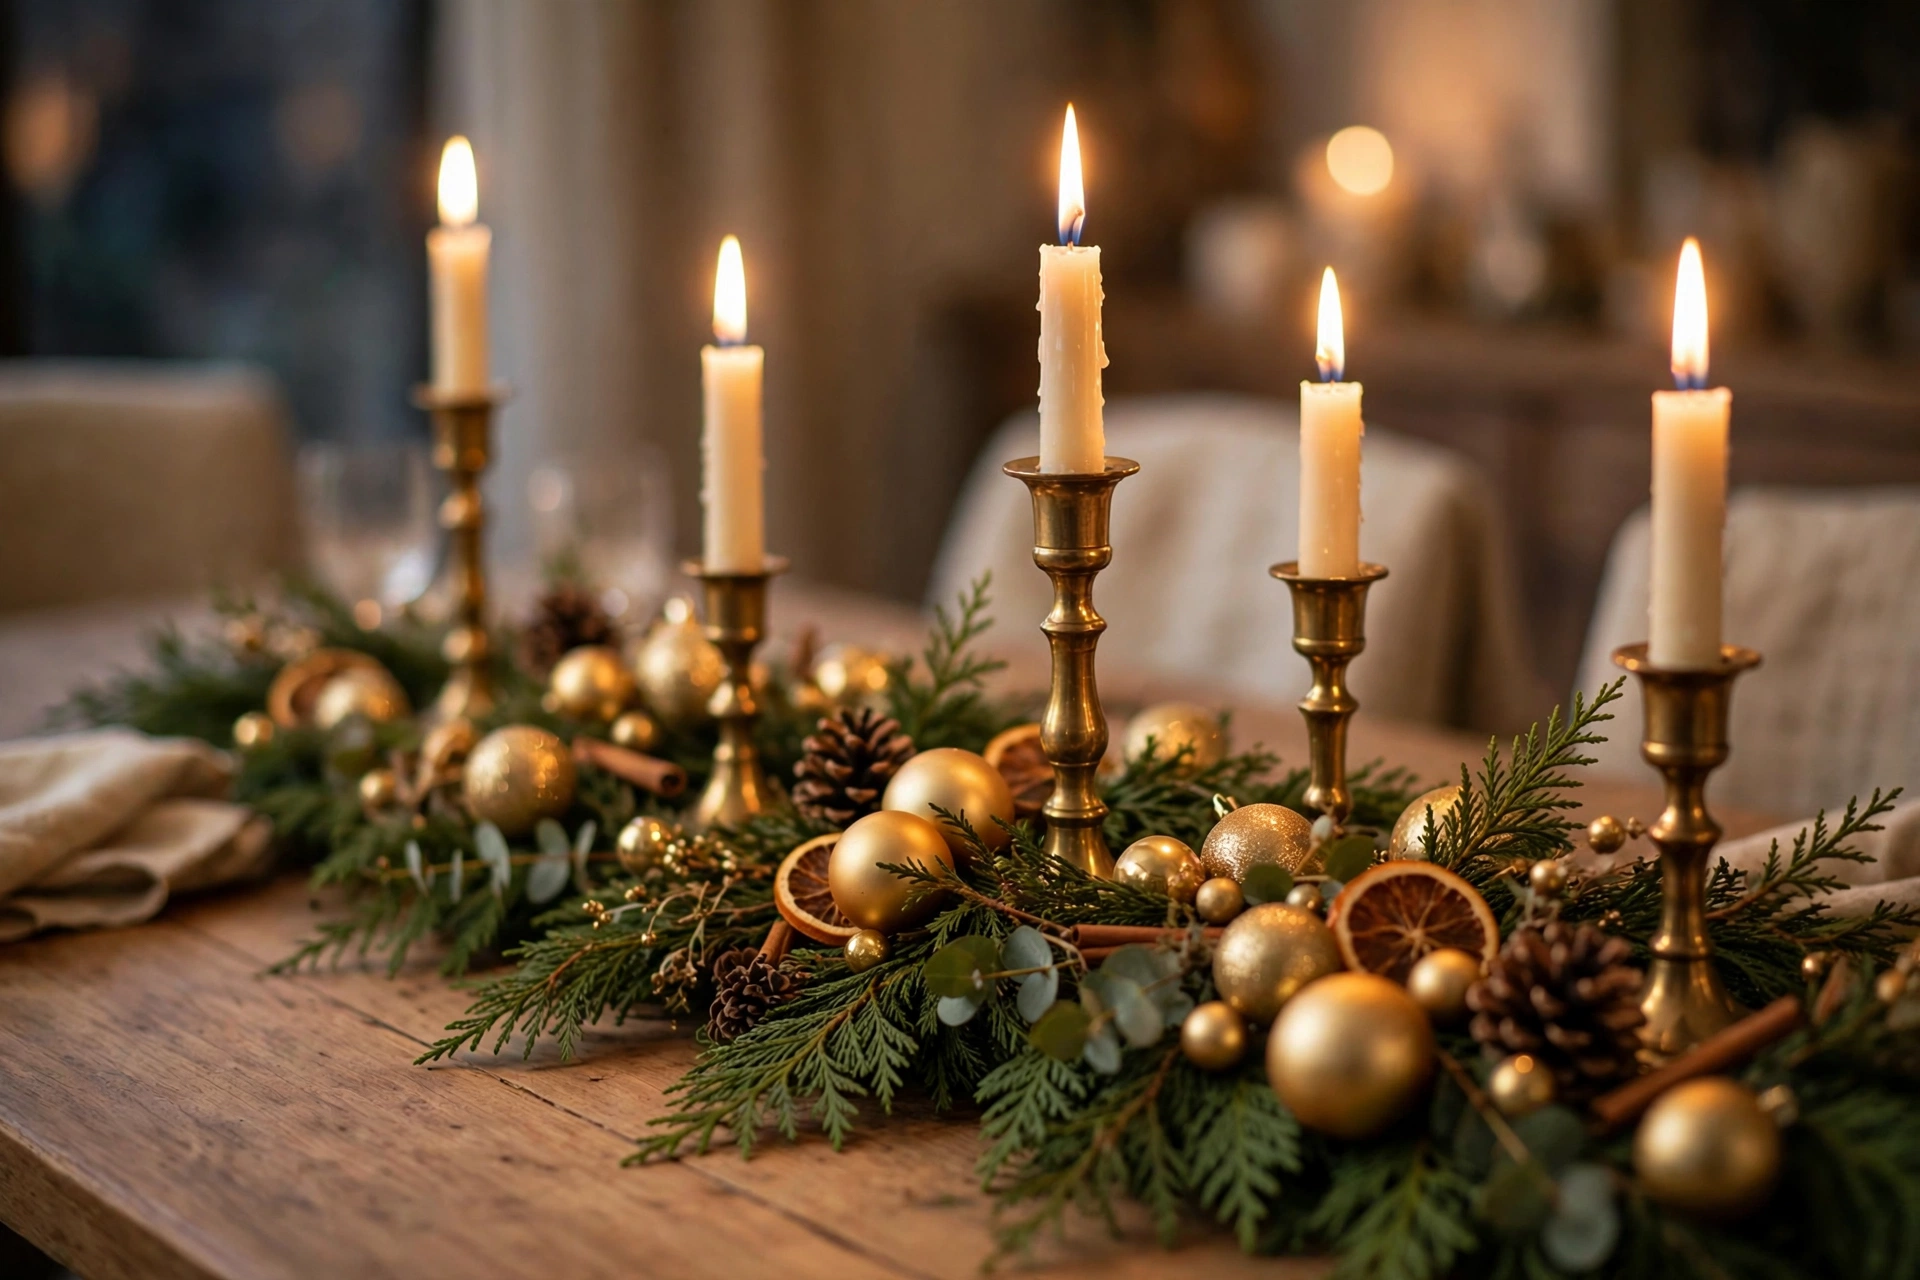
Walk into a holiday dinner party and look at the table first. The plates are simple, the food smells great, but it is the centerpiece that makes you think the host has it all together. Candlelight, gold, fresh greens. It looks like a magazine shoot.
Here is the secret: most of those centerpieces cost almost nothing. The bougie look comes from a few repeatable tricks. Group things in threes, mix one metal with fresh greenery, keep the height low, and light a candle. That is the whole formula.
This list gives you 20 DIY Christmas centerpiece ideas that look expensive but are easy to build in an afternoon. Every idea tells you exactly what to buy, what to gather, and how to put it together. Pick one for your own table, and save a second for the hostess gift you keep forgetting.
Quick Answer: How Do You Make a DIY Christmas Centerpiece Look Expensive?
To make a DIY Christmas centerpiece look expensive, limit yourself to two colors plus one metal, group items in odd numbers at three heights, and add fresh greenery and candlelight. Use a tray or runner to anchor the arrangement, keep it low enough to see over, and repeat one rich texture like velvet, brass, or glass.
Table of Contents
20 DIY Christmas Centerpiece Ideas for a Bougie Holiday Look
1. A Gold Candle Cluster on a Mirrored Tray
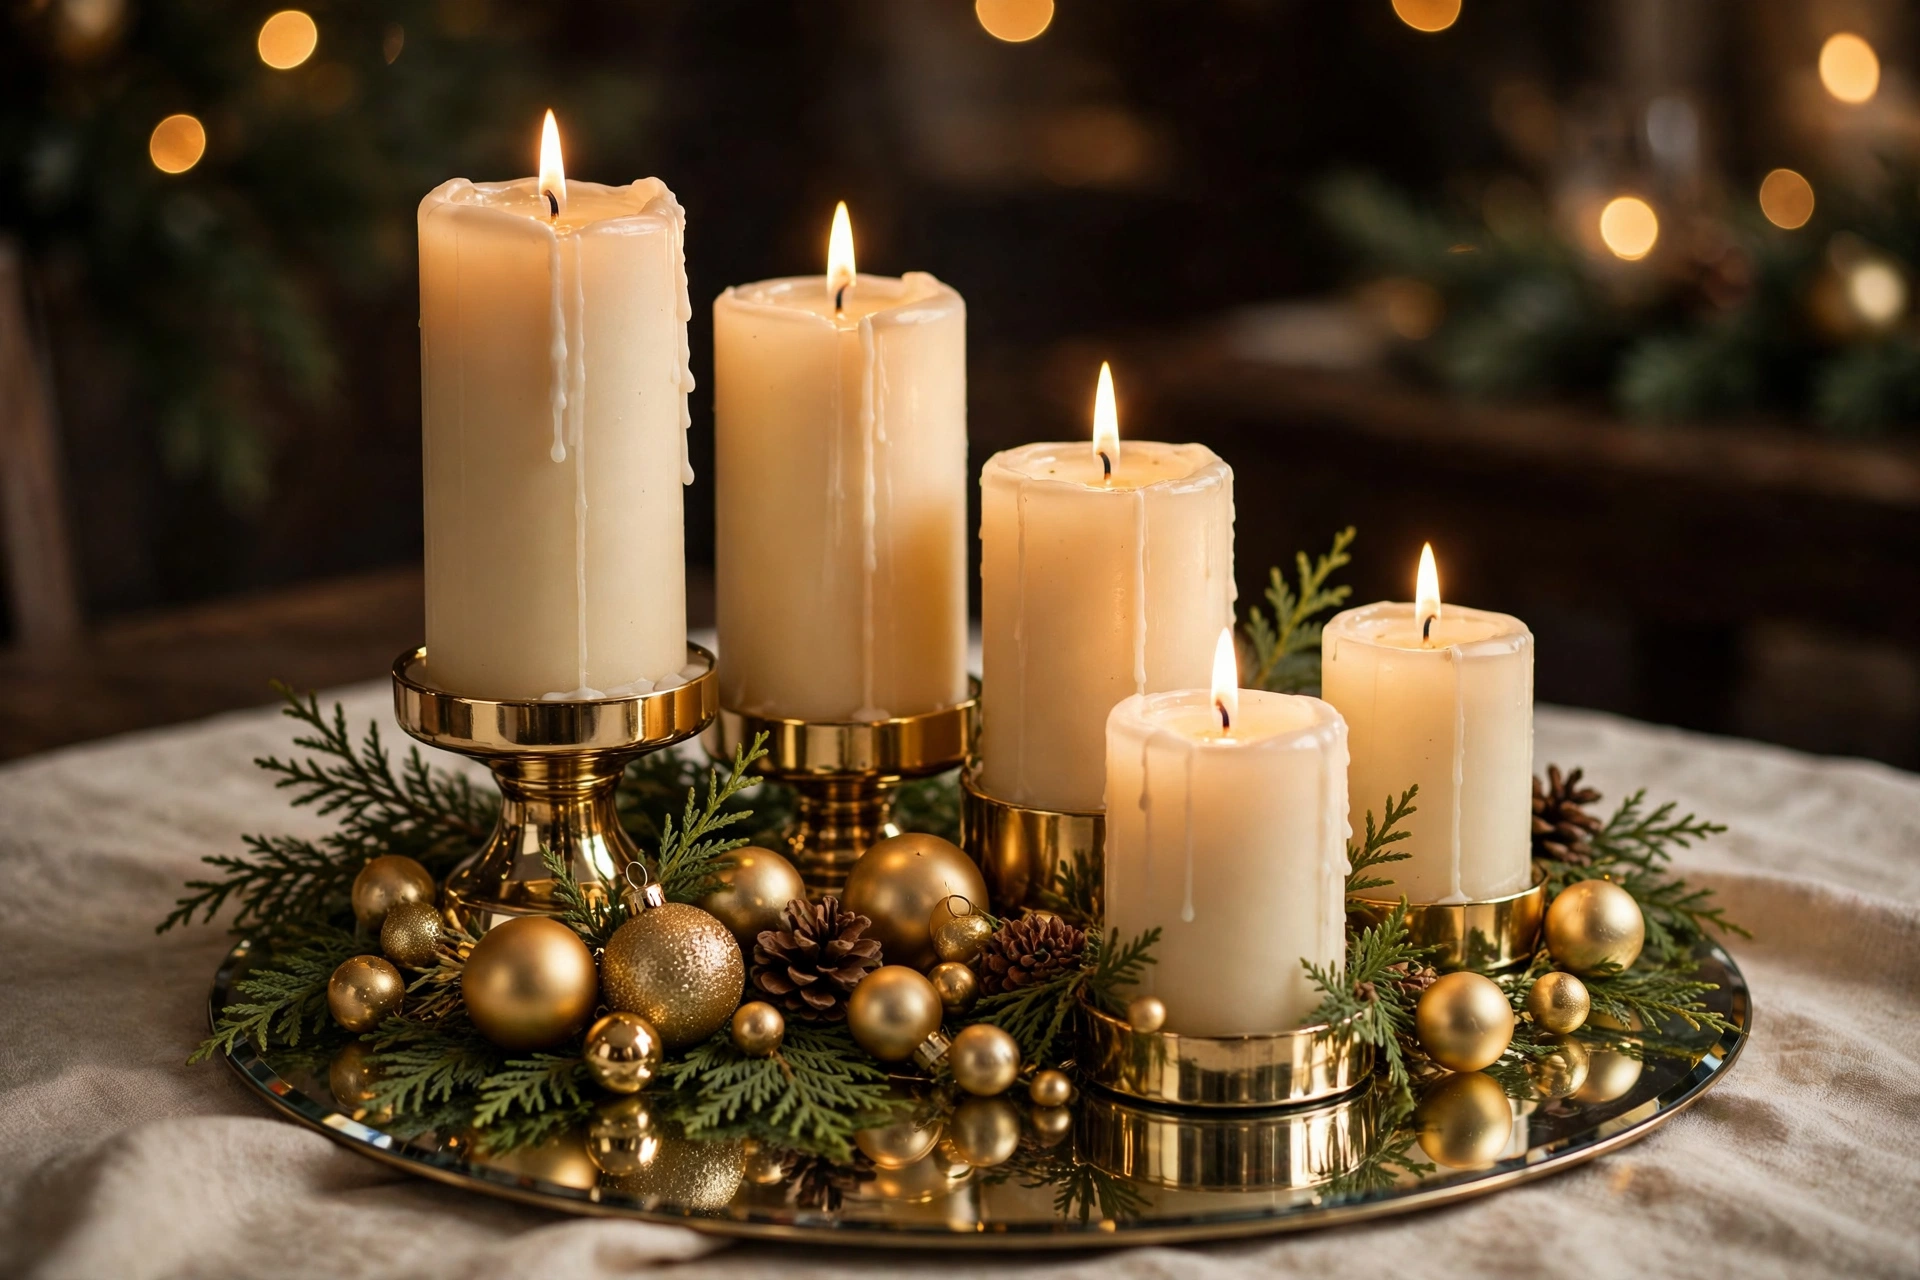
Nothing reads luxe faster than a tight cluster of candles on a reflective surface. Start with a round mirrored tray or a large round mirror from a craft store. Gather five to seven pillar candles in cream or ivory at three heights, and set them in simple gold holders. Thrifted brass candlesticks work beautifully here, and a coat of metallic gold spray paint can pull mismatched holders into one set. Cluster the candles close together in the center of the tray, then tuck small sprigs of cedar and a few gold ornaments around the bases. Light them all at once for the full effect. The mirror doubles the glow, so even plain candles look like a styled shoot. Keep the whole cluster in the middle third of the table so serving dishes fit on either side.
2. A Tall Hurricane Full of Ornaments and Fairy Lights

A tall glass hurricane vase turns a handful of ornaments into a glowing column. Choose a vase at least 12 inches tall with a wide mouth. Drop in a short string of warm white battery fairy lights first, with the battery pack tucked at the bottom. Then layer in ornaments in two finishes, such as shiny gold and matte champagne, letting them nestle around the light strand. Finish with a few sprigs of eucalyptus or pine poking out of the top. The glass magnifies the sparkle, and the whole thing takes five minutes. Make two and flank them with a low garland runner for a full tablescape. Use plastic or shatterproof ornaments if you have kids or a wobbly table, since a tall vase can tip.
3. A Eucalyptus Runner With White Pillar Candles
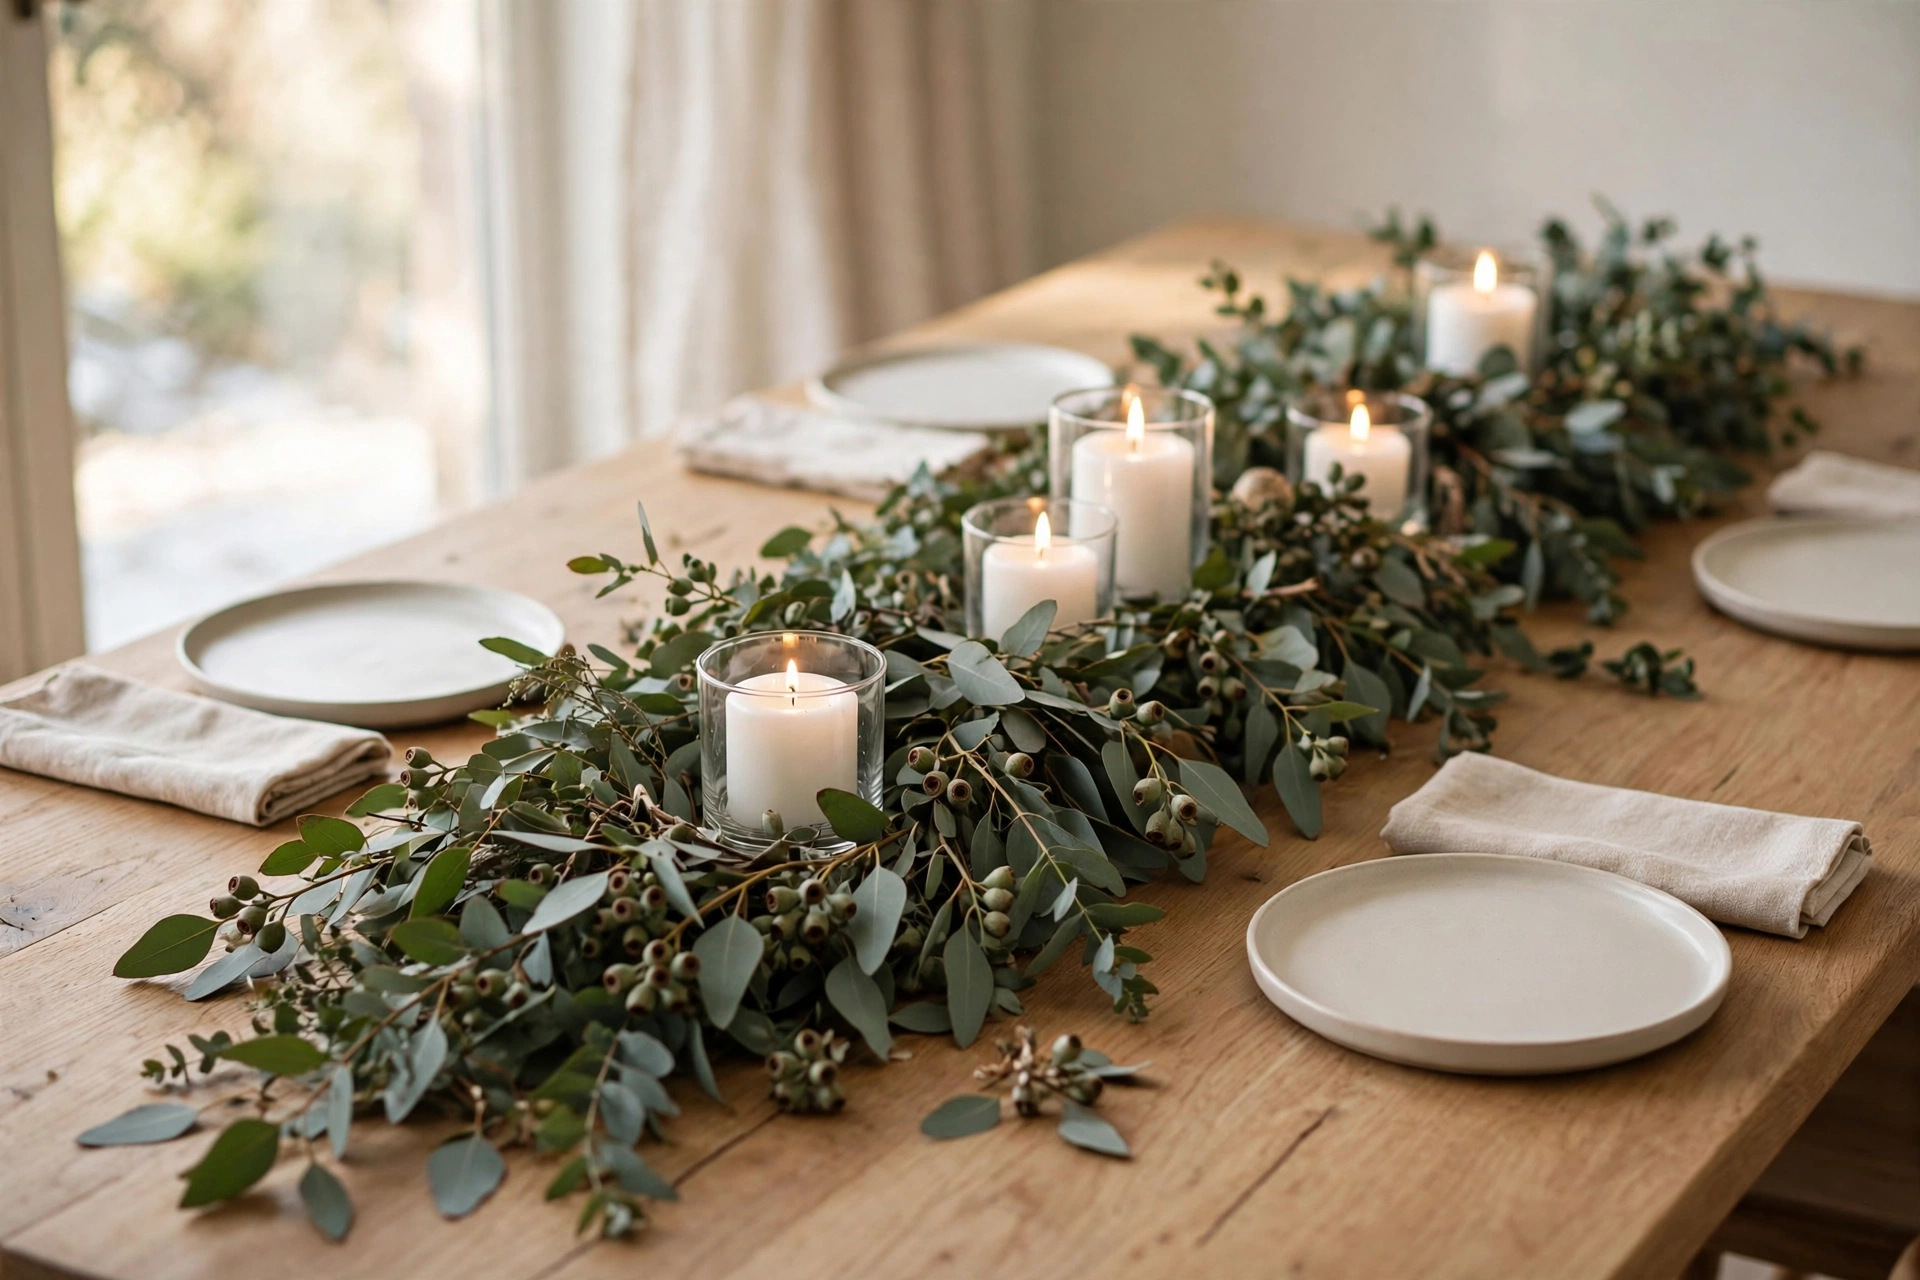
Seeded eucalyptus is the quiet luxury of holiday greenery, and it costs a fraction of a flower arrangement. Buy two or three bunches and lay them end to end down the center of the table, overlapping the stems so there are no gaps. Let the branches spill naturally over the table edges at both ends. Then set white pillar candles directly on the table in the greenery at three heights, using small glass or brass holders to protect the table. Tuck in a few white roses or ranunculus if you want flowers, but the eucalyptus alone looks finished. The silvery green color pairs with everything, and the light scent is fresh without overpowering the food. Mist the eucalyptus lightly each day to keep it looking perky through the week.
4. DIY Mercury-Glass-Look Votives

Real mercury glass votives can be pricey, but the look is easy to fake. Buy plain clear glass votive holders from a dollar store. Spray the insides lightly with looking-glass spray paint, then immediately spritz with a mix of half water and half white vinegar. The vinegar breaks up the metallic coating into the mottled, aged pattern that makes mercury glass. Let them dry fully, then place a tea light or votive candle inside. Group five to nine of them down the table in a loose line, mixing them with a few sprigs of cedar. The flickering light through the mottled glass looks genuinely antique. This project costs a few dollars total and works on any smooth glass, so you can also age small jars or bud vases the same way.
5. A Cedar Garland Runner With Brass Candlesticks
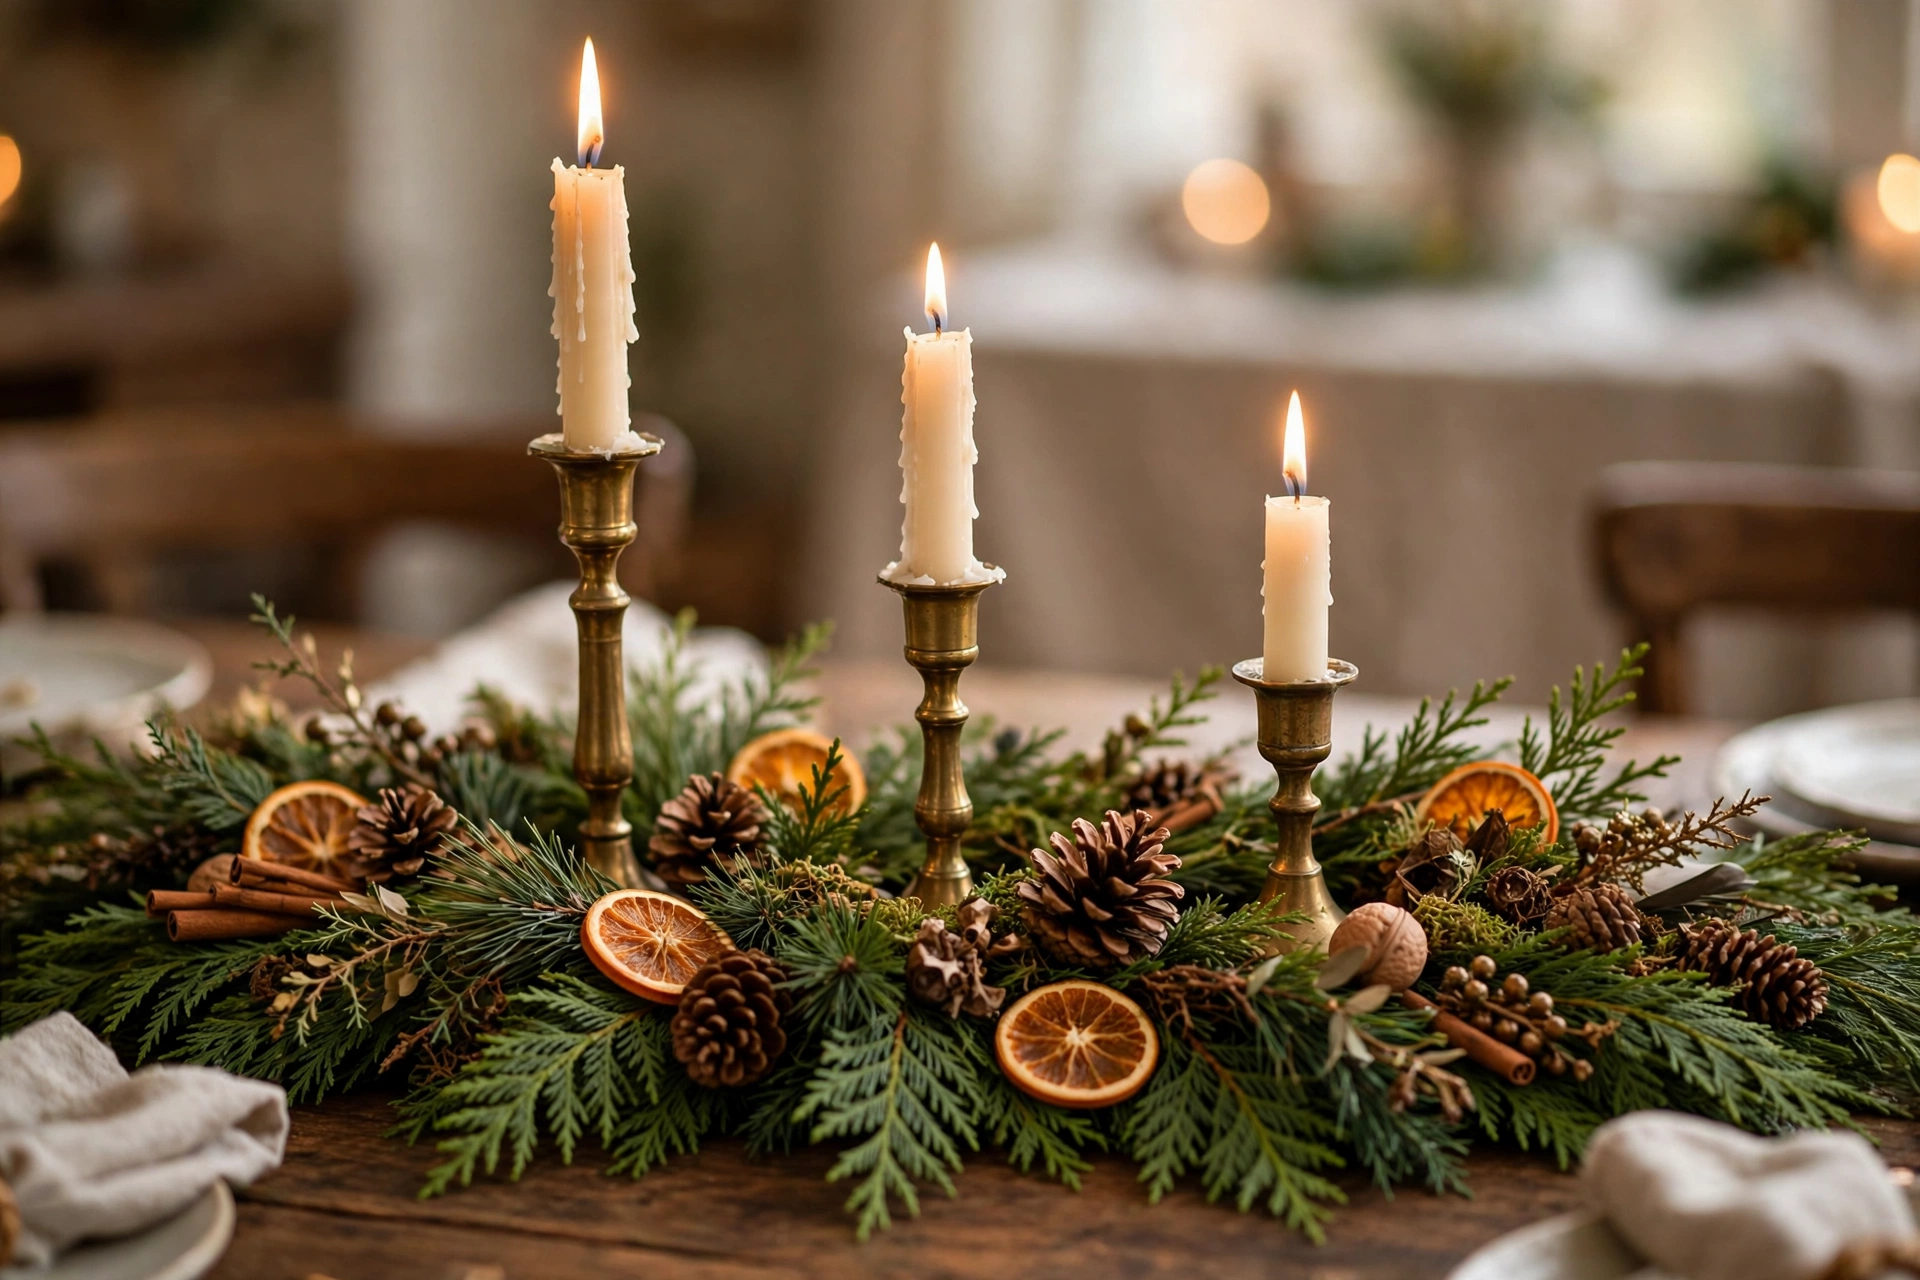
Fresh cedar garland with brass candlesticks is the classic bougie combination, and it is simple to build. Lay a cedar garland down the center of the table and fluff the branches wide so it looks full. If one garland looks thin, layer a second one on top. Then place brass or gold candlesticks directly into the garland at uneven intervals, using ivory tapers at three different heights. Thrift stores are full of brass candlesticks for a dollar or two, and polish or spray paint makes them match. Tuck a few pinecones and dried orange slices into the greenery for texture. The whole runner should stay under 6 inches tall so guests can see across the table. This is one of the most photographed holiday looks because it works with any plate or glassware.
6. Apothecary Jars Layered With Ornaments and Pinecones
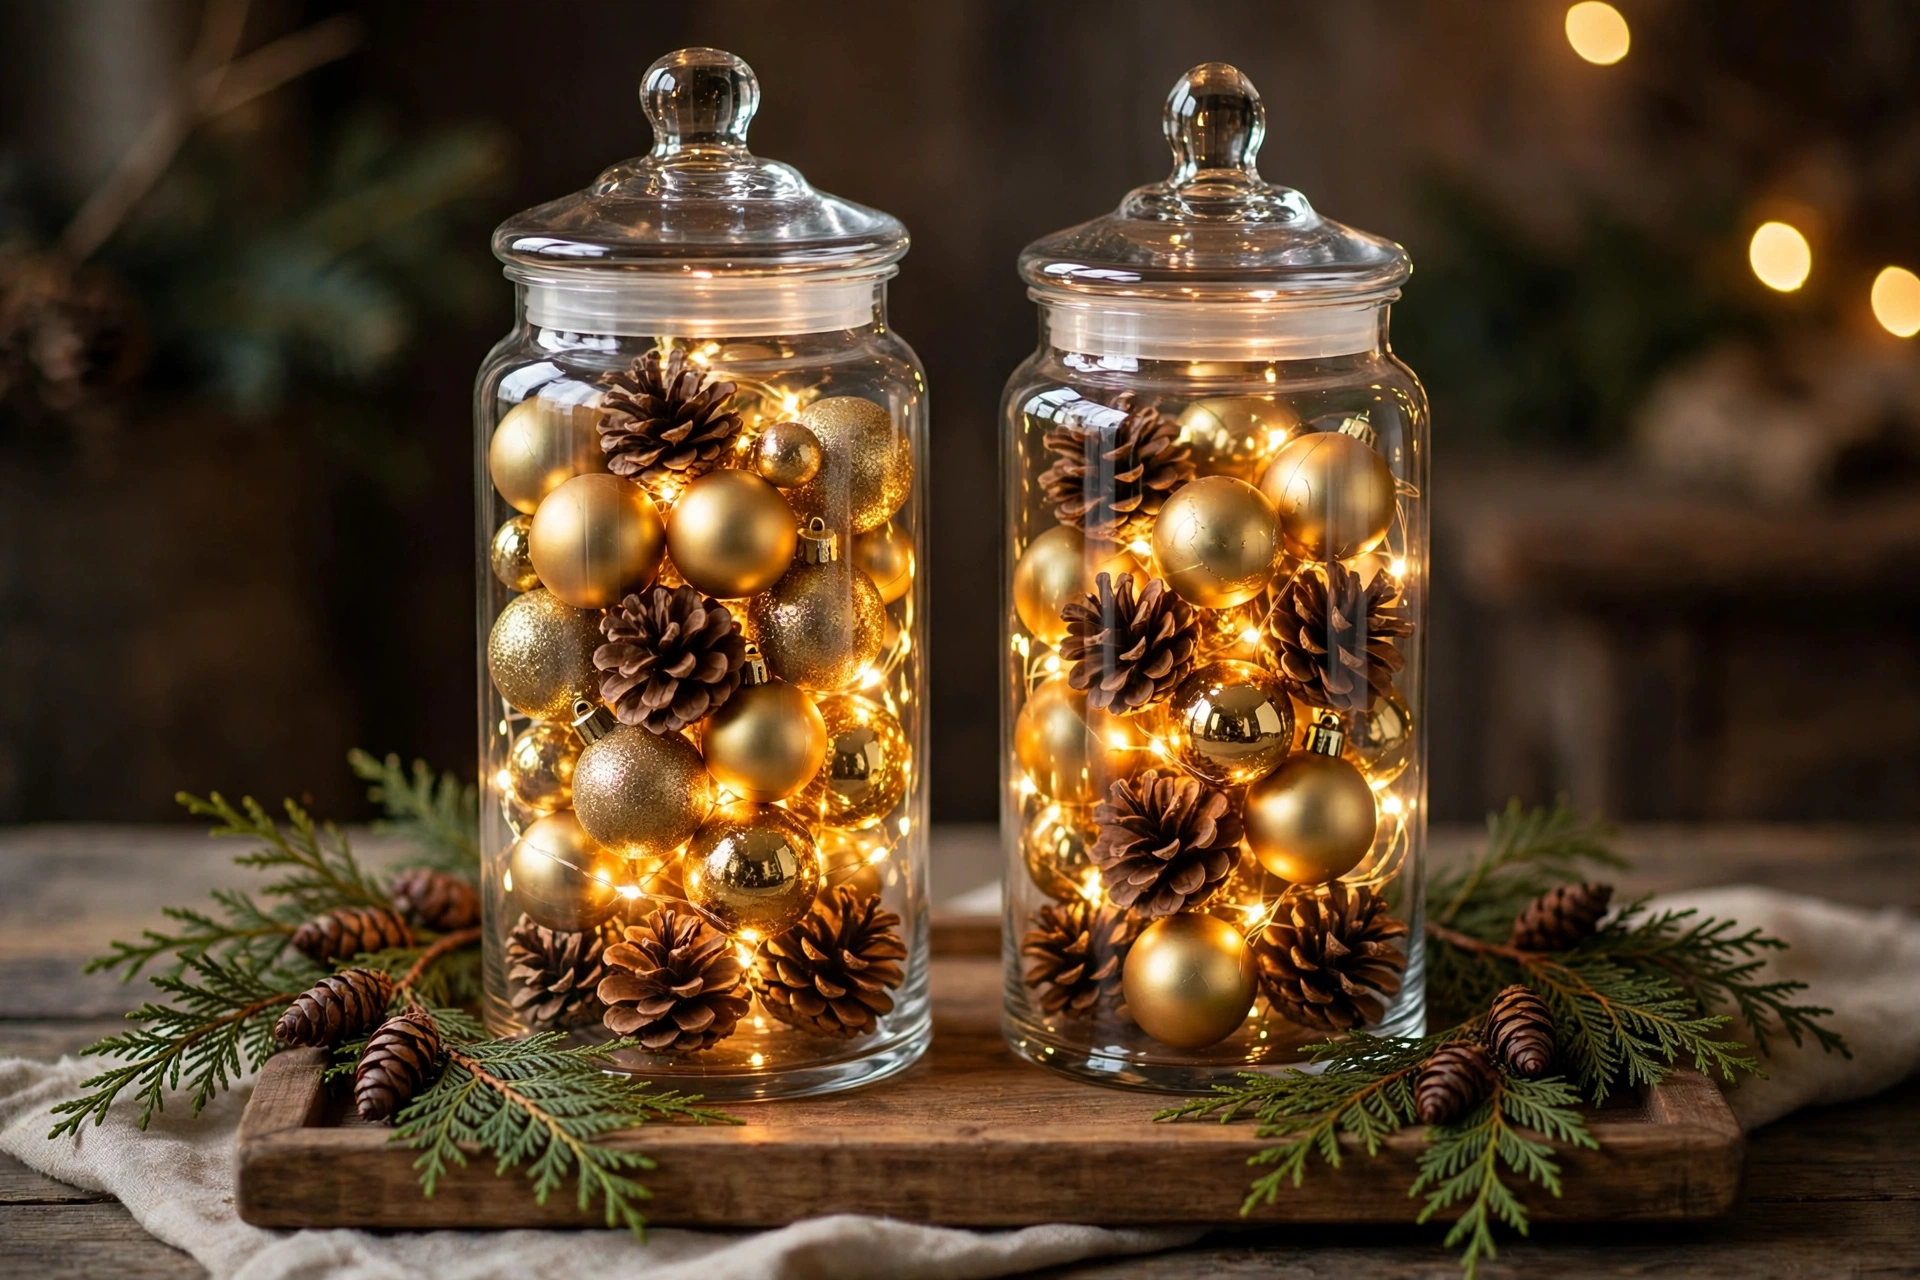
Tall apothecary jars turn ordinary ornaments into a display piece. Find two or three glass jars with lids in different heights, or use large mason jars and vases you already own. Fill each one in layers: a handful of pinecones at the bottom, then ornaments in one color family, then a short strand of battery fairy lights tucked through the middle. Put the lids on for a polished, collected look. Group the jars close together on a tray or a folded linen runner, and scatter a few loose ornaments and cedar sprigs around the bases. The layers show through the glass and look intentional, like something from a boutique. After the holidays, swap the ornaments for lemons or coffee beans and the jars work year-round.
7. Floating Cranberries and Candles in a Glass Bowl

This is the easiest centerpiece on the list and one of the prettiest. Fill a wide, low glass bowl or trifle dish two-thirds full with water. Drop in two cups of fresh cranberries and a few sprigs of rosemary or pine, which will float and tangle into a natural raft. Then set three to five floating candles on top and light them just before guests sit down. The red berries, green sprigs, and flickering flames in clear water look stunning with almost no effort. Change the water every two days and the berries stay fresh for about a week. Keep the bowl away from the table edge and out of reach of small hands, and never leave floating candles burning unattended. For a twist, freeze the cranberries in ice cubes first for a frosted effect.
8. A Velvet Ribbon and Fresh Greenery Runner
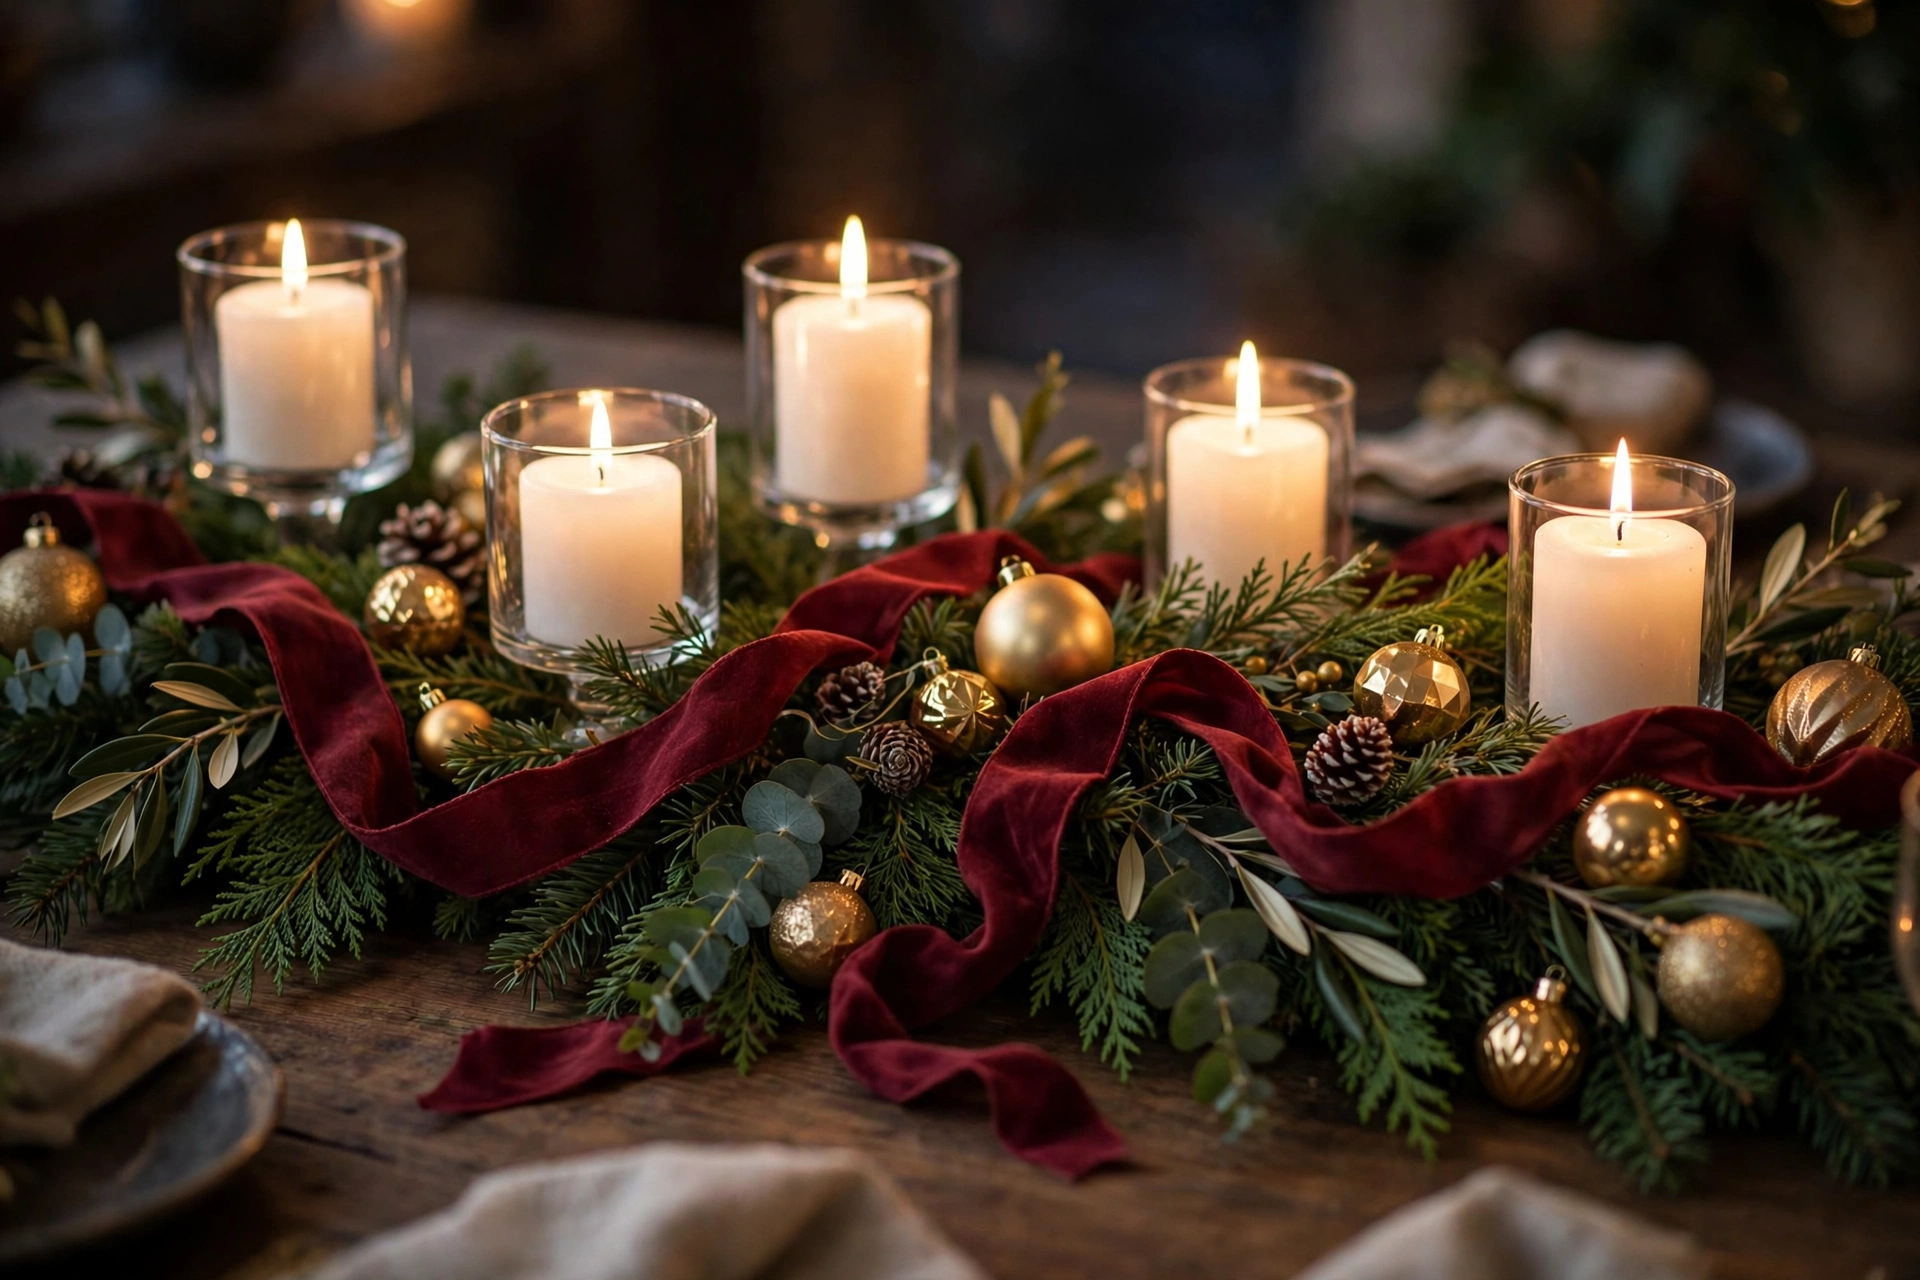
A wide velvet ribbon woven through greenery looks like a professional stylist did it. Lay a garland of mixed greens, such as pine, cedar, and eucalyptus, down the center of the table. Take a 2.5 to 4 inch wide velvet ribbon in a rich color like burgundy, emerald, or champagne, and weave it through the garland in loose S-curves, letting it pool and twist naturally. The ribbon should be wired so it holds its shape. Add white or ivory pillar candles in simple glass holders along the runner, and tuck in a few metallic ornaments. The velvet catches the light and adds the one rich texture that makes everything else look more expensive. Use a fabric ribbon with a water-resistant finish, since fresh greens can dampen plain fabric.
9. Gilded Pinecones in a Wooden Dough Bowl
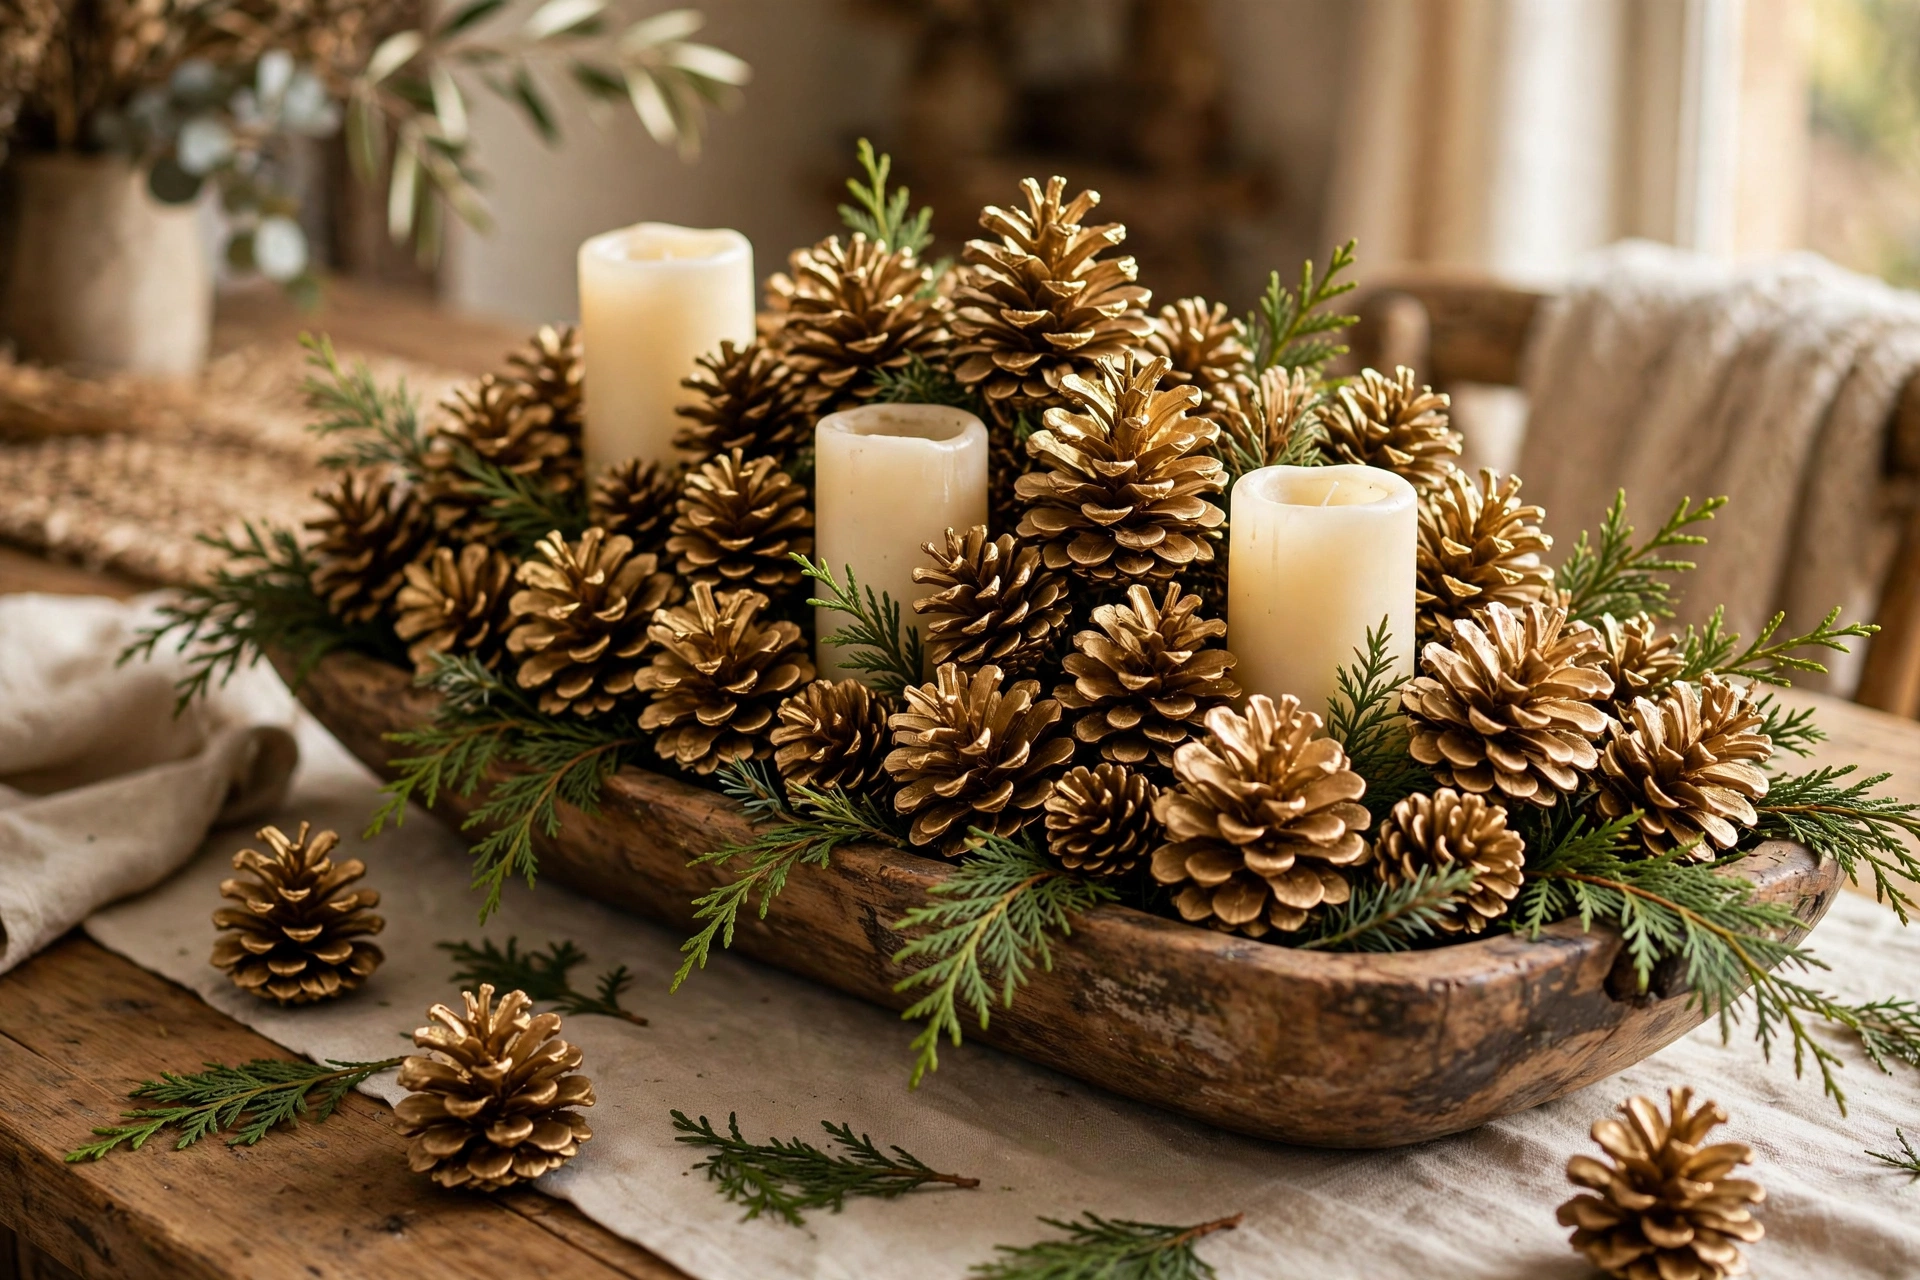
A wooden dough bowl full of gold pinecones is rustic luxury in its simplest form. Collect large pinecones, or buy a bag from a craft store, and spray paint them metallic gold, antique brass, or champagne. Do two light coats so the texture of the scales still shows. Pile them generously into a long wooden dough bowl or a low wooden tray until it mounds over the top. Tuck in a few sprigs of cedar and two or three unscented pillar candles in the middle. The contrast of rough wood and gleaming gold is what makes this look expensive. This centerpiece costs almost nothing if you gather the cones yourself, it never wilts, and you can store it assembled in a bag for next year. Keep the candles in glass holders so wax never touches the painted cones.
10. Champagne Coupes Glowing With Fairy Lights

Vintage-style champagne coupes make magical candle holders. Set three to five coupes down the center of the table, or cluster them on a tray. Coil a short strand of warm white battery fairy lights inside each glass, letting a few lights spill over the rim, and add two or three tiny ornaments or a sprig of rosemary. The curved glass bends the light beautifully. You can also skip the lights and use each coupe as a holder for a single floating candle with a cranberry or two. Thrift stores sell coupes for a dollar each, and mismatched ones look charming as a set. This idea works especially well for New Year’s Eve, when the coupe shape feels extra festive. Keep the battery packs hidden under a fold of the runner.
11. A Dried Orange and Cinnamon Stick Centerpiece

Dried oranges and cinnamon smell like Christmas and look like a high-end styling choice. Slice oranges a quarter inch thick, lay them on a wire rack over a baking sheet, and dry them in the oven at 200 degrees for 3 to 4 hours, flipping once. They should feel leathery, not sticky. Bundle three cinnamon sticks together with twine, and make a dozen of these bundles. Arrange fresh cedar or pine down the table, then tuck in the orange slices standing upright and the cinnamon bundles lying flat. Add ivory pillar candles and a few brass ornaments. The whole table will smell wonderful without any artificial fragrance. Dried oranges keep for months in a dry spot, so make extra for gift wrapping and the tree.
12. A White-on-White Winter Woodland
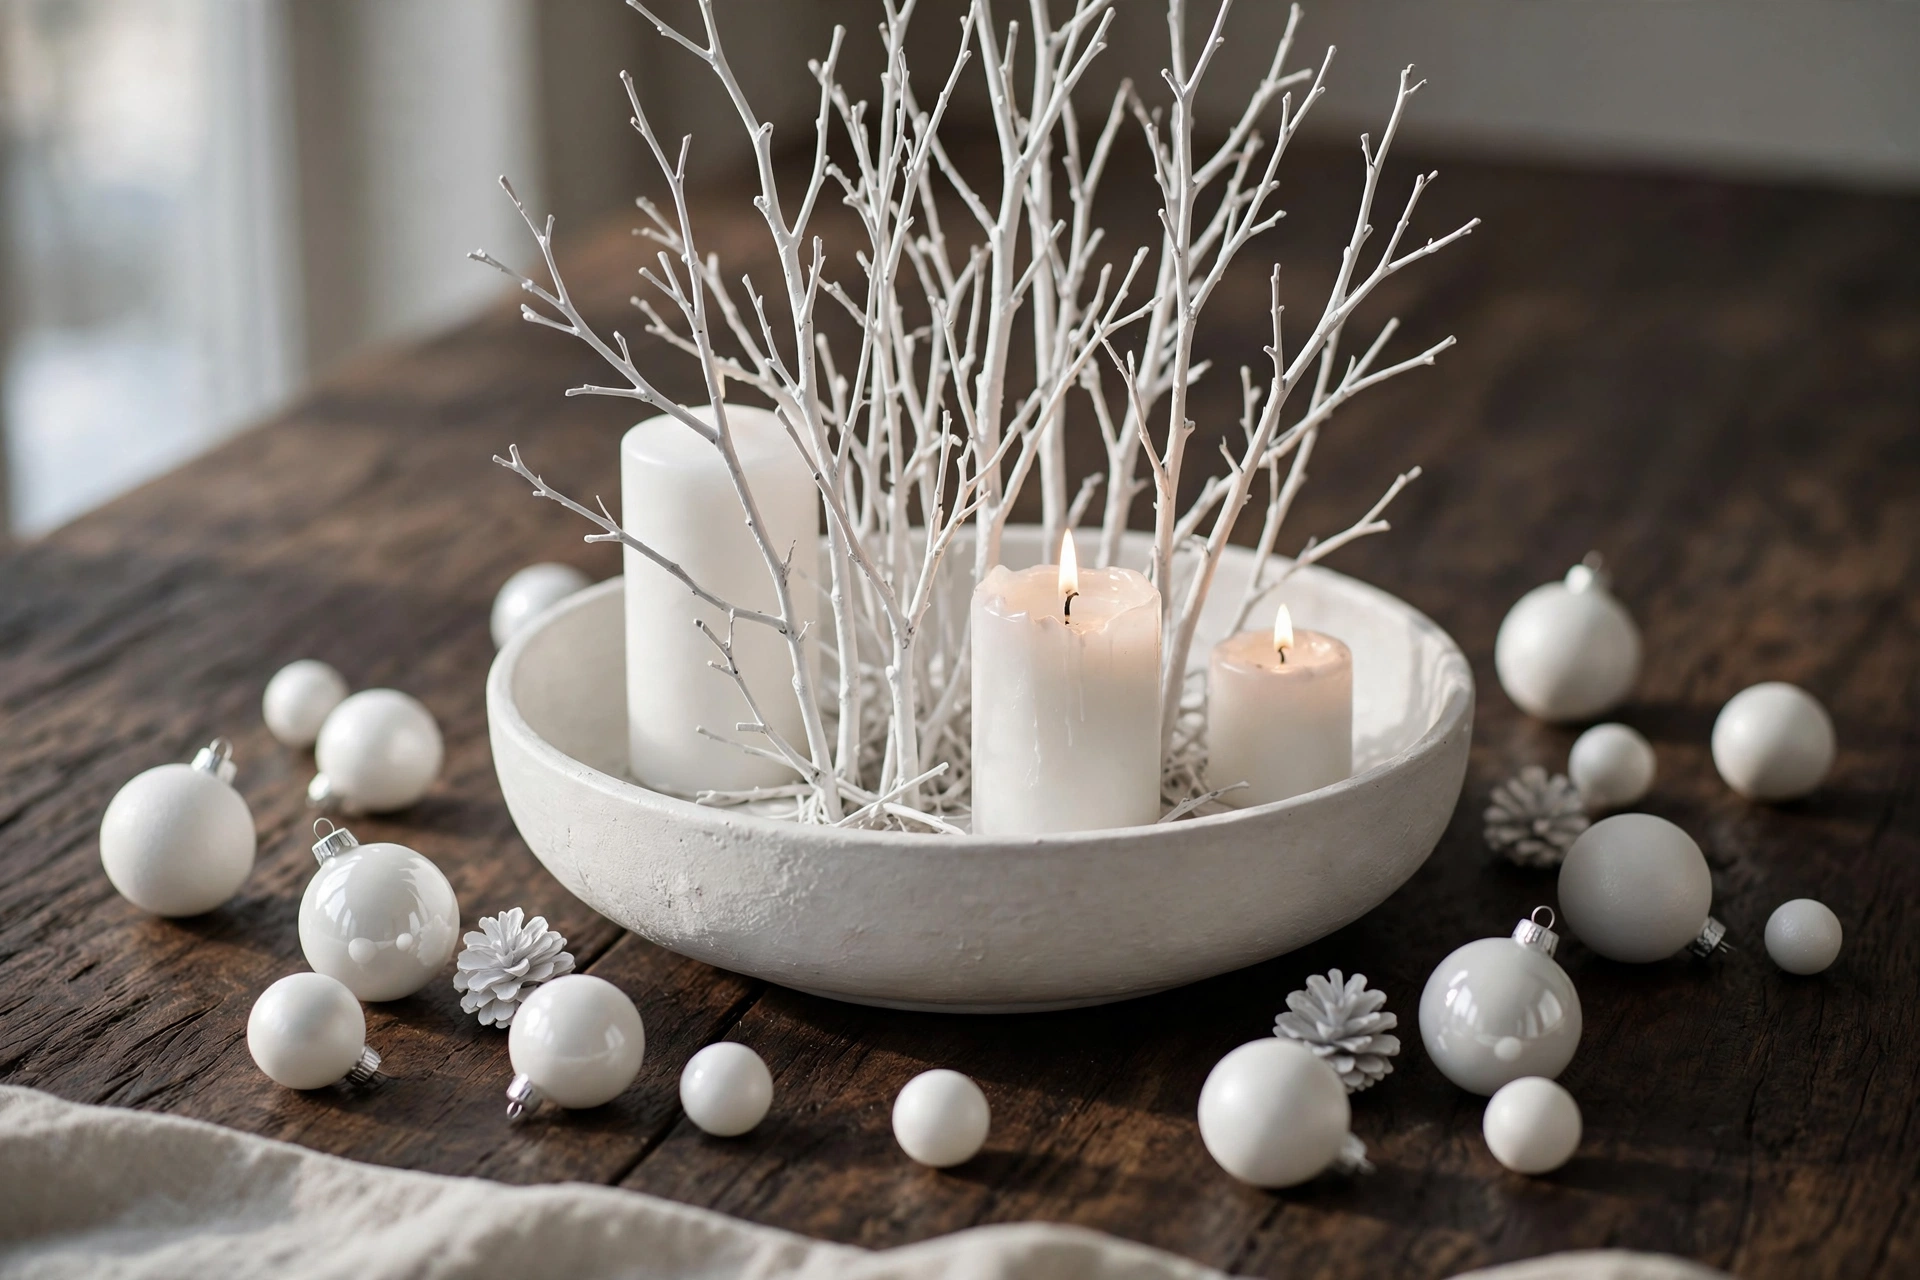
An all-white centerpiece looks calm, modern, and very expensive. Gather bare branches from the yard and spray them matte white, or buy a few frosted stems from a craft store. Arrange them in a low white ceramic bowl or a footed compote, fanning them out like a small winter forest. Tuck in white pillar candles at different heights, white ornaments in matte and shiny finishes, and a few faux snow-dusted pine sprigs. Keep every single element white, cream, or clear glass. The lack of color is what makes it striking, especially against a dark wood table or navy tablecloth. Add one string of cool or warm white fairy lights woven through the branches for evening glow. This look suits minimalist homes and pairs beautifully with simple white dinnerware.
13. Antique Books, Brass Candles, and Greenery
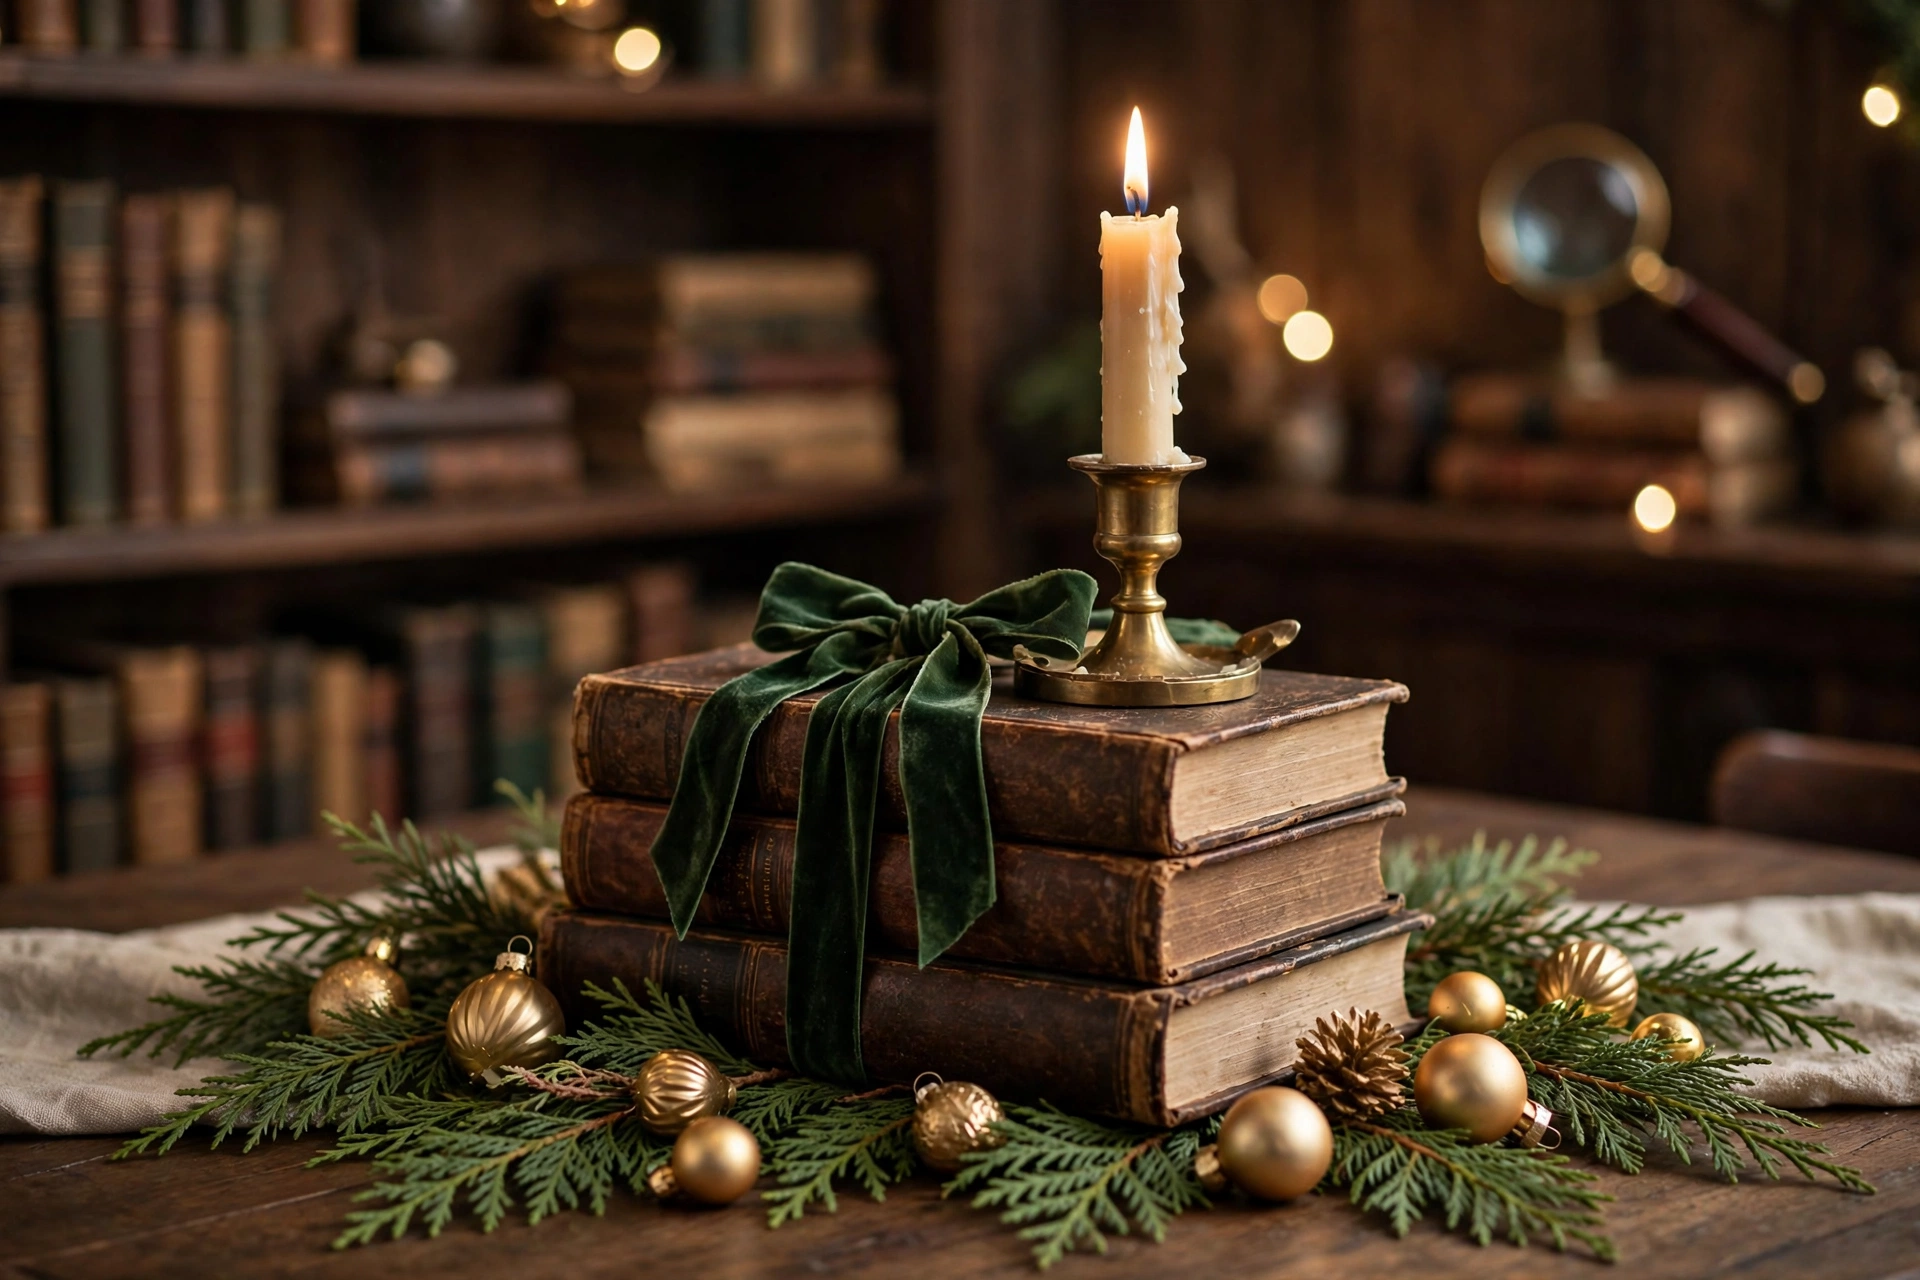
A stack of old books is the cheapest riser you will ever own, and it adds instant character. Pull two or three hardcover books with cloth or leather-look covers in deep green, burgundy, or brown from a thrift store or your own shelf. Stack them slightly off-center in the middle of the table, largest on the bottom. Set a brass candlestick with an ivory taper on top, and lay cedar sprigs and a few ornaments around the base. The books lift the candlelight to eye level, which is flattering for everyone at the table. Tie the stack with a velvet ribbon for a finished look, and slip a small pine sprig under the bow. Use books you do not mind getting a little wax on, or protect them with a small brass tray under the candlestick.
14. A Copper Bowl of Pomegranates and Greens
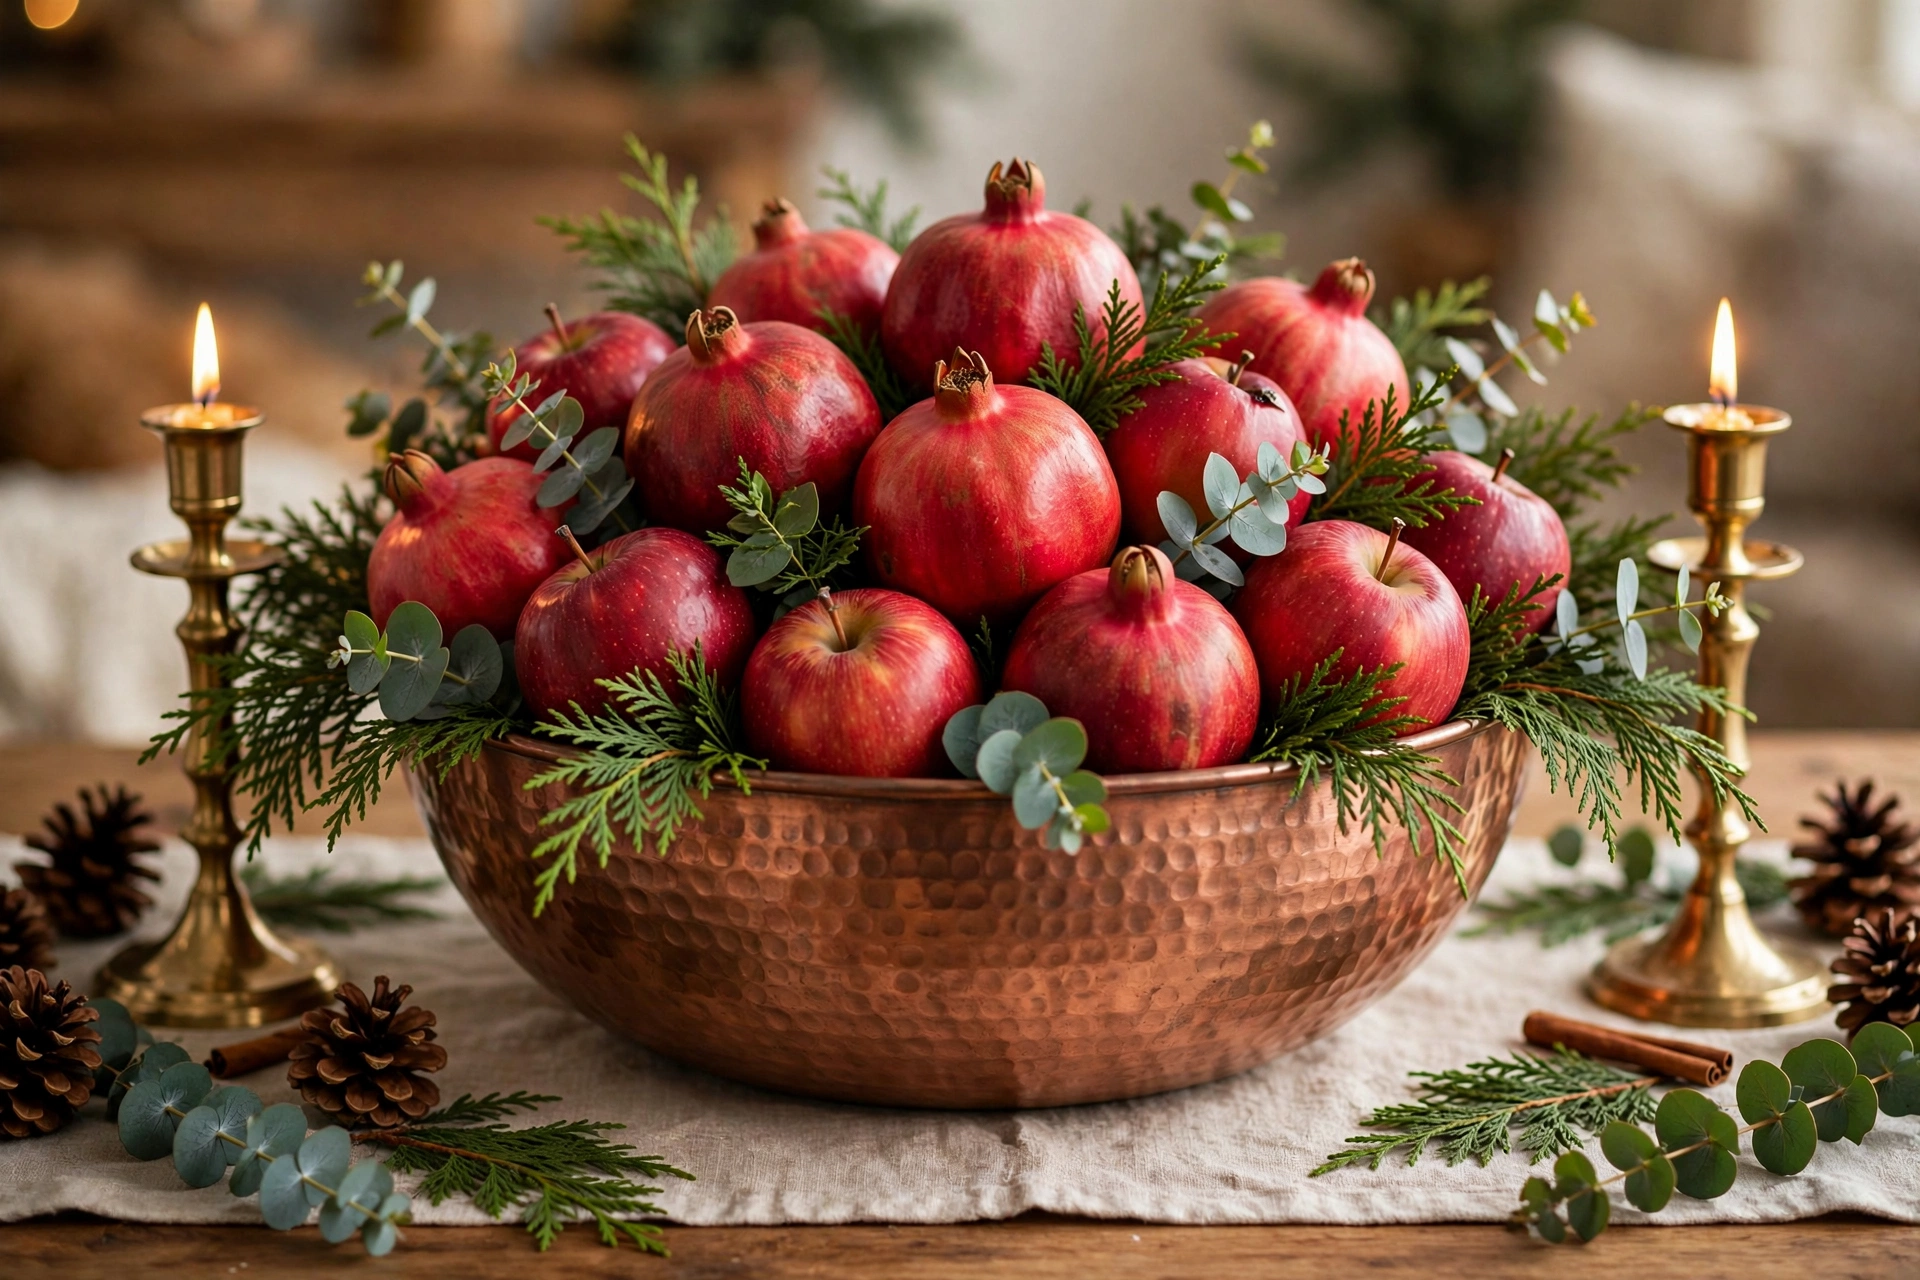
Fresh fruit in a metallic bowl is an old styling trick that always looks abundant. Find a large copper, brass, or gold-toned bowl, even a thrifted one with a good shine. Fill it with whole pomegranates, red apples, or clementines, piling them high so they mound above the rim. Tuck cedar and eucalyptus sprigs between the fruit so green peeks through. Set the bowl on a linen runner with a few brass candlesticks on either side. The deep red fruit against warm metal looks rich and festive, and guests can actually eat the display. Replace any fruit that softens, and keep the bowl out of direct sun so it lasts the week. After dinner, the fruit goes into a salad and the bowl goes back on the shelf.
15. Snow-Dusted Mason Jar Luminaries
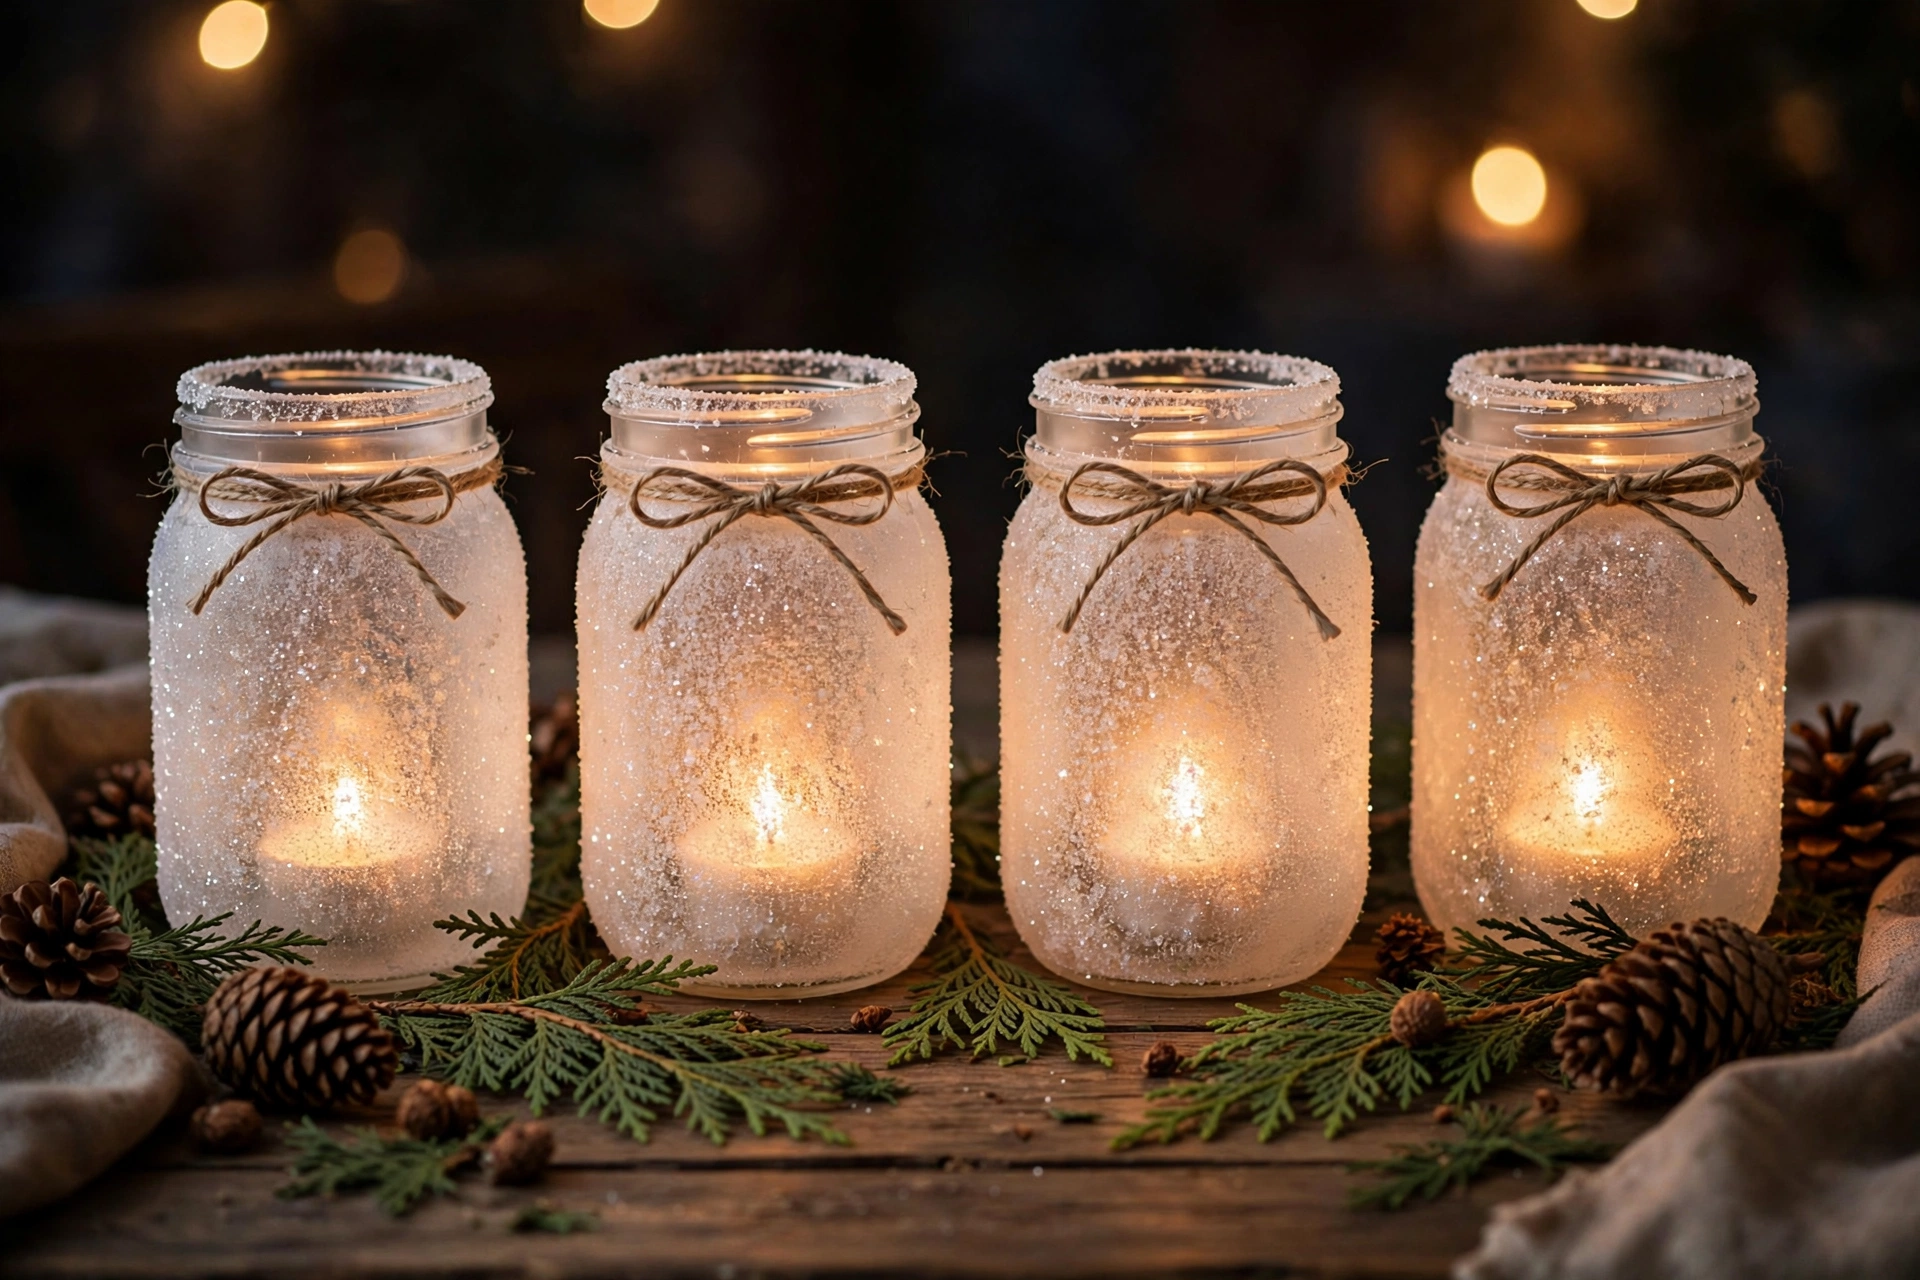
Frosted mason jars glow like little lanterns and cost pennies to make. Brush the outside of clean mason jars with a thin coat of craft glue or decoupage medium, then roll them in epsom salt until coated. The salt looks exactly like fresh snow and sparkles in candlelight. Tie a piece of twine or thin velvet ribbon around the rim, and drop in a tea light or LED votive. Line five to seven jars down the center of the table, mixing pint and quart sizes, and scatter cedar sprigs and pinecones between them. The soft, diffused light is incredibly flattering. Use LED tea lights if children will be at the table, since the salt coating can get warm near a real flame. These also make lovely luminaries along a mantel or windowsill.
16. A Trio of Birch Log Candle Holders
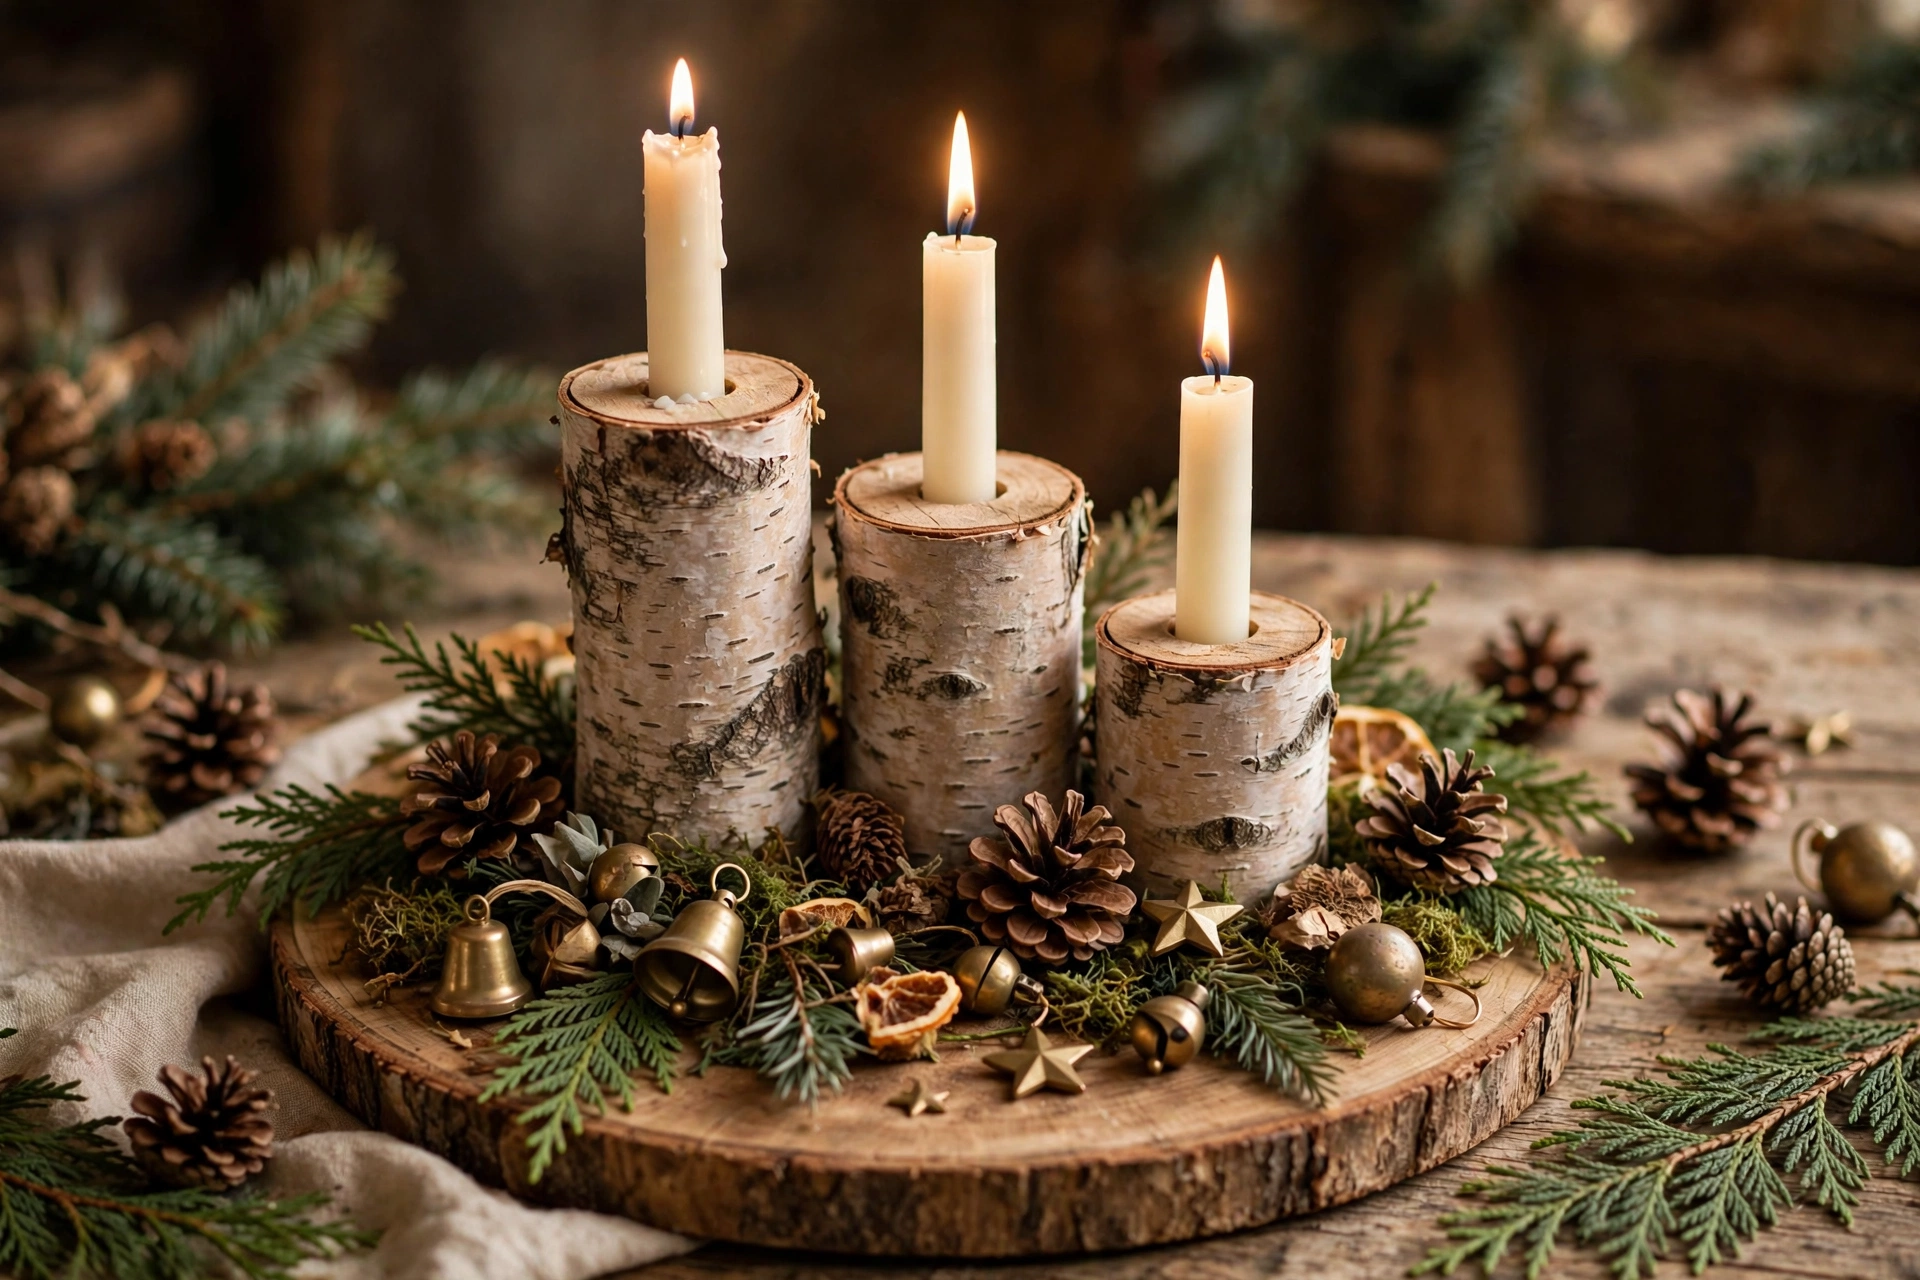
Birch logs with drilled candle holes bring a woodland lodge feel to the table. Cut or buy birch logs in three heights, from 4 to 10 inches tall. Drill a hole in the top of each one just wide enough to hold a taper candle snugly, about an inch deep. Sand the tops smooth and set ivory or deep red tapers inside. Group the three logs close together on a round wood slice or a linen runner, and surround them with cedar sprigs, pinecones, and a few brass ornaments. The white bark with dark markings is naturally beautiful and needs no decoration. Always use dripless tapers and keep the flames away from the greenery, or use LED tapers for a worry-free version. These also work as a mantel display after the holidays if you swap the tapers for plain white.
17. Velvet-Covered Ornaments in a Compote Bowl

Velvet ornaments look like they came from a European Christmas market, and you can make them in minutes. Buy inexpensive smooth ball ornaments and small squares of velvet or velveteen fabric in deep green, burgundy, or navy. Wrap each ball in fabric, gather the excess at the top, and secure it with a rubber band, then cover the band with a small ribbon bow or a sprig of greenery. The soft, light-absorbing texture looks incredibly luxe next to shiny glass ornaments. Pile a dozen of them into a footed compote bowl or a mercury glass bowl until they mound over the edge. Set the bowl on a stack of coffee table books or a cake stand for height. Mix in a few metallic ornaments for contrast, and keep the whole arrangement in one or two velvet colors.
18. Rosemary and Citrus Mini Wreaths Around Candles

Tiny wreaths ringing each candle make a plain table look hand-styled. Form small rings, about 4 to 5 inches across, from fresh rosemary sprigs, wiring the stems together into circles. Tuck in thin dried orange slices and a few cranberries, wiring them in place. Set a white pillar candle in a low glass holder in the center of each wreath. Make three to five of these and space them down the table, or cluster them on a round tray. The rosemary releases its scent gently in the warmth of the candle, and the whole thing looks like a catered event. These wreaths last about three to four days looking fresh, so assemble them the day before your dinner. Mist them lightly and store in a cool spot overnight.
19. A Styled Tiered Tray for the Holidays

A two-tiered tray packs a whole vignette into a tiny footprint, which makes it perfect for small tables and kitchen islands. Start with the bottom tier: a ring of cedar or faux greenery, three small bottle brush trees in different heights, and a few gold ornaments. On the top tier, place one statement piece like a small lantern with a fairy light string, plus a tiny stack of faux gifts and a pinecone or two. Keep to two colors and one metal across both tiers so it reads as one arrangement. The height of the tray draws the eye up, which makes even a simple setup look designed. Style it once and it is done for the season, and you can lift the whole tray off the table when you need serving space.
20. An Oversized Lantern Filled With Ornaments and Lights
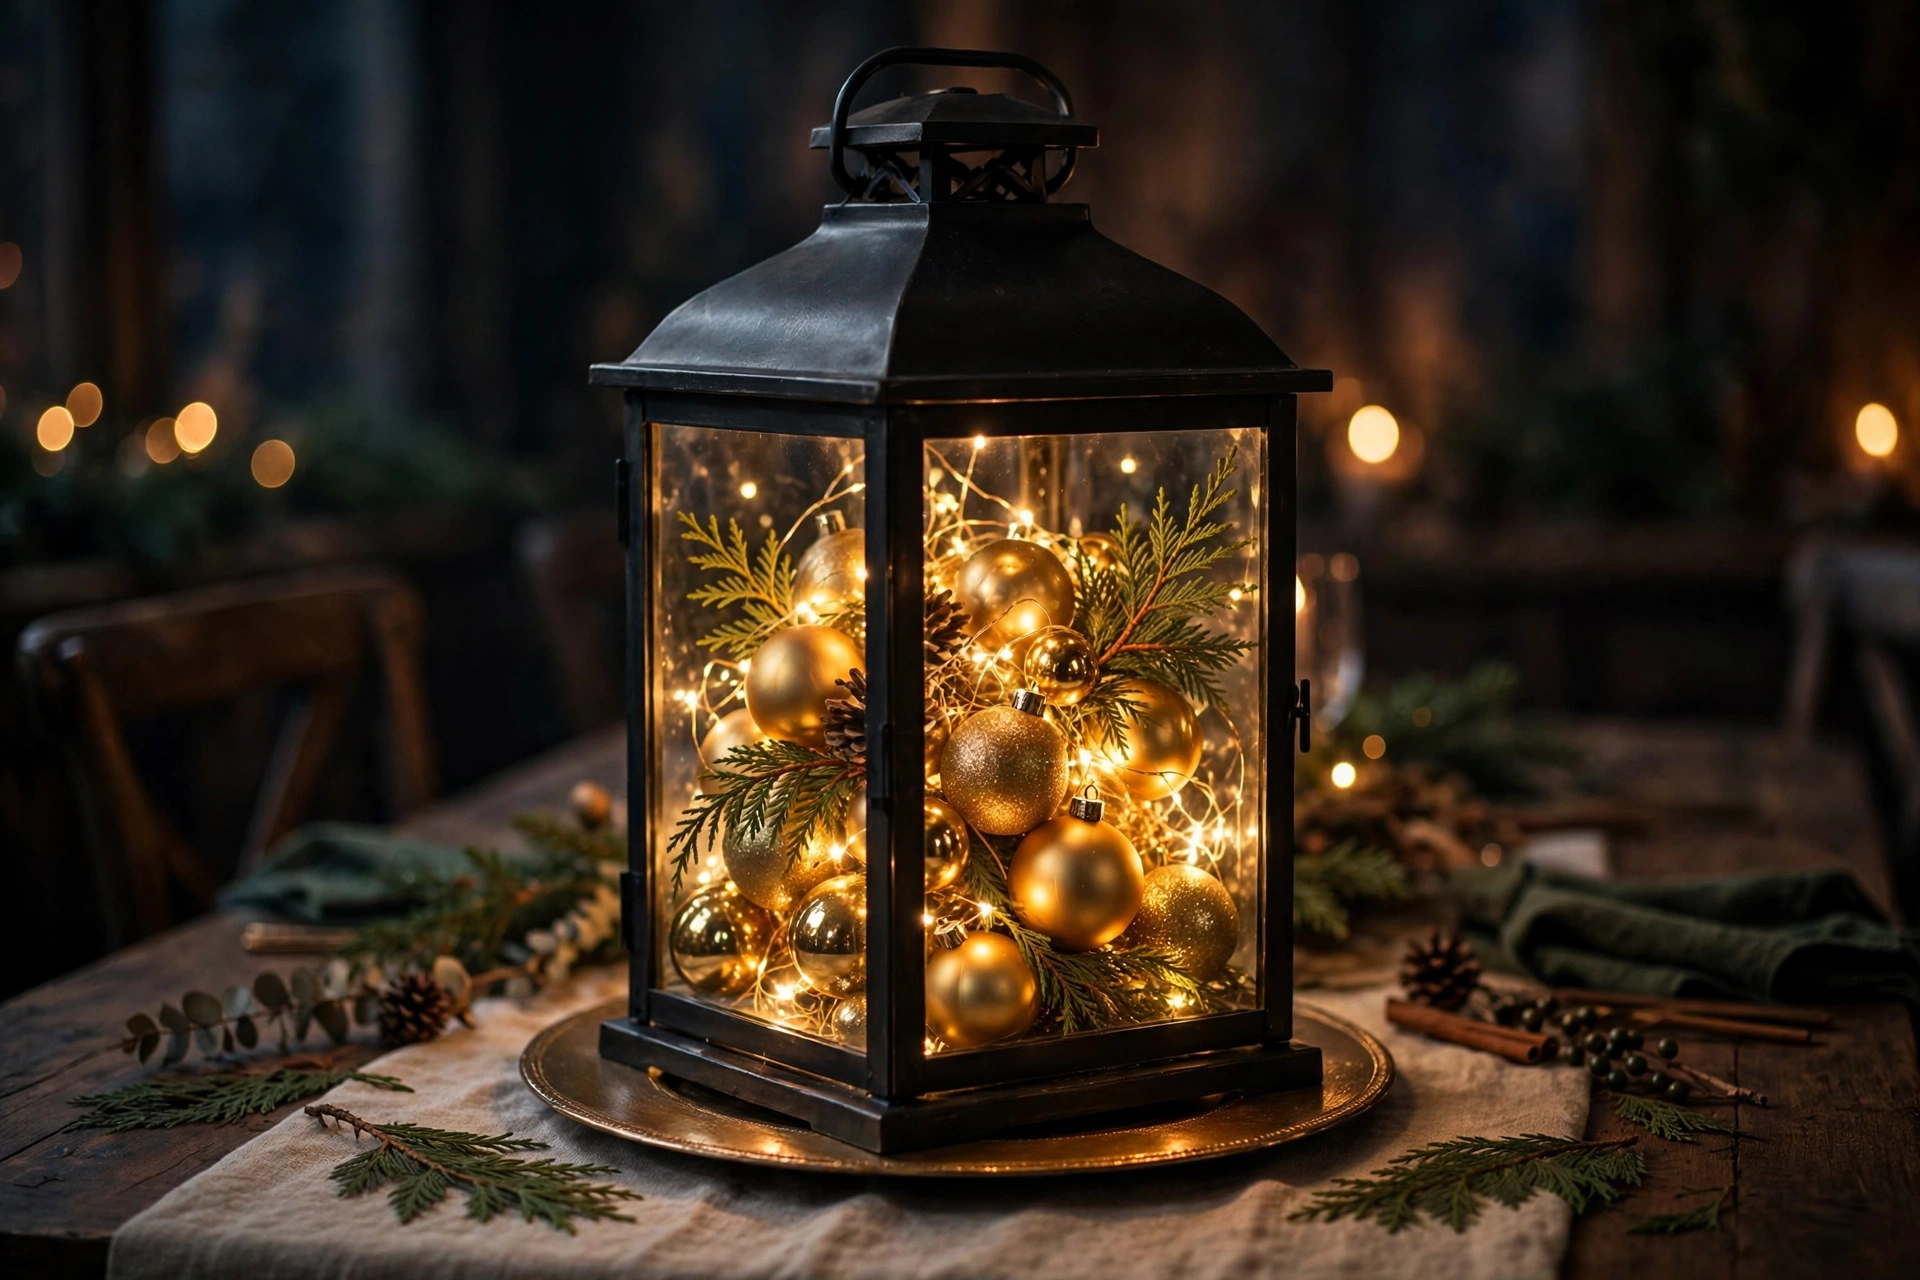
One oversized lantern can carry an entire table. Choose a lantern at least 16 inches tall in black, wood, or aged metal. Open the door and fill the base with a nest of cedar sprigs, then pile in ornaments in your palette until it looks abundant. Weave a short strand of battery fairy lights through the ornaments so the whole lantern glows from within. Close the door and set the lantern in the center of the table on a round charger or a folded runner. The lantern frames the sparkle like a little stage, and it looks intentional with zero arranging skill required. After Christmas, swap the ornaments for pinecones and a pillar candle and the lantern works straight through winter. Keep the battery pack accessible so you can switch the lights on easily.
Styling Tips That Make Everything Look Planned
- Anchor it. Every centerpiece needs a base: a tray, a runner, a wood slice, or a folded throw. The base is what makes scattered items look like one arrangement.
- Work in threes. Three heights, three textures, odd numbers of candles. Groups of three and five look styled; even numbers look stiff.
- Pick one metal. Gold, brass, copper, or silver. Mixing metals can work, but one metal always looks more expensive.
- Add something alive. Fresh cedar, eucalyptus, rosemary, or even a bowl of clementines makes faux and dried elements look better.
- Light it low. Turn off the overhead light and let candles and fairy lights do the work. Warm light makes every material look richer.
- Leave breathing room. A centerpiece should fill the middle third of the table, not the whole surface. Guests need space for plates and elbows.
Practical Setup: How to Build a Centerpiece Step by Step
- Measure the table. Note the length and width, and decide whether the arrangement runs down the middle or sits as one cluster.
- Lay the base. Runner, tray, or wood slice first. Everything else sits on or inside it.
- Add greenery. Garland, loose branches, or eucalyptus. This is the filler that hides mechanics and gaps.
- Place the tallest items. Lanterns, hurricanes, tall candlesticks. Set heights first so the composition has a skeleton.
- Fill the middle. Ornaments, pinecones, fruit, jars. Work in odd-numbered clusters.
- Add candlelight. Pillars, tapers, tea lights, fairy lights. Vary the heights and keep flames away from greens.
- Finish with texture. Ribbon, dried oranges, velvet ornaments. These are the details people notice up close.
- Do the sight-line check. Sit in a chair at each end of the table. If you cannot see the person across from you, lower the arrangement.
Common Mistakes to Avoid
- Too tall. Anything over 12 inches in the middle of a dining table blocks conversation. Save tall pieces for buffets and consoles.
- Too many colors. Four ribbon colors, three ornament colors, and two metals look busy. Pick a small palette and repeat it.
- Scent overload. One scented element is plenty. Strong candles plus pine plus cinnamon can overwhelm the food.
- Real flames near greens. Fresh cedar and pine dry out fast and catch easily. Use LED candles inside greenery, or keep real flames well clear.
- No base. Items sitting directly on a bare table look scattered. A tray or runner pulls them into one composition.
- Forgetting the sides. A centerpiece viewed only from one side looks flat from the other. Walk around the table as you build.
- Blocking the serving space. Leave room for the dishes you will actually serve. A beautiful table you cannot eat at is a failed table.
- Building it too early. Fresh greenery and fruit fade. Assemble fresh elements one to two days before the event.
Small-Space Alternatives
- Use one statement piece instead of a runner: a single lantern, hurricane, or compote bowl.
- Style a tiered tray, which goes vertical instead of spreading across the table.
- Choose a round tray cluster that lifts off easily when you need the space.
- Hang a small wreath or a swag on the wall behind the table instead of building wide.
- Use bud vases with single stems instead of a full garland.
- For a tiny bistro table, one mason jar luminary and a sprig of cedar is enough.
- Move the big arrangement to a nearby console or sideboard and keep the table minimal.
Budget-Friendly Alternatives
- Free: Pinecones, bare branches, and cedar clippings from the yard, plus jars and books you already own.
- Under $10: A bag of cranberries, a bundle of cinnamon sticks, tea lights, epsom salt for frosted jars, and thrifted brass candlesticks.
- Under $25: A mirrored tray, a glass hurricane vase, a strand of battery fairy lights, and metallic spray paint.
- Make it look pricey: One metal, one ribbon, fresh greenery, and candlelight. Those four things fake a big budget.
- Thrift first. Brass, glass hurricanes, apothecary jars, and compote bowls are thrift store staples.
- Buy once: Good fairy lights, a quality garland, and real brass candlesticks come back every year.
Pro Styling Recommendations
- Match the metal to your room. Warm brass suits traditional spaces; matte black or silver suits modern ones.
- Repeat the centerpiece palette in one other spot, like the mantel or entry, so the house feels linked.
- Photograph the arrangement before guests arrive. Photos reveal gaps and clutter faster than your eyes do.
- Use dripless or LED candles on the dining table. Wax on a tablecloth ruins the bougie effect fast.
- Layer heights deliberately: one tall anchor, two medium pieces, and low filler. Never everything at one level.
- Keep a small kit: extra tea lights, matches, floral wire, and a few spare ornaments for last-minute fixes.
- Plan the teardown. Bag ornaments by color, coil fairy lights around cardboard, and label the box.
Frequently Asked Questions
Conclusion
A bougie Christmas centerpiece is not about spending more. It is about a tight palette, one good metal, fresh greenery, and candlelight doing the heavy lifting. Every idea on this list uses things you can find at a thrift store, a grocery store, or your own backyard.
Pick one idea that fits your table and build it this weekend. Light the candles, turn off the overhead light, and sit down to look at it from a guest’s chair. When the table glows and everything feels pulled together, you will know exactly why the centerpiece is the hardest-working decoration in the house.