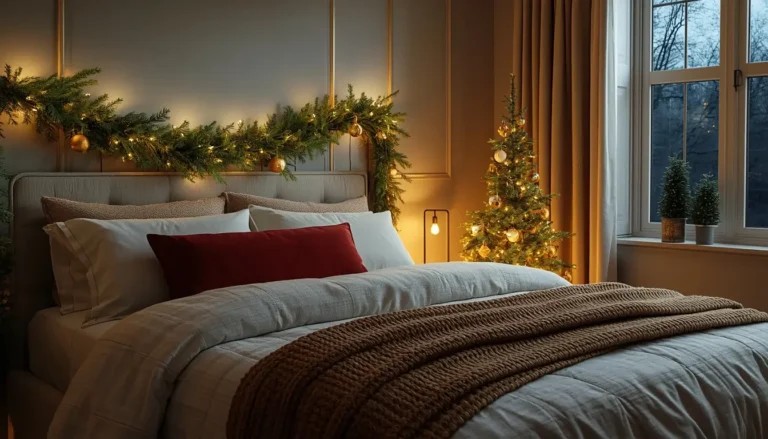
15 One-Afternoon DIY Christmas Crafts That Look Handmade (Not Crafty)

Picture this. It’s a gray afternoon. There’s a mug of tea at your elbow, a stack of kraft paper on the table, and the kind of quiet that only happens when you’re making something with your hands.
By dinner, there’s a garland drying by the oven, a few ornaments on the tree, and a pile of gift tags with your handwriting on them.
That’s the best part of a Christmas craft. It’s small. It’s finished in one sitting. And it makes the house feel like yours.
But here’s the catch. Many craft ideas look cute in the photo and a bit tired in real life. Too much glitter. Too many colors. Too many plastic bits. The result looks crafty, not handmade.
The good news is that handmade decor has a recipe. Use natural, matte materials. Stay in a tight color palette. Add one small finishing detail. That’s it.
Below are 15 DIY Christmas crafts you can finish in one afternoon, each with time, cost, and skill notes, plus a safety guide, a craft kit list, and three bundle plans so you can pick the right projects for your day. With about seven weeks until Christmas, there’s plenty of time to start.
Quick Answer: How Do You Make DIY Christmas Crafts Look Handmade, Not Crafty?
Choose natural, matte materials like wood, kraft paper, twine, wool, linen, and dried oranges. Keep to two or three colors. Repeat the same shapes across several pieces. Add a finishing detail, like linen ribbon, a hand-lettered tag, or a coat of clear sealer. Keep each craft simple, and make a few in the same style so the decor feels like a set.
Six Rules for Handmade That Looks Polished
- Pick a tight palette. Two or three colors, such as cream, forest green, and rust, make any craft look planned.
- Choose matte over shiny. Wood, paper, wool, and linen look warm and handmade. Glitter and glossy plastic look crafty.
- Repeat a shape. If you make stars, make a few in different sizes. Repeating a shape ties the pieces together.
- Let imperfection show on purpose. Slightly uneven lines look handmade. Perfectly identical copies look factory-made.
- Finish with one detail. A linen ribbon, a thin line of twine, a wax-sealed tag, or a clear sealer makes a craft look finished.
- Style it well. A craft looks better on a clean surface with space around it. Don’t crowd pieces together.
Craft Safety Rules
Crafting is relaxing, and a few simple rules keep it that way.
- Respect hot glue. The tip and the glue are very hot and can burn skin. Use a heat-safe mat, keep it away from kids, and unplug it when done.
- Keep pets away from salt dough. Salt dough ornaments can be harmful to dogs if eaten. Hang them high and keep them out of reach, or use air-dry clay instead.
- Dry food-based crafts fully. Dried oranges and salt dough need to dry completely, or they can mold. Dry them low and slow, flipping as they dry.
- Handle wax carefully. Melt wax in a double boiler, never over direct heat, and keep water away from hot wax. Never leave melting wax alone.
- Check your paint labels. Look for non-toxic paints and seal projects that kids or pets may touch.
- Ventilate when you use sealers or spray paint. Open a window and work in a well-ventilated space.
- Use flameless candles with natural materials. Cinnamon sticks, paper, and wood burn easily.
- Cut safely. Use a cutting mat, cut away from your hands, and keep craft knives covered when not in use.
- Keep small parts away from little ones. Beads, buttons, and tiny ornaments are choking hazards.
Your Afternoon Craft Kit
| Supply | What it’s for | Used in crafts |
|---|---|---|
| Natural twine and cotton string | Hanging, tying, finishing | 1, 2, 3, 4, 5, 8, 9, 10, 12 |
| Kraft paper and cardstock | Stars, tags, trees, wrapping | 4, 7, 11, 12 |
| Scissors and a craft knife | Cutting paper and fabric | Most crafts |
| Hot glue gun and glue sticks | Quick, strong joins | 6, 8, 9, 11, 15 |
| Non-toxic acrylic paint and fine brush | Details and lettering | 2, 3, 10 |
| Clear sealer (water-based) | Protects clay and wood | 2, 3 |
| Oven and baking sheet | Drying oranges and clay | 1, 3 |
| Linen or cotton ribbon | Finishing touches | 6, 8, 12 |
| Mugs, tea, and a good playlist | The best supplies | All crafts |
Quick Compare: Time, Cost, and Skill
| # | Craft | Active time | Cost | Skill |
|---|---|---|---|---|
| 1 | Dried orange garland | 30 min | Low | Easy |
| 2 | Wood slice ornaments | 45 min | Low | Easy |
| 3 | Stamped clay ornaments | 60 min | Low | Easy |
| 4 | Folded paper stars | 45 min | Very low | Medium |
| 5 | Pom-pom garland | 60 min | Low | Easy |
| 6 | Scrap-fabric bow garland | 45 min | Very low | Easy |
| 7 | Paper silhouette trees | 45 min | Very low | Easy |
| 8 | Grapevine wreath | 45 min | Low | Easy |
| 9 | Cinnamon candle wraps | 20 min | Low | Easy |
| 10 | Painted wooden bead garland | 60 min | Low | Easy |
| 11 | Paper cone forest | 45 min | Very low | Easy |
| 12 | Stamped gift wrap and tags | 45 min | Very low | Easy |
| 13 | Simmer pot jars | 30 min | Low | Easy |
| 14 | Soy candles in thrifted cups | 60 min | Medium | Medium |
| 15 | No-sew sweater stockings | 60 min | Low | Easy |
Part One: Ornaments and Tree
1. Dried Orange Garland
Craft card: Active time: 30 minutes plus oven time | Cost: low | Skill: easy | You’ll need: oranges, a baking sheet, twine, a needle or skewer
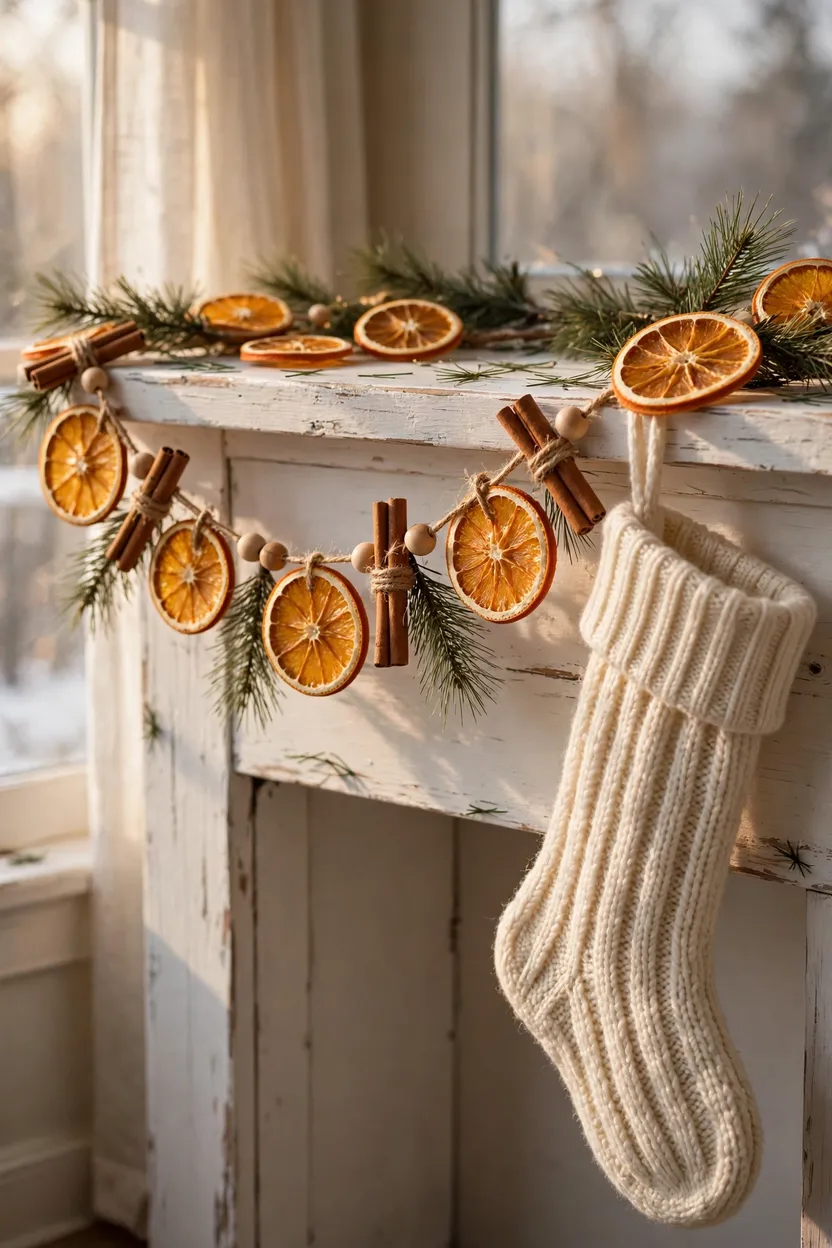
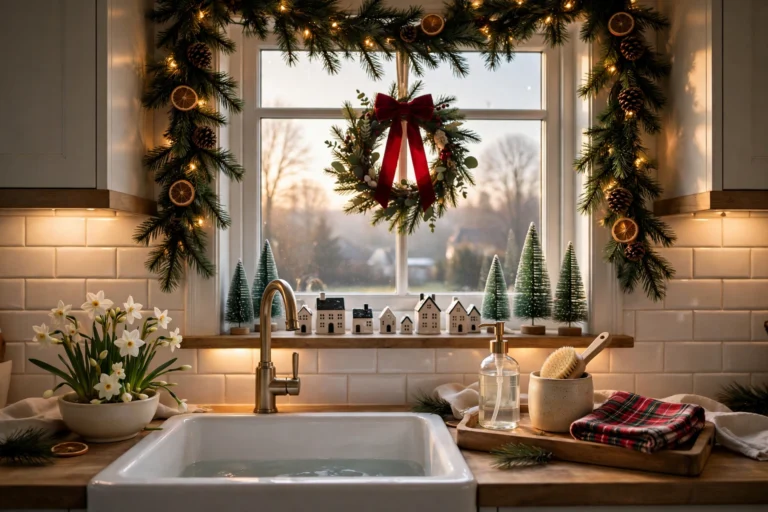
Dried oranges are the easiest way to get a warm, glowing, handmade look. Slice oranges about a quarter inch thick, pat them dry, and bake them on a lined tray at a low temperature for a few hours, flipping them now and then, until they feel dry and no longer sticky. Let them cool fully, poke a hole through each slice, and string them on twine with cinnamon sticks or small wooden beads in between. Keep the strand loose and uneven, since that’s what makes it look like handmade instead of store-bought. Start these first in your afternoon so they bake while you work on the next craft.
2. Hand-Lettered Wood Slice Ornaments
Craft card: Active time: 45 minutes | Cost: low | Skill: easy | You’ll need: thin wood slices, a fine paint pen or brush, twine, a small drill or awl
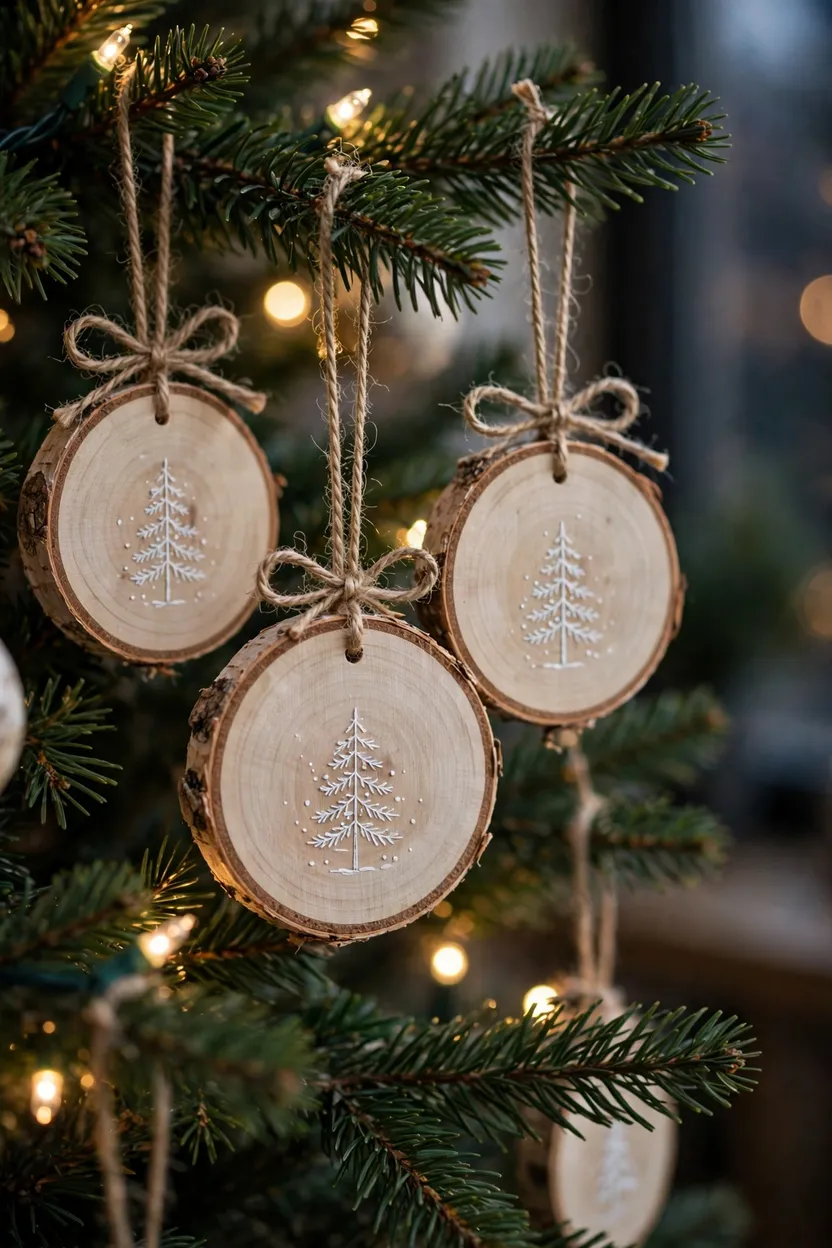
Wood slices look handmade the moment you hang them. Choose thin, dry slices of birch or pine, make a small hole near the top, and sand any rough edges. Write a short word, a name, a year, or a tiny simple drawing like a star or a fir tree with a fine paint pen. Stick to one ink color, such as cream, black, or forest green, so the set feels cohesive. Tie each slice with a short loop of natural twine. Seal them with a light coat of clear sealer in a ventilated spot if you want them to last for years.
3. Stamped Clay Ornaments With Pressed Greenery
Craft card: Active time: 60 minutes plus drying | Cost: low | Skill: easy | You’ll need: air-dry clay or salt dough, a rolling pin, cookie cutters, small sprigs of pine or herbs, twine
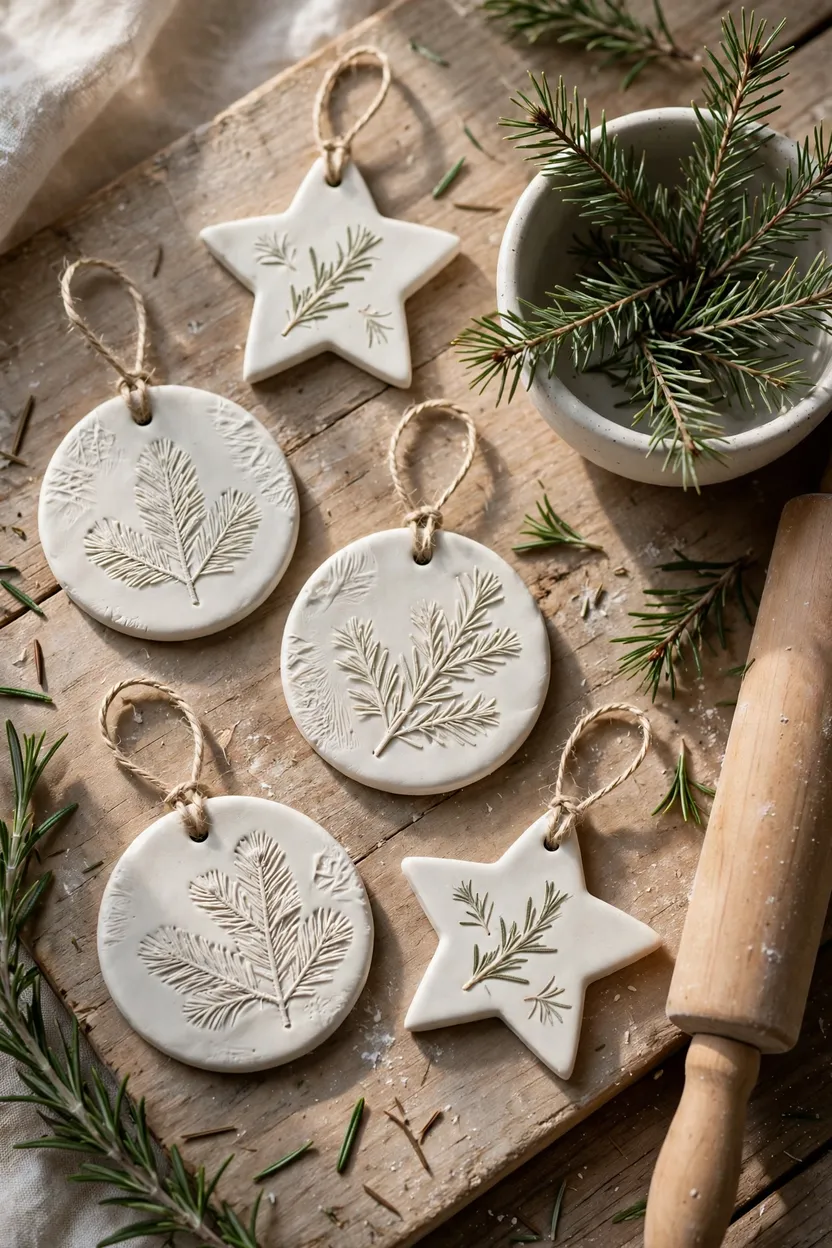
Stamped clay ornaments look like fine pottery with almost no skill. Roll out air-dry clay or salt dough, press a small sprig of pine, rosemary, or cedar into the surface, then lift it away to leave a delicate impression. Cut out shapes with a round or star cutter, poke a hole for twine, and let the pieces dry fully, flipping them to dry both sides. If you use salt dough, bake it low and slow and keep the ornaments out of reach of pets, since salt can harm dogs if eaten. Leave the clay unpainted or brush on a thin wash of cream or sage, and seal with a clear sealer.
4. Folded Paper Stars
Craft card: Active time: 45 minutes | Cost: very low | Skill: medium | You’ll need: strips of kraft paper or cardstock, a bone folder or butter knife, thread

Folded paper stars look intricate, but they’re built from simple strips. Cut narrow strips of kraft or cream paper, fold them into a flat knot, and weave the ends into a small star. The kraft color has a warm, natural look that matches wood and greenery. Make a few sizes and hang them from windows, the tree, or a branch. Your first star may be a little wonky, and that’s part of the charm. Keep paper stars away from open flames and heaters.
Part Two: Garlands and Wall Decor
5. A Wool Pom-Pom Garland
Craft card: Active time: 60 minutes | Cost: low | Skill: easy | You’ll need: wool or cotton yarn in two or three colors, a pom-pom maker or a fork, scissors, twine

Pom-poms are soft, cheerful, and quick to make. Wrap yarn around a pom-pom maker or a fork many times, tie off the center, and trim the ends into a round, fluffy ball. Make them in cream, rust, and moss green, and vary the sizes from small to large. Thread them onto a length of twine with a large needle, spacing them unevenly for a natural look. Use wool or cotton yarn, which looks richer than shiny acrylic. Hang the garland across a mantel, a shelf, or a window frame, away from any heater or flame.
6. A Scrap-Fabric Bow Garland
Craft card: Active time: 45 minutes | Cost: very low | Skill: easy | You’ll need: fabric scraps or old linen and plaid fabric, scissors, twine, fabric glue or a glue gun
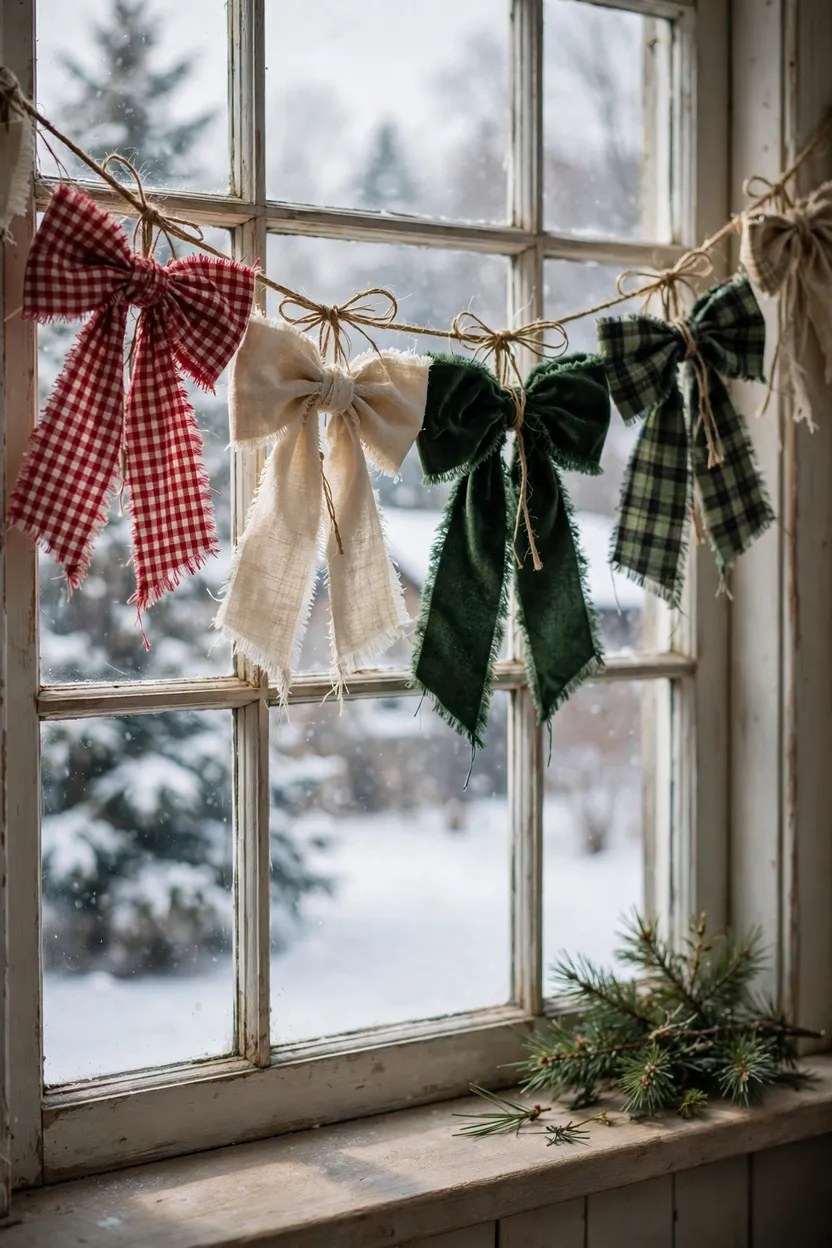
Bows are everywhere this season, and they’re simple to make from scraps. Tear or cut strips of fabric about two inches wide, tie them into loose bows, and fasten each one to a length of twine. Mix plaid, gingham, linen, and velvet in the same color family, so the garland feels collected and not messy. Frayed edges add to the handmade look, so don’t hem them. Vary the size of the bows and keep the spacing uneven. Use this garland on a staircase, a window, a shelf, or the back of a chair.
7. Paper Silhouette Trees in Frames
Craft card: Active time: 45 minutes | Cost: very low | Skill: easy | You’ll need: kraft paper or black cardstock, scissors or a craft knife, thrifted frames, cream paper for backing
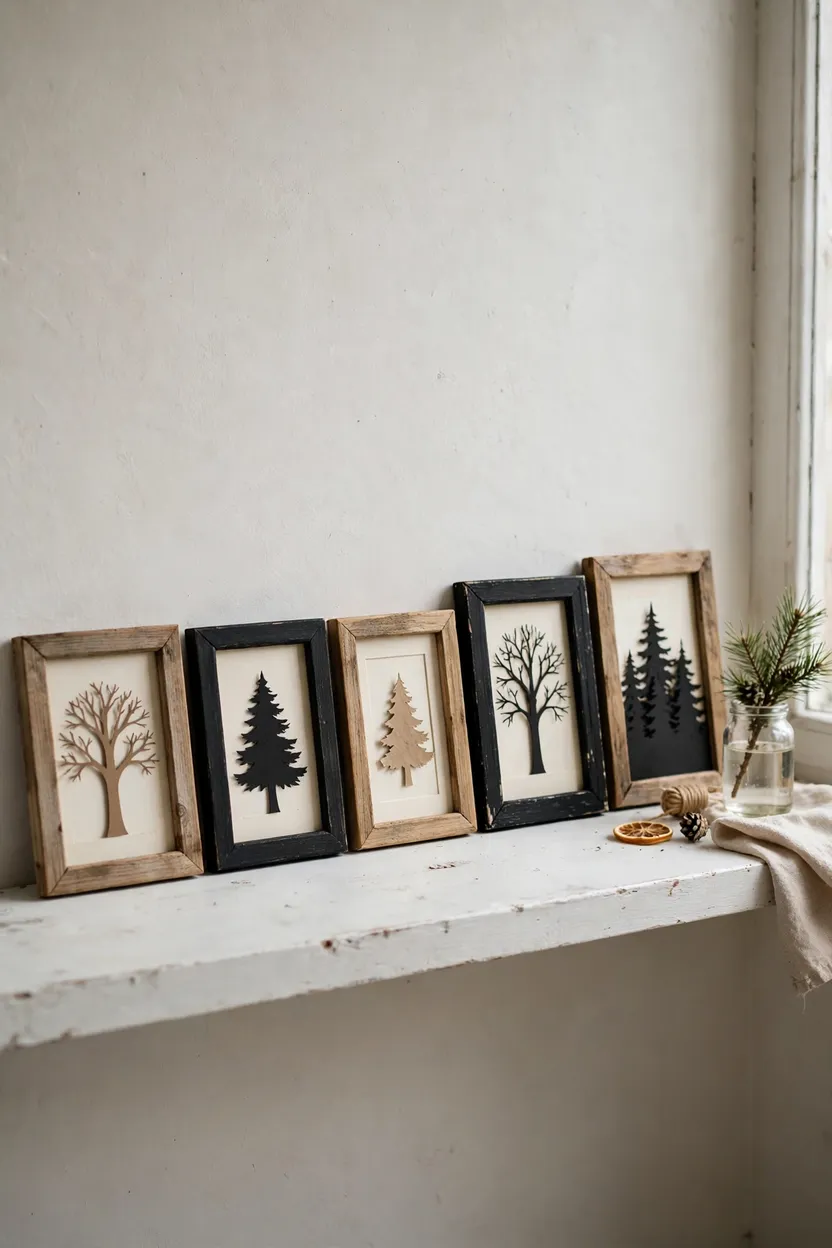
A small group of framed paper trees looks like gallery art. Cut simple tree shapes out of kraft or black paper, mount them on cream paper, and place them in thrifted frames of different sizes. Use wide mats and a lot of white space, so the shapes stand out. Hang them in a cluster of three to five, or lean them along a shelf or mantel. Paint the frames in one color, such as black or natural wood, to make the set feel unified. Use a craft knife carefully on a cutting mat, and cut away from your hands.
8. A Grapevine Wreath With Mixed Greens
Craft card: Active time: 45 minutes | Cost: low | Skill: easy | You’ll need: a grapevine wreath base, floral wire, pine, cedar or eucalyptus sprigs, a ribbon
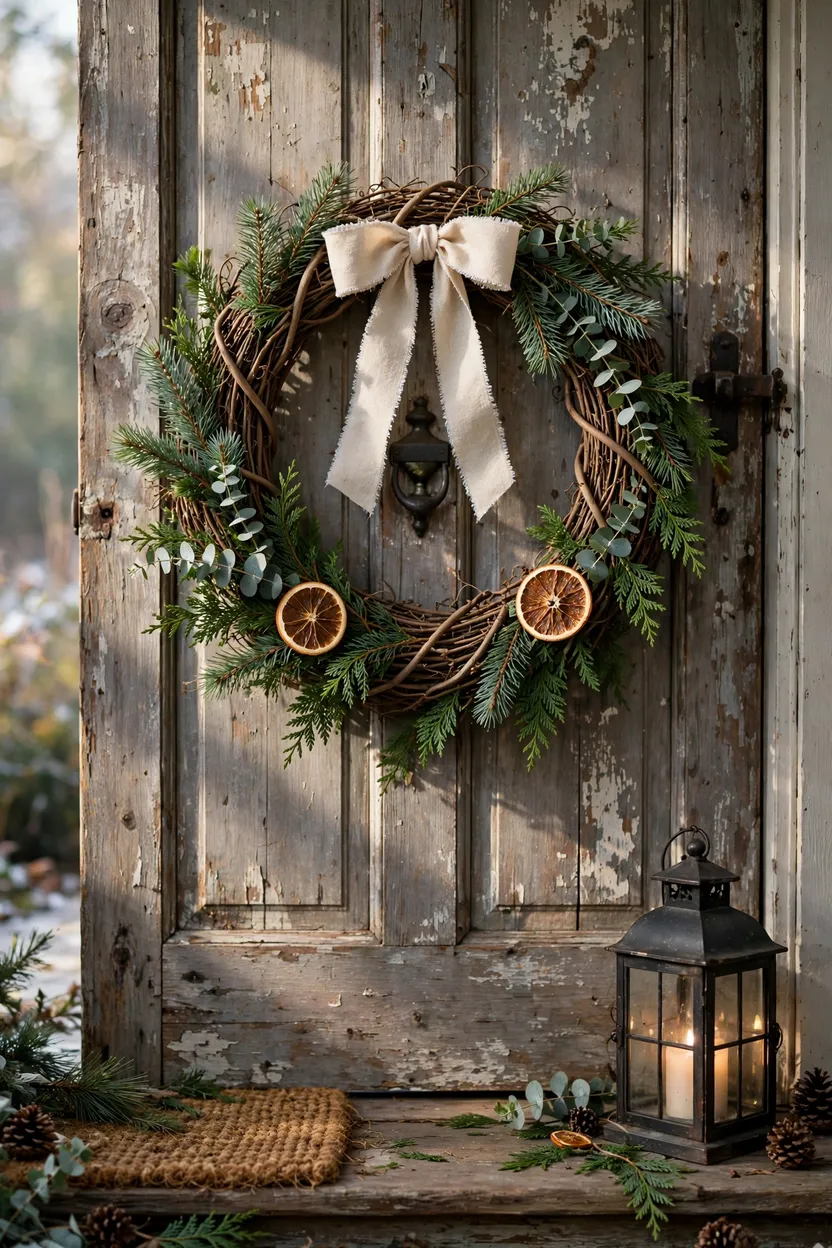
A grapevine wreath is a friendly base that looks rustic even before you add anything. Cut small bundles of mixed greens, such as pine, cedar, and eucalyptus, and wire them onto the base in the same direction. Leave some of the vine showing for an airy, handmade feel. Finish it with a wide linen or velvet ribbon, and a few dried orange slices or small cones if you like. Use fresh greens sparingly indoors and keep them away from heat, or use faux sprigs for a longer-lasting wreath. If you forage, take only what you need, and follow local rules.
Part Three: Table and Mantel
9. Cinnamon Candle Wraps
Craft card: Active time: 20 minutes | Cost: low | Skill: easy | You’ll need: flameless pillar candles or glass hurricane holders, cinnamon sticks, twine, a glue gun or rubber band
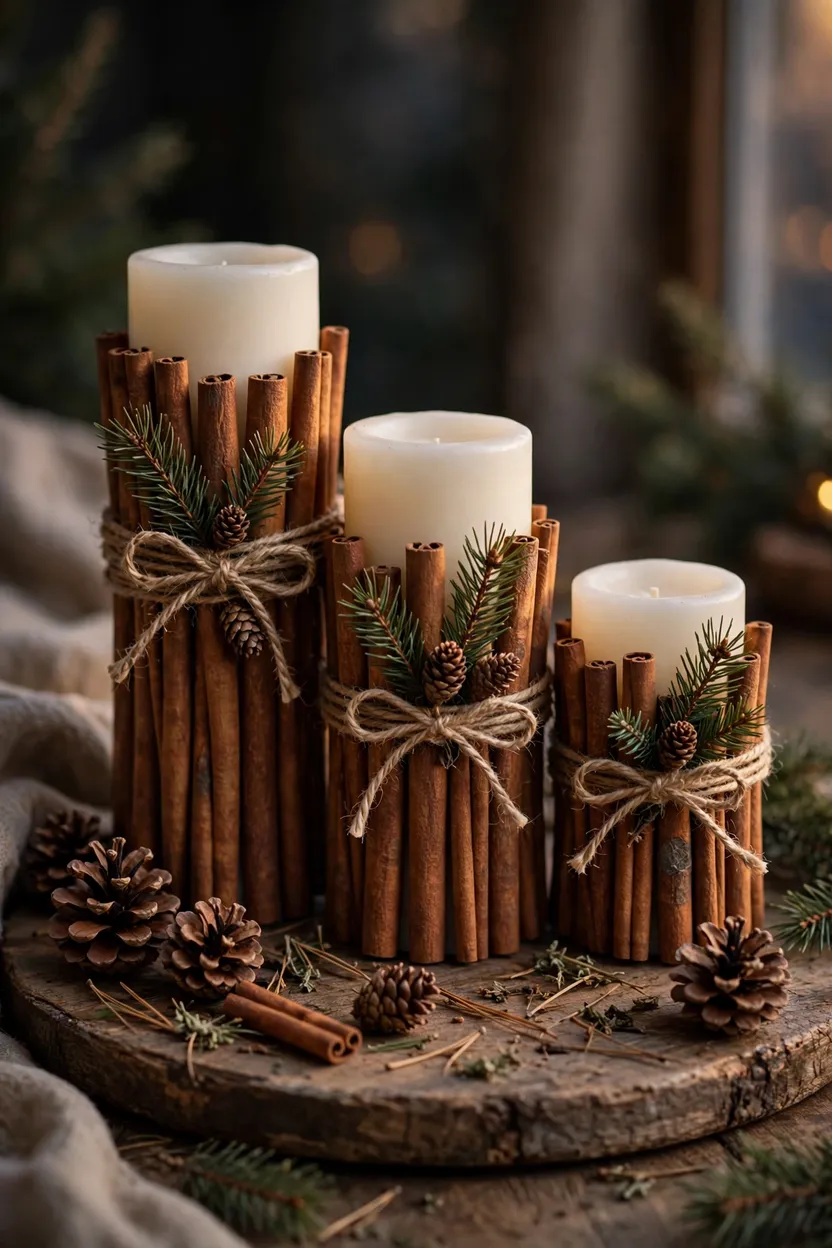
This is the quickest craft in the list, and it smells wonderful. Set a row of cinnamon sticks around a pillar candle, hold them with a rubber band, and tie a length of twine and a small sprig of pine over the top. Use flameless candles, since cinnamon sticks and twine can catch fire. The warm brown color looks lovely on a table, a mantel, or a tray. Make three in different heights for a layered look. Replace the sticks each year, since they lose scent over time.
10. A Painted Wooden Bead Garland
Craft card: Active time: 60 minutes | Cost: low | Skill: easy | You’ll need: wooden beads, non-toxic acrylic paint in matte colors, twine, a large-eye needle

Wooden bead garlands are a classic handmade look. Paint plain wooden beads in a soft palette of cream, sage, rust, and blush, and let them dry on skewers stuck in a block of foam or an egg carton. Thread them on twine with a few unpainted beads in between. Vary the bead sizes and spacing. Use matte paint for a quieter finish than glossy craft paint. Hang it on the tree, drape it across a shelf, or wrap it around a candle holder.
11. A Paper Cone Forest
Craft card: Active time: 45 minutes | Cost: very low | Skill: easy | You’ll need: cardstock or old book pages, scissors, a glue gun or glue stick, twine

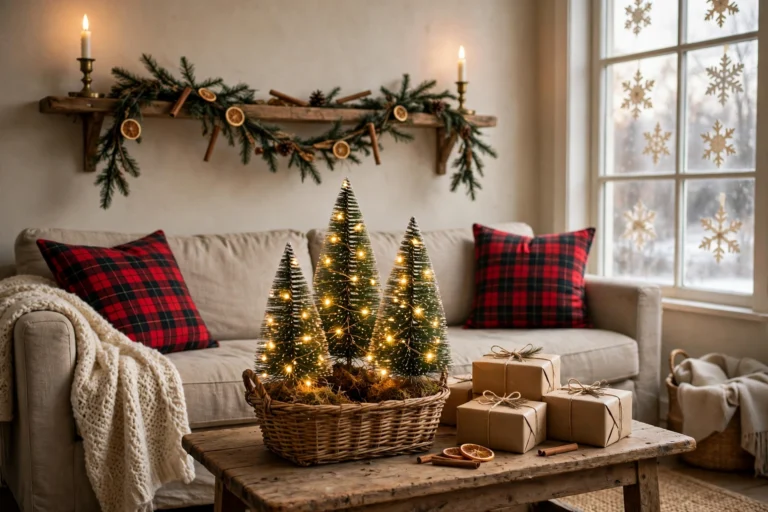
A little forest of paper trees looks like a sculpture. Roll cardstock or old book pages into cones of different heights, glue the seam, and trim the base flat so they stand. Tie twine around some, add a tiny star on top, or dab white paint on the tips for a snowy look. Group them in odd numbers on a tray, a mantel, or a shelf. Mix cream, kraft, and soft green for a quiet palette. Keep the trees away from flames and use battery lights for glow.
Part Four: Gifts and Cozy Makes
12. Hand-Stamped Gift Wrap and Tags
Craft card: Active time: 45 minutes | Cost: very low | Skill: easy | You’ll need: kraft paper, a potato or a pencil eraser, a small knife, non-toxic paint or ink, kraft tags, twine

Stamped paper is the easiest way to make gifts look special. Cut a potato in half, carve a simple shape like a star, a tiny tree, or a dot, and press it into a thin layer of paint, then onto kraft paper. Repeat in a loose pattern, and let it dry. Add tags with a short hand-lettered name, and tie with natural twine and a sprig of pine. This look is also very kind to the planet, since kraft paper is easy to recycle. Carve the potato with care and keep the knife away from kids.
13. Simmer Pot Jars
Craft card: Active time: 30 minutes | Cost: low | Skill: easy | You’ll need: dried orange slices, cinnamon sticks, star anise, cloves, cranberries or pine sprigs, mason jars, ribbon, a tag
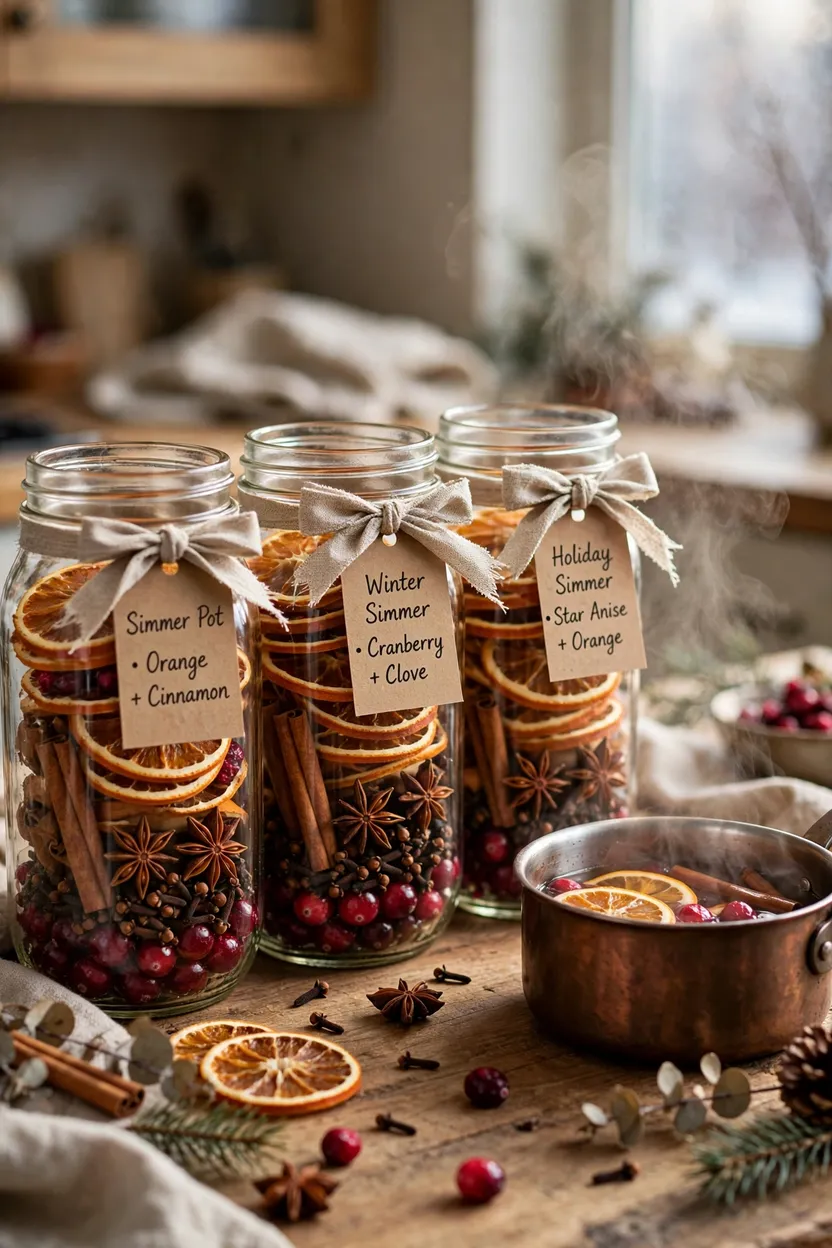
Simmer pot jars make your home smell like Christmas and double as gifts. Layer dried orange slices, cinnamon sticks, star anise, cloves, and a few dried cranberries in a jar, then tie a ribbon and a tag on the neck with simple instructions to simmer in water on the stove. They look pretty on a shelf even before they’re used. Never leave a simmering pot unattended, and keep the water level topped up. Use a small pot with a lid nearby, and keep it out of reach of children and pets.
14. Soy Candles in Thrifted Cups
Craft card: Active time: 60 minutes plus setting time | Cost: low to medium | Skill: medium | You’ll need: soy wax flakes, wicks, essential or fragrance oil, a double boiler, thrifted teacups or small jars
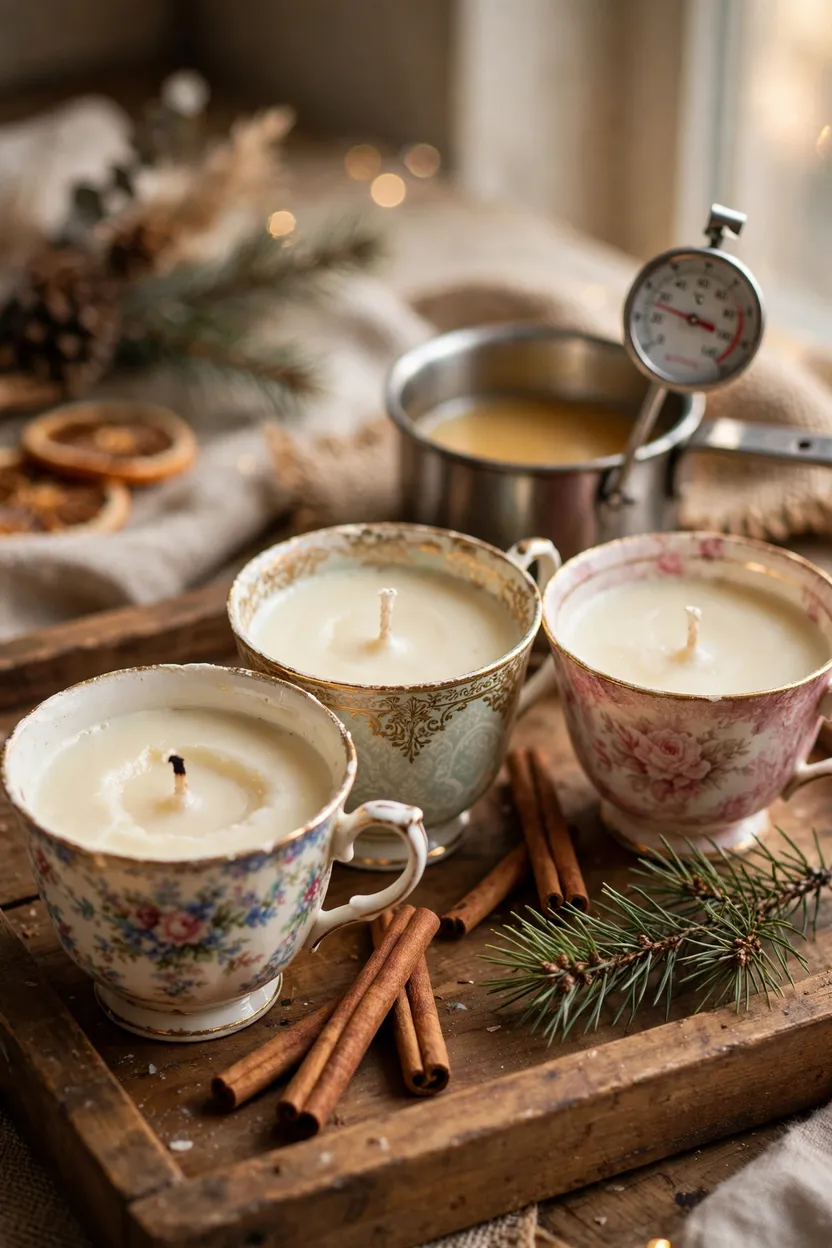
Candles in thrifted cups look charming and give old dishes a new job. Melt soy wax in a double boiler, never over direct heat, and keep water away from the hot wax. Center a wick in each cup, pour the wax slowly, and add a gentle scent like cedar, orange, or vanilla. Let the candles set fully, trim the wick, and keep them in a safe spot. Burn candles on a heat-safe surface, never leave them lit unattended, and keep them away from fabrics and greenery. This is the one craft on the list that needs the most care.
15. No-Sew Sweater Stockings
Craft card: Active time: 60 minutes | Cost: low | Skill: easy | You’ll need: an old wool or knit sweater, a stocking-shaped template, fabric glue or a glue gun, ribbon

Old sweaters make the coziest stockings. Trace a stocking shape onto the sweater, cut two pieces, and join the edges with strong fabric glue or a simple whip stitch. Leave the cuff or a folded band at the top, add a loop of ribbon, and you’re done. Choose cream, oatmeal, or fair-isle patterns for a warm, heirloom feel. Hang them from a mantel, a ladder, or a bookshelf. Check that the glue is fully dry before you fill them, and wash a sweater before cutting so it’s clean.
Styling Tips
- Show off the set. Display three or more crafts in the same style, such as stars, bows, and beads, so they look like a collection.
- Give pieces space. Leave a little empty surface around each craft so it can be seen.
- Mix handmade with simple store-bought. A plain white ceramic bowl or a basic wooden tray lets your crafts shine.
- Use texture. Pair paper with wool, wood with linen, and dried fruit with greenery.
- Add warm light. Battery fairy lights or flameless candles make handmade items glow.
- Group in odd numbers. Three or five items look more natural than pairs.
- Photograph in daylight. A window and a plain background show off handmade detail best.
Three Afternoon Bundles
Pick one bundle for each afternoon, so the work stays calm and finishable.
Bundle A: The Tree Afternoon (about 3 hours).
- Start the dried orange slices in the oven (Craft 1).
- Make the wood slice ornaments while the oven works (Craft 2).
- Fold a handful of paper stars (Craft 4).
- Finish by threading the orange garland and trimming the tree.
Bundle B: The Mantel Afternoon (about 3 hours).
- Make the pom-pom garland (Craft 5).
- Tie the scrap-fabric bow garland (Craft 6).
- Paint and thread the wooden beads (Craft 10).
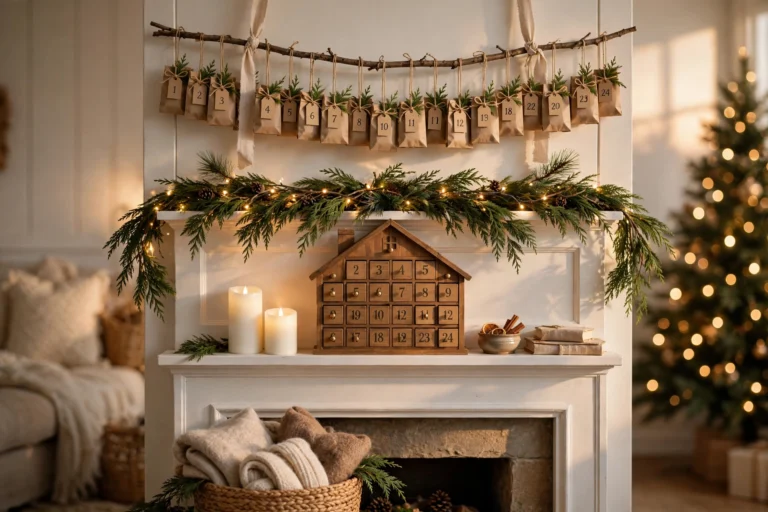
- Style the mantel with the three garlands and a few cinnamon candle wraps (Craft 9).
Bundle C: The Gift Afternoon (about 3 hours).
- Stamp the gift wrap and let it dry (Craft 12).
- Make the simmer pot jars (Craft 13).
- Pour the soy candles and let them set (Craft 14).
- Wrap gifts and tie on tags and sprigs.
Tip: Do oven or drying crafts first, so they work in the background while you make the next craft.
Common Mistakes to Avoid
- Using too many colors. Rainbow crafts look busy. Pick two or three colors and stick with them.
- Choosing shiny materials. Glitter, plastic, and glossy paint can make a craft look cheap. Choose matte and natural.
- Skipping the finishing detail. A craft without a ribbon, tag, or sealer can look unfinished.
- Not drying food-based crafts fully. Oranges and dough can mold if they’re still damp when stored.
- Leaving salt dough where pets can reach it. Salt can be harmful to dogs if eaten. Hang ornaments high or use air-dry clay.
- Using candles with natural materials. Cinnamon sticks, twine, and paper burn easily. Use flameless candles.
- Making everything at once. Pick three crafts per afternoon. A calm afternoon beats a stressful weekend.
- Making identical copies. Small differences look handmade. Don’t worry about making each one the same.
- Skipping safety gear. Use a cutting mat, a heat-safe pad for the glue gun, and good ventilation for sealers.
- Forgetting where it will live. Decide where each craft will hang or sit before you make it, so it fits your space.
Small-Space Alternatives
- Make small pieces. Ornaments, paper stars, and candle wraps take up almost no room.
- Use a tray. A paper cone forest or a set of candle wraps on one tray makes a mini display.
- Hang crafts in a window. Paper stars, orange slices, and clay ornaments look lovely in the light.
- Craft on a tray. Use a large tray on your lap or a small table so you can clear up fast.
- Pick one hero. A single garland on a shelf is enough for a small room.
- Choose flat storage. Stars, tags, and silhouettes store flat in a book or box.
- Work in short bursts. One craft in an hour still counts.
Budget-Friendly Alternatives
| Big idea | Lower-cost swap |
|---|---|
| Store-bought wood slices | Slices cut from fallen branches, or cardboard circles painted to look like wood |
| Air-dry clay | Salt dough made with flour and salt, with extra care around pets |
| Pom-pom maker | A fork and leftover yarn |
| New wreath base | A wire hanger bent into a ring, wrapped with twine |
| Fresh greens | Foraged sprigs, if allowed, or a few branches from a tree lot trimming bin |
| Craft paint | Small sample pots or leftover wall paint |
| Candle supplies | Skip candle making and make cinnamon wraps with flameless candles |
Spend on a few good basics, like a sharp pair of scissors, a clear sealer, and natural twine. Save on everything else, since scraps, paper, and thrifted items work beautifully.
Storage and Care Tips
| Craft | Storage tip |
|---|---|
| Dried orange garland | Store dry in a breathable box, or compost after one season |
| Wood slice ornaments | Store flat in a dry box with tissue |
| Clay or salt dough ornaments | Make sure they are fully dry and sealed, wrap in tissue, and keep away from damp areas |
| Paper stars and trees | Store flat or nested in a box to keep the shape |
| Pom-pom and bow garlands | Wrap loosely around a piece of cardboard |
| Wreath | Hang or store in a large box to keep the shape, and replace fresh greens each year |
| Candle wraps and candles | Keep in a cool place away from heat |
| Stockings | Wash, dry, and store in a breathable bag |
Label each box with the craft name and the year. A small note about the materials helps next year’s you.
Pro Styling Recommendations
- Start with a color story. Choose your palette before you buy supplies, so every craft belongs.
- Make one hero and a few helpers. A big garland can lead, with small ornaments and tags supporting it.
- Repeat one material in many forms. Use kraft paper in stars, tags, and wrap for a cohesive look.
- Photograph your work. Take a quick photo of each craft, so you can recreate it next year.
- Label your crafts with the year. A tiny date on the back of an ornament turns it into a keepsake.
- Edit as you go. If a craft looks too busy, take a piece away. Less usually looks better.
- Share the making. Invite a friend, put on music, and make it a tradition.
Easy Swaps by Style
| Your style | Craft choices |
|---|---|
| Farmhouse | Scrap-fabric bows, wood slices, grapevine wreath |
| Scandinavian | Paper stars, silhouette trees, wool pom-poms |
| Boho | Dried oranges, painted beads, clay ornaments |
| Modern | Paper cone forest, simple clay ornaments, white and kraft gift wrap |
| Cabin | Sweater stockings, cinnamon candle wraps, stamped wrap in forest green |
Conclusion
A handmade Christmas isn’t about making everything yourself. It’s about making a few things with care.
Pick one afternoon. Put the kettle on. Slice the oranges, cut the paper, and tie the twine. Keep the colors quiet and the materials natural, and don’t worry if one star leans a little to the left. That lean is what makes it yours.
When you hang the garland and see the light glow through the dried oranges, you’ll feel something that a store-bought ornament can’t give. Make a few, share a few, and save a few for next year. The best part of handmade decor is that it carries the afternoon you made it in.