18 Christmas Ribbon Decor Ideas for Trees and Garlands
You have the lights up. The ornaments are on. The tree looks fine, but it doesn’t look finished.
That is usually a ribbon problem.
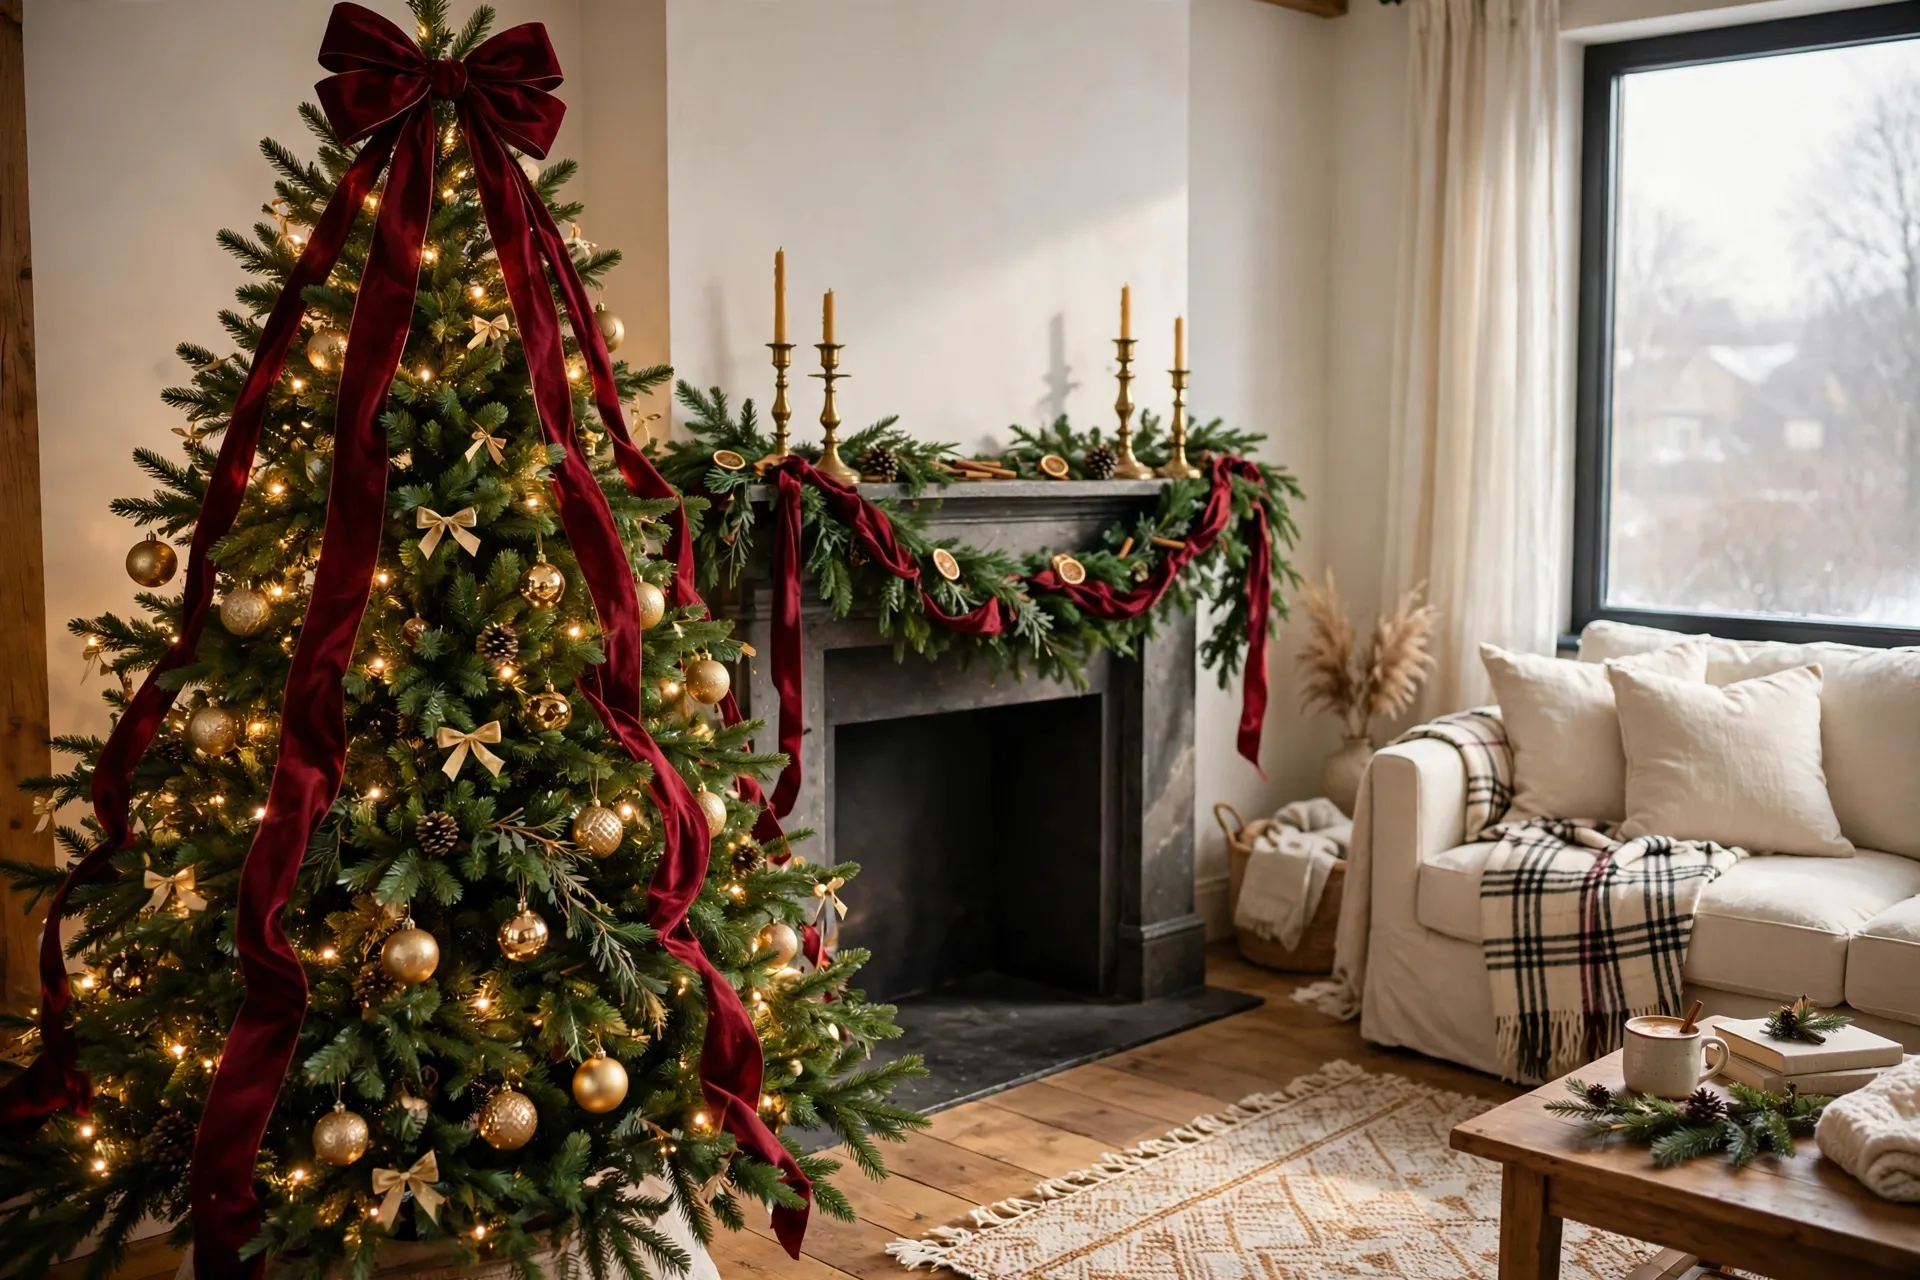
Ribbon is the part that connects everything. It adds soft lines, fills gaps between branches, and gives the eye a path from the topper to the floor. Picture a wide burgundy ribbon falling in gentle waves down the tree, with small gold bows tucked into the branches. Then picture the same ribbon along the mantel, so the whole room looks like one idea.
Below are 18 Christmas ribbon decor ideas for trees and garlands, from simple cascades to bow garlands for the stairs. You will also find a clear answer to the question everyone asks, how much ribbon to buy, plus safety notes for candles, lights, and pets.
Quick answer: Use wired ribbon, 2.5 to 4 inches wide, on a standard 7-foot tree, and plan on about three yards of ribbon per foot of tree as a starting point. Anchor it at the top, let it fall in waves, and tuck it between branches every foot or so. Repeat the same ribbon on garlands so the whole room matches.
Table of Contents
Before You Buy: How Much, What Type, What Width
Ribbon is easy to under-buy. These basics help.
- How much ribbon: Start with about three yards per foot of tree. That is roughly 20 yards for a 6.5-foot tree, about 22 to 23 yards for a 7.5-foot tree, and 27 or more for a 9 or 10-foot tree. Add more if you want a fuller look or several cascades, and buy one extra roll for bows and gifts.
- Width: For trees around 7 to 8 feet, 2.5 to 4 inches is the sweet spot. Smaller trees look better with 1.5 to 2-inch ribbon. Anything thinner can get lost in the branches.
- Wired or not: Wired ribbon holds its shape, makes loops easy, and keeps swags from drooping. Unwired ribbon is better for bows, ornament hangers, and gift wrap.
- Tools: Floral wire or pipe cleaners, floral U-pins, sharp scissors, and a few clothespins to hold ribbon while you work.
- Match the dye lot: Colors can differ slightly between batches, so buy all your rolls of one ribbon at the same time.
- Cut the ends smart: A V-notch or a diagonal cut looks neat and helps prevent fraying.
Which ribbon for which look
- Wired satin or taffeta: Crisp and bold. Best for cascades and big bows.
- Velvet: Rich and soft. Best for bows, toppers, and mantel garlands, and it looks best in deep colors.
- Grosgrain: Ribbed and sturdy. Holds a bow shape well.
- Plaid or tartan: Classic and cozy. Best on a plain green or flocked tree.
- Linen, burlap, or cotton: Natural and rustic. Pair with pinecones, wood, and plain greenery.
- Sheer or organza: Light and airy. Best layered over another ribbon.
Safety First: Candles, Lights, and Pets
- Keep ribbon away from heat. Don’t let ribbon or bows touch bulbs that get hot, candles, or heaters. Place a real tree at least three feet from any heat source, and keep ribbon on a mantel well away from lit candles. Battery candles are a simple swap.
- Choose flame-resistant decor when you can. Check labels, and replace anything that looks scorched or frayed.
- Protect your pets. Ribbon and string can cause serious problems if a cat swallows it. Keep ribbon tails short, tuck ends in, and place long pieces high where pets can’t reach. If a pet swallows ribbon, don’t pull on it. Call a vet right away.
- Don’t block exits. Garlands on doors and stairs should leave paths clear, and the handrail should stay easy to grip.
- Turn off the lights. Unplug the tree lights when you leave home or go to bed.
1. Vertical Cascade From the Topper to the Floor
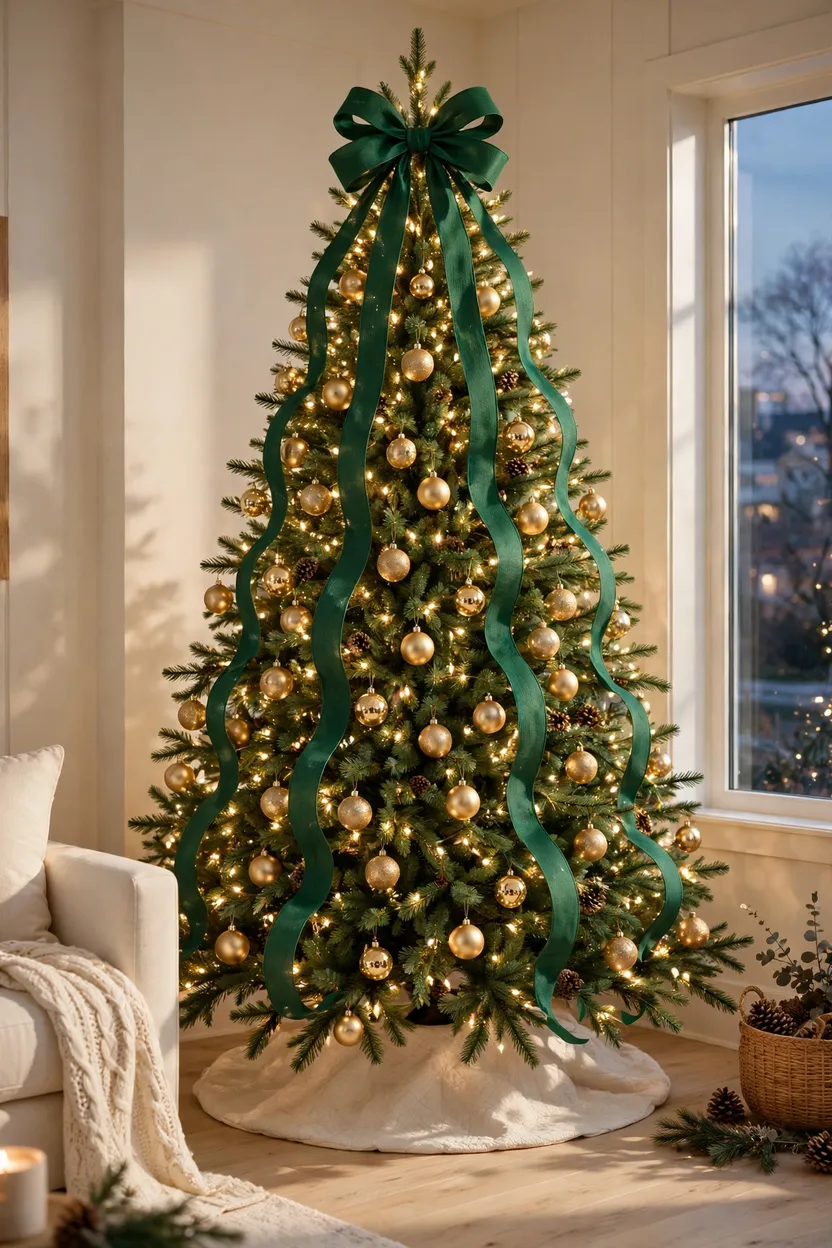
A vertical cascade pulls the eye up and down, so the tree looks taller and fuller. It works best with wide wired ribbon in a solid color, since the stiff edges hold soft waves. Anchor the ribbon behind the topper, then let it fall and pinch small loops every foot or so, tucking each one deep into the branches. The folds create shadows and highlights, which hide gaps and make a thin tree look dense. Use five or six runs, spaced evenly around the tree, with fewer on a slim one. Cut each tail to end right at the tree skirt.
How to do it: Pin one end near the top. Let the ribbon fall, pinching and tucking a loop about every 12 inches. Pin the end near the base. Repeat around the tree and fluff the loops.
At a glance: Best for tall and sparse trees | Ribbon: wired, 2.5 to 4 inches | Difficulty: medium | Cost: medium
2. Loose Horizontal Swags Around the Tree
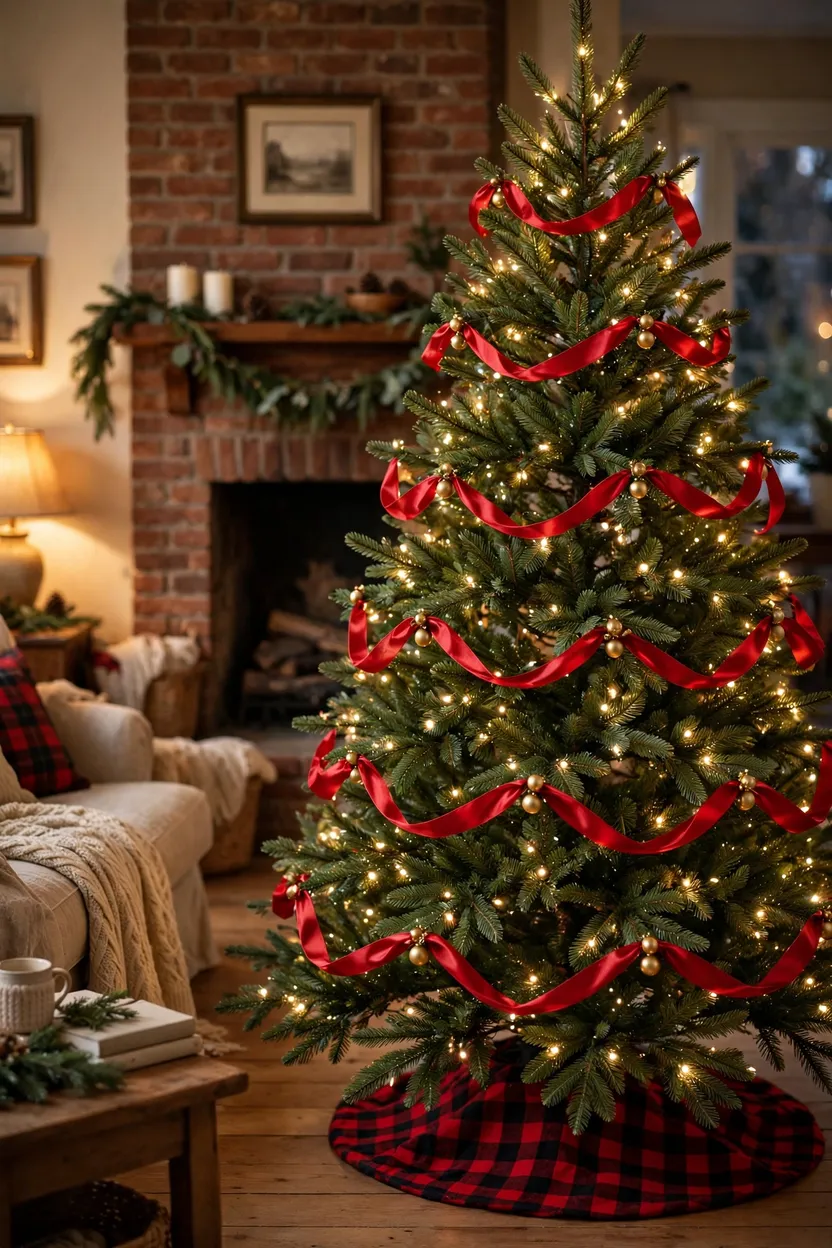
Horizontal swags give the tree a layered, traditional look. Each swag drapes between two branches, so the ribbon scoops down in a soft curve. Space the rows about a foot apart, and stagger the swag points so they don’t line up like stripes. Choose a medium-width ribbon in a color that stands out against the greenery, like red, cream, or gold. Pin each ribbon point to a sturdy branch with a floral U-pin so it doesn’t slide. Add a few small ornaments where the ribbon meets the branch, and it will look planned from every angle.
How to do it: Pin the end to a branch. Loop the ribbon to the next branch about 18 inches away and pin it, letting it dip. Repeat around the tree, then start a new row a foot lower, staggering the points.
At a glance: Best for traditional trees | Ribbon: wired, 2.5 inches | Difficulty: easy to medium | Cost: medium
3. Tuck-and-Billow Ribbon Waves
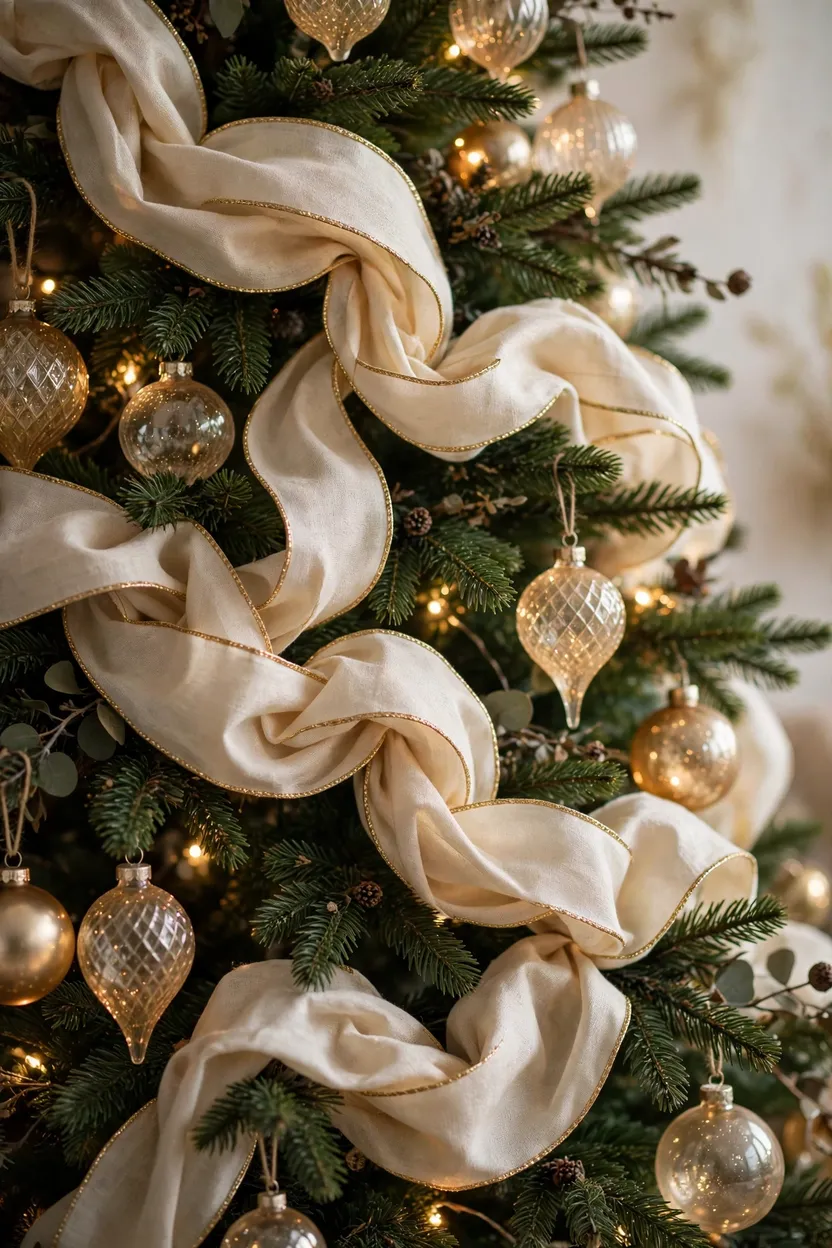
The tuck-and-billow method makes the ribbon look like it is flowing through the tree. You tuck it deep into the branches, pull out a big soft puff, then tuck it deep again. The depth creates shadow, so the tree looks richer than a flat wrap would. It works well with a bit of wire in the ribbon, which holds each puff in shape. Choose a wide ribbon in a color that matches your ornaments, so it blends into the tree. This style hides sparse spots and is great for a tree that looks a little thin.
How to do it: Pin the end deep inside the branches. Pull out an 8 to 10 inch puff of ribbon, then tuck the next section deep again. Zigzag around the tree, and fluff the puffs at the end.
At a glance: Best for hiding gaps | Ribbon: wired, 3 to 4 inches | Difficulty: medium | Cost: medium
4. Scatter Velvet Bows Like Ornaments

Bows are still one of the biggest Christmas decor trends, and they are easy to use. Scatter them across the tree like ornaments, tucking them near branch tips so they show. Use velvet in a deep color, like burgundy or forest green, for a rich look, or cream for a softer one. Make the bows larger near the bottom and smaller near the top, so the tree keeps its shape. Start with about a dozen and add more until the tree feels balanced. Use wire on the back of each bow so it stays put.
How to do it: Tie a bow with 1.5 to 2 yards of ribbon. Twist floral wire around the center, and leave the wire ends long. Wrap the wire around a branch near the tip. Fluff the loops and trim the tails in a V.
At a glance: Best for a trendy, bow-filled look | Ribbon: velvet, 1.5 to 2.5 inches | Difficulty: easy | Cost: low to medium
5. Top the Tree With an Oversized Bow and Long Tails
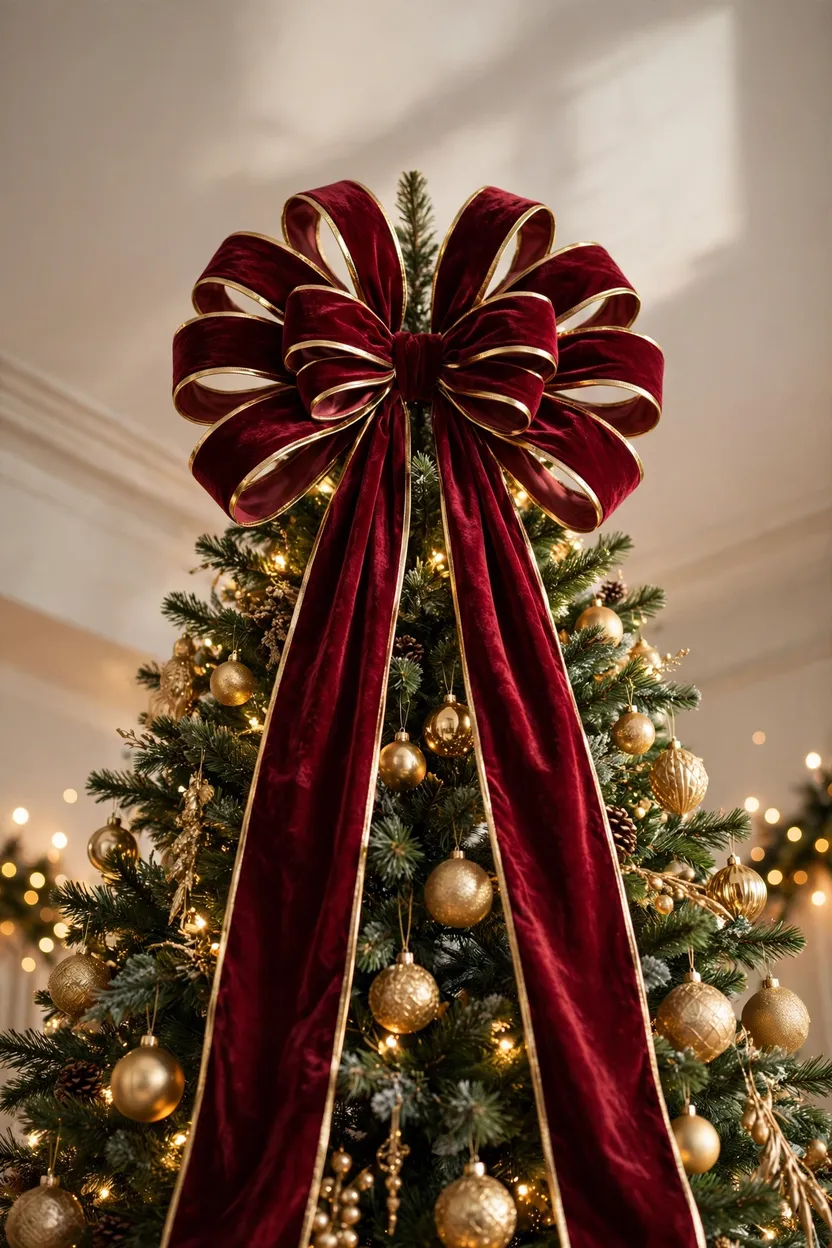
An oversized bow makes a topper that is soft, bold, and simple. Use wide wired ribbon so the loops hold their shape, and make the bow big enough to look intentional from across the room. Let the tails fall down the front of the tree in two long waves, or run them into your cascade, so the topper and the ribbon look like one piece. Pick a color that matches the rest of the ribbon, like burgundy with gold. Wire the bow firmly to the top of the tree, so it won’t tip. Keep the tails trimmed so they don’t reach the floor, which also keeps pets away.
How to do it: Make a bow with six to eight loops from 4-inch wired ribbon, and wire the center. Attach it to the top branches with extra wire. Let two tails fall down the tree and tuck them in.
At a glance: Best for a statement topper | Ribbon: wired, 4 inches | Difficulty: medium | Cost: medium
6. Layer a Sheer Ribbon Over a Solid One

Two ribbons in two widths add depth with very little effort. Lay a narrow satin or velvet ribbon over a wider sheer or organza one, and treat them as a single ribbon. The sheer layer picks up the light, while the narrow ribbon adds color and weight. Use two shades of the same color for a calm look, such as ivory over cream. Run the pair as a cascade or a swag, and pin them together as you go. This is a smart way to make a basic ribbon look more expensive.
How to do it: Lay the narrow ribbon down the center of the wide one. Pin them together at the top. Cascade or swag them as one, pinning every foot or so.
At a glance: Best for a layered, light look | Ribbon: sheer 4 inches with satin 1.5 inches | Difficulty: medium | Cost: low to medium
7. Use Plaid Ribbon on a Plain Green or Flocked Tree
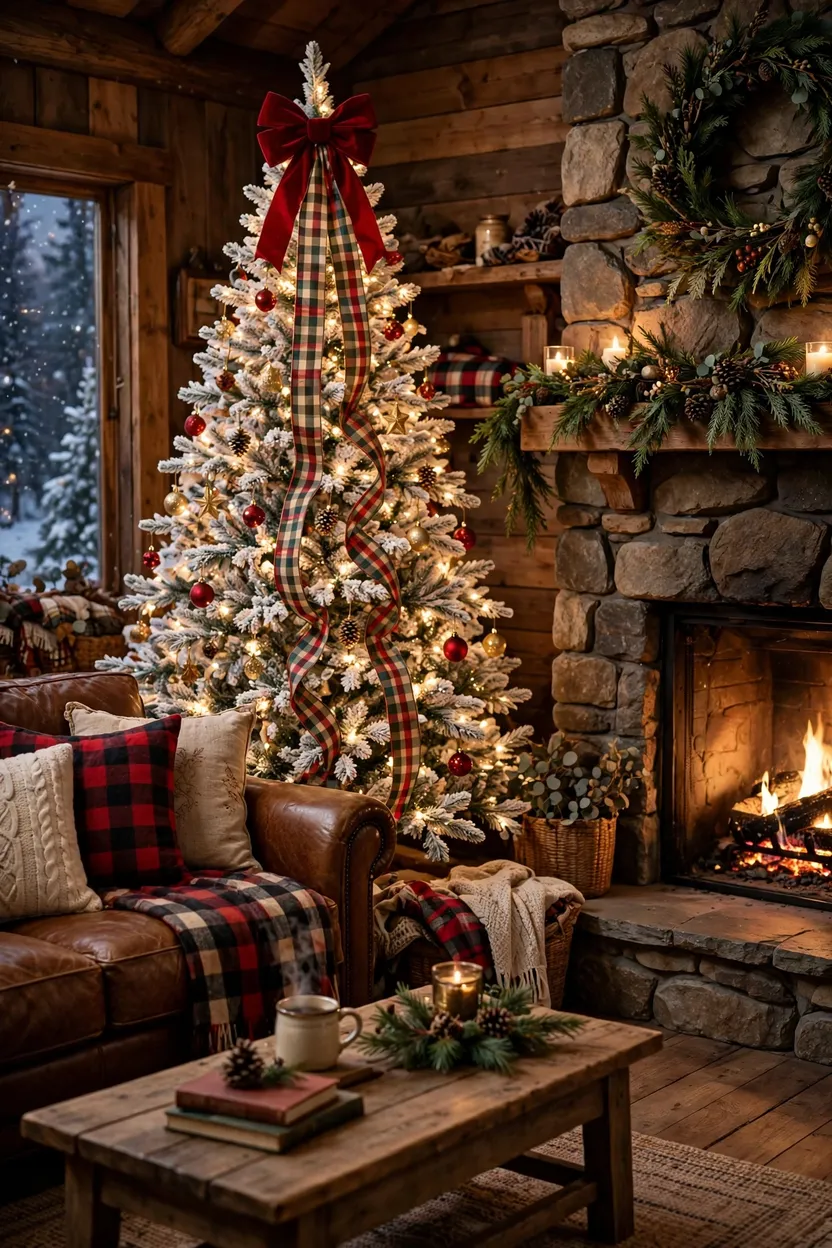
Plaid ribbon gives a tree a cozy lodge feeling. It looks best on a plain green or flocked tree, where the pattern stands out. Choose a wired plaid in red, green, and cream, or in black and white for a modern look, and keep the ornaments simple. Pair it with a solid velvet bow or topper so the pattern doesn’t compete with itself. Stick to one or two plaids at most. Repeat the same plaid on a wreath or a mantel bow so the room feels connected.
How to do it: Pin the plaid ribbon at the top, and cascade or swag it. Add a solid velvet bow at the top and a few more near the base. Keep ornaments in one or two solid colors.
At a glance: Best for cozy, traditional looks | Ribbon: wired plaid, 2.5 to 4 inches | Difficulty: easy to medium | Cost: medium
8. Pair Burgundy and Gold Ribbon

Burgundy is one of the leading Christmas colors this year, and it pairs well with gold. Use a wide burgundy velvet or satin ribbon for the main cascade, then add small gold bows or a thin gold-edged ribbon for sparkle. Keep the ornaments in gold, bronze, and a few cream pieces so the tree doesn’t get too dark. Warm white lights bring out the red tones and make the velvet glow. Add one more layer of gold, like a garland of beads, and the tree feels rich without feeling heavy. Repeat the same ribbon on the mantel to tie it all together.
How to do it: Run burgundy wired ribbon in vertical cascades. Tie gold bows and tuck them near the branch tips. Add gold and cream ornaments, and finish with a bow topper in both colors.
At a glance: Best for a rich, classic palette | Ribbon: velvet or satin, 2.5 to 4 inches | Difficulty: easy to medium | Cost: medium
9. Style a Cream and White Tree With Pearls
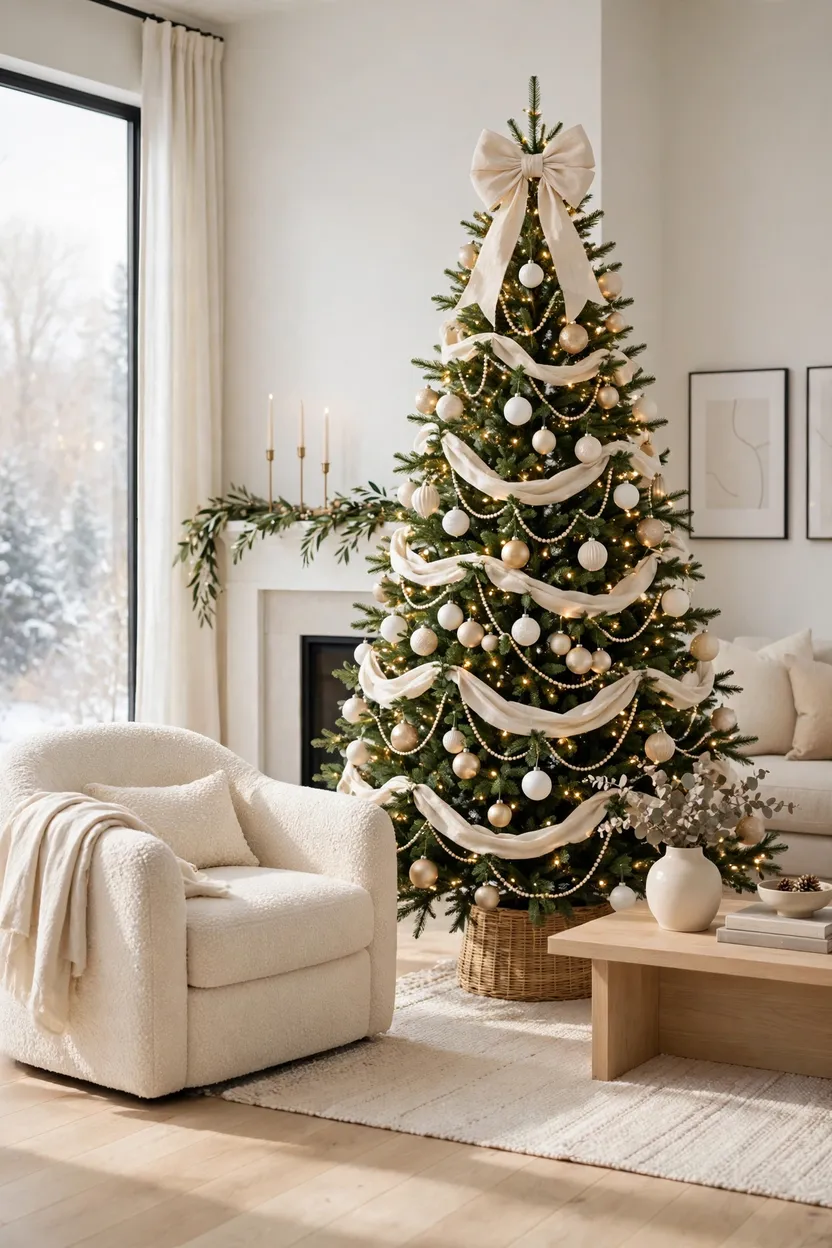
A cream and white ribbon tree looks soft, calm, and bright. Use wide ivory or cream ribbon in loose swags or a gentle cascade, and add pearl strands that follow the same curves. Choose matte ornaments in white, champagne, and pale gold so the tree glows without shine. This look works best on a green tree where the cream stands out, or on a flocked tree if you add a touch of gold for contrast. Keep the lights warm white. It is a good choice for a bright room or a modern home that wants a gentle holiday look.
How to do it: Swag wide cream ribbon around the tree in loose rows. Drape pearl strands along the same lines. Add matte ornaments and a cream bow topper.
At a glance: Best for a soft, neutral look | Ribbon: cream satin or linen, 2.5 to 4 inches | Difficulty: easy | Cost: medium
10. Hang Ornaments From Ribbon Loops
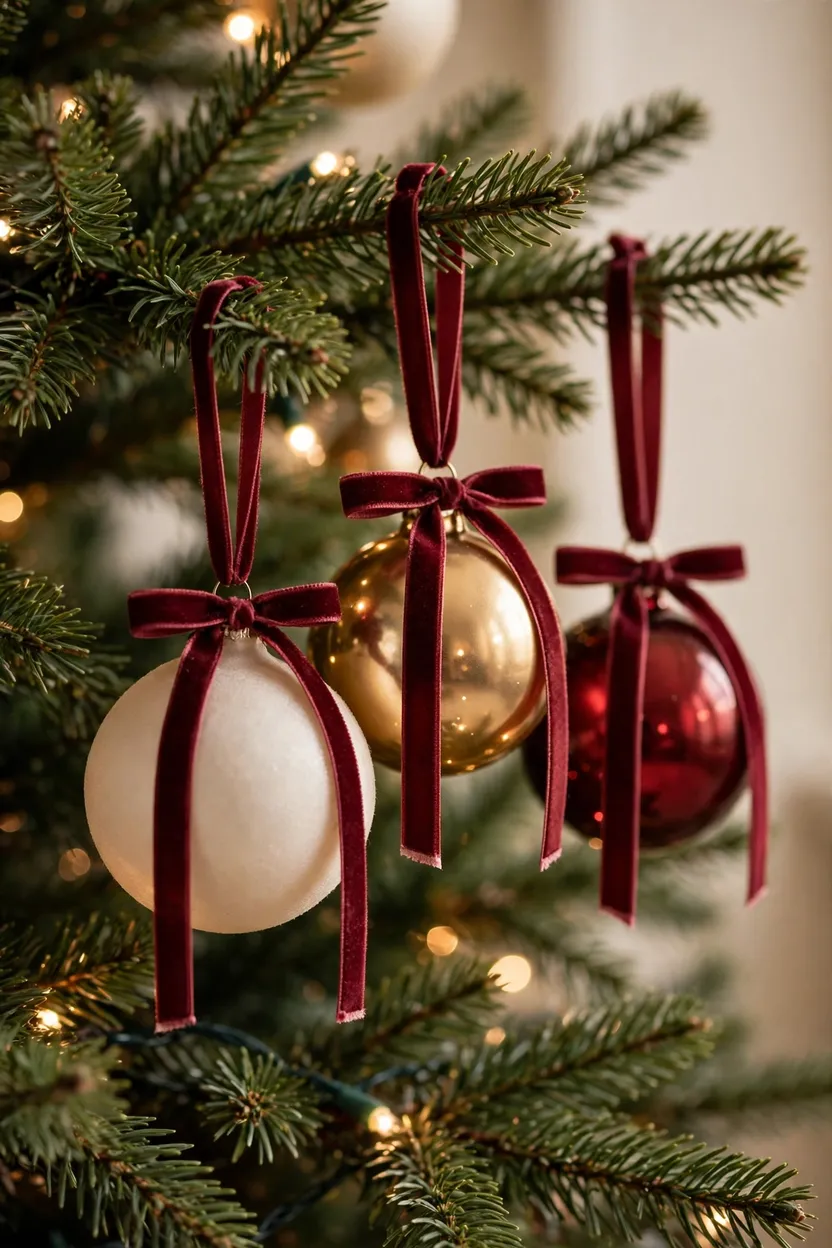
Ribbon hangers give a tree a finished look with very little cost. Replace metal hooks with small loops of narrow ribbon in one color, and the whole tree looks consistent. Use 1/4 or 3/8 inch velvet, satin, or grosgrain, and tie each loop with a firm knot. Cut the tails short so they don’t dangle where pets can reach them. Ribbon also lets you hang ornaments flat against a branch, which saves space on a crowded tree. It is an easy way to add a pop of color without adding a single new ornament.
How to do it: Cut an 8 to 10 inch piece of narrow ribbon. Thread it through the ornament cap and tie a firm knot. Trim the tails short, then hang the loop over a branch.
At a glance: Best for a tidy, matching look | Ribbon: narrow velvet or satin, 1/4 to 3/8 inch | Difficulty: easy | Cost: low
11. Trim a Mini Tabletop Tree With Narrow Ribbon
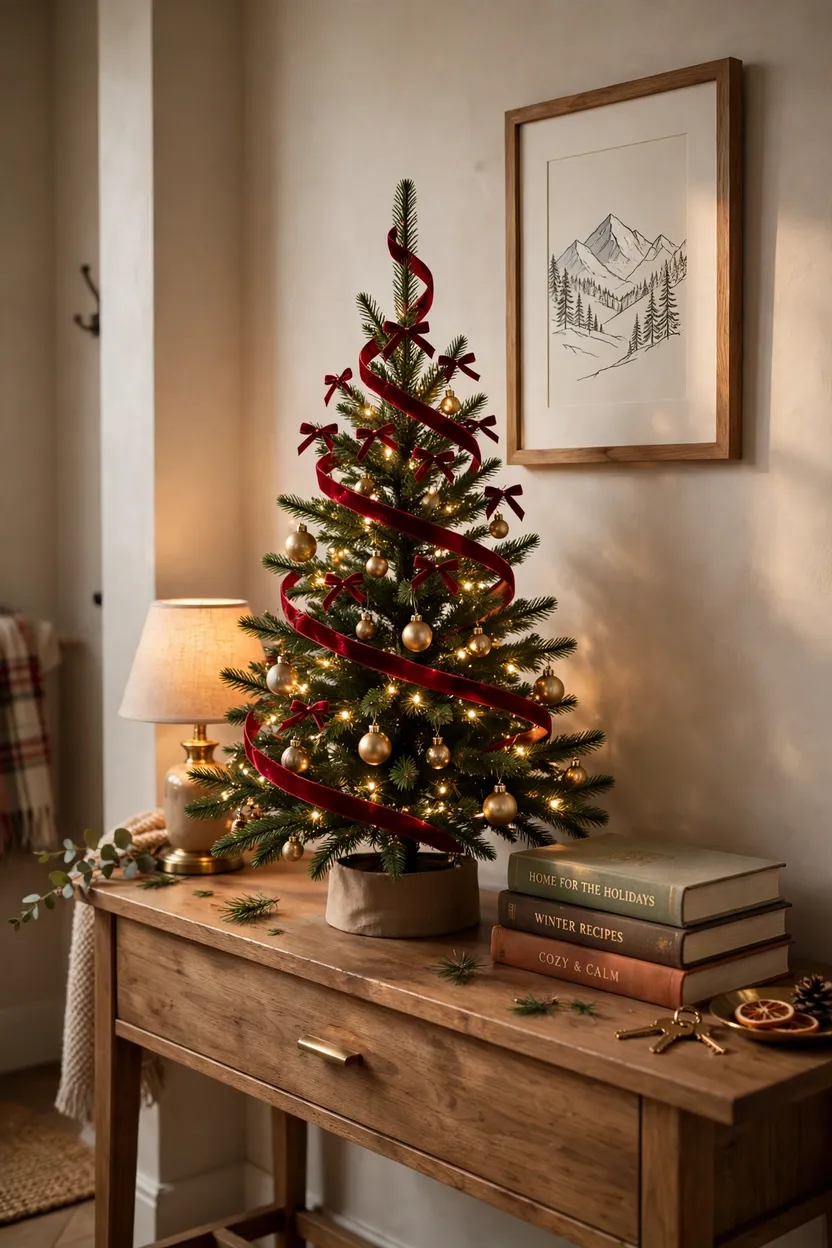
A small tree needs small ribbon. Narrow ribbon, about 1/2 to 1 inch wide, looks right on a tree under three feet tall, while wide ribbon swamps it. Spiral the ribbon from the top down, tucking it between branches, and add a few tiny bows near the top. On a tabletop tree, the baseline of three yards per foot suggests about 6 to 9 yards, though you may use less if you only add bows. Set the tree on a tray or a small table, and keep it away from candles. It is a pretty option for a desk, an entry console, or a kid’s room.
How to do it: Pin the end near the top. Wrap the ribbon down in a loose spiral, tucking it between branches. Pin the end at the base, then add small bows and a mini topper.
At a glance: Best for small spaces and desks | Ribbon: narrow, 1/2 to 1 inch | Difficulty: easy | Cost: low
12. Weave Ribbon Through a Mantel Garland
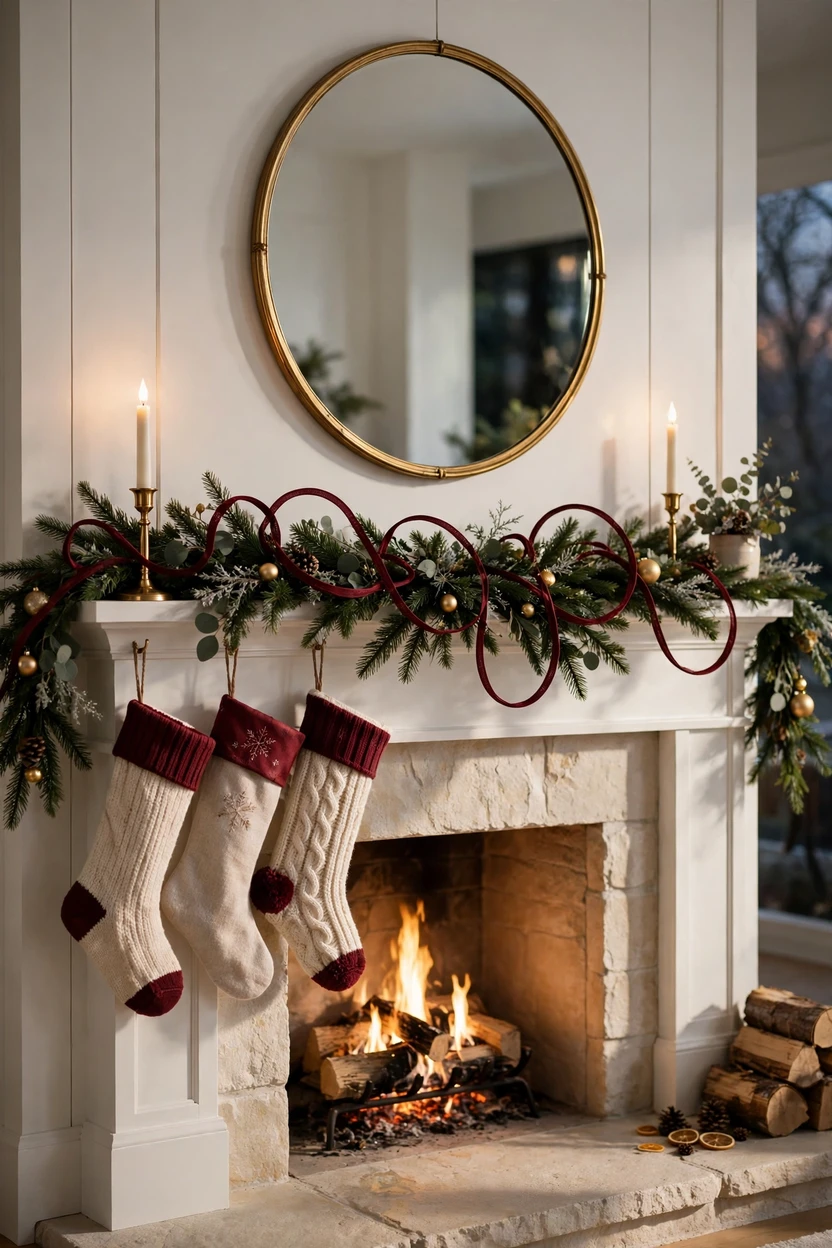
Ribbon turns a plain evergreen garland into a finished piece. Weave a wired ribbon in loose S-curves through the greenery, pinning it every foot or so, and add loops that stand out from the branches. Plan on roughly two to three times the length of the garland for a full weave. Choose a ribbon that matches your tree, so the mantel and tree look related. Place battery candles or a few brass candlesticks well away from the greenery and the ribbon. A symmetrical drape suits a formal mantel, and an uneven one looks relaxed.
How to do it: Drape the garland. Weave the ribbon over and under the branches in loose curves, and pin every foot. Add a few loops, then fluff the greenery and ribbon together.
At a glance: Best for mantels and sideboards | Ribbon: wired, 2.5 inches | Difficulty: medium | Cost: medium
13. Drape a Bow Garland Across the Mantel
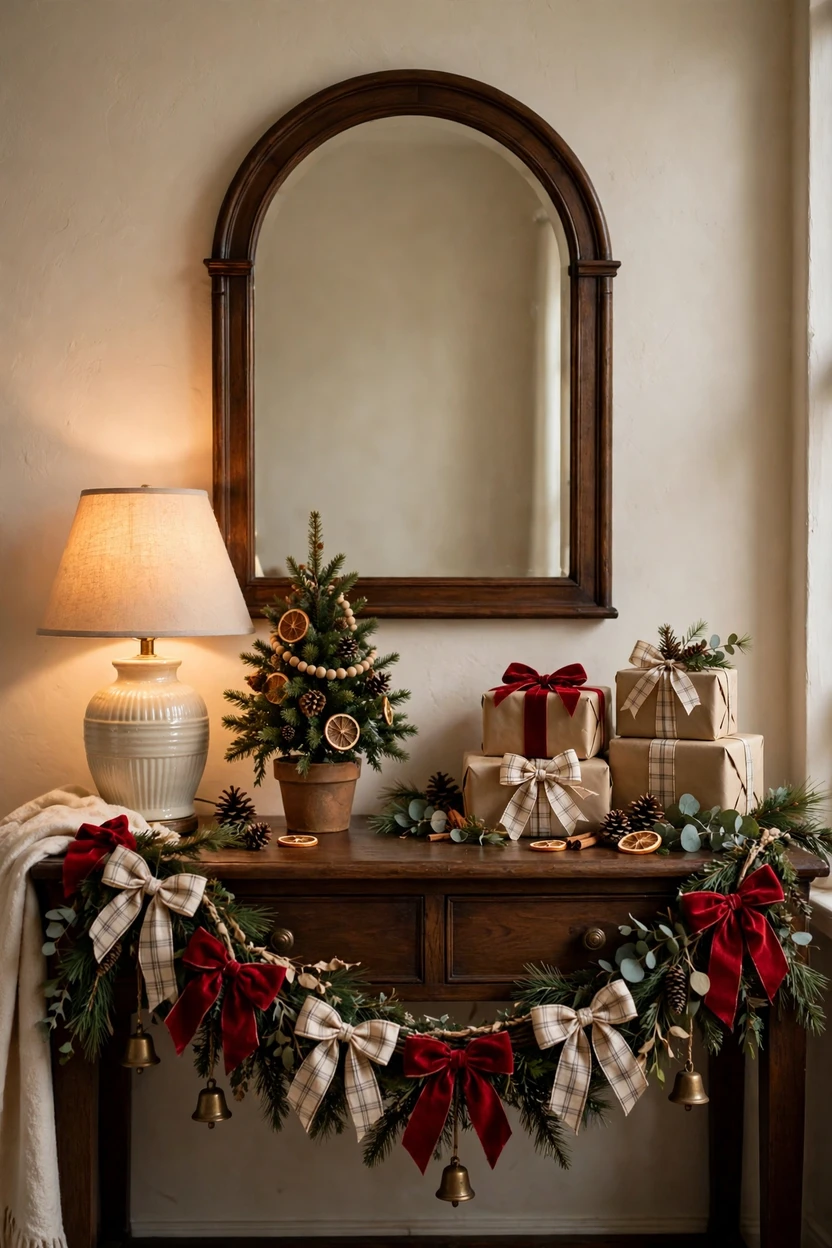
A garland made of bows works with or without greenery. Tie bows along a length of thick ribbon or cord, spaced about 10 to 12 inches apart, and let it drape across the mantel, a console table, or a window. Use about a yard of ribbon for each bow. Add small brass bells between the bows if you like a gentle jingle. Velvet bows in red, green, or cream look soft and traditional, and plaid bows feel cozier. Hang the garland with removable hooks or tie it to a mantel decoration, and take it down in seconds after the holidays.
How to do it: Cut a long base ribbon or cord. Tie a bow with about a yard of ribbon, and knot it onto the base every 10 to 12 inches. Hang the ends and let the garland swag in the middle.
At a glance: Best for mantels, consoles, and windows | Ribbon: velvet or plaid, 1.5 to 2.5 inches | Difficulty: easy | Cost: low to medium
14. Wrap the Staircase Garland in Ribbon and Bows
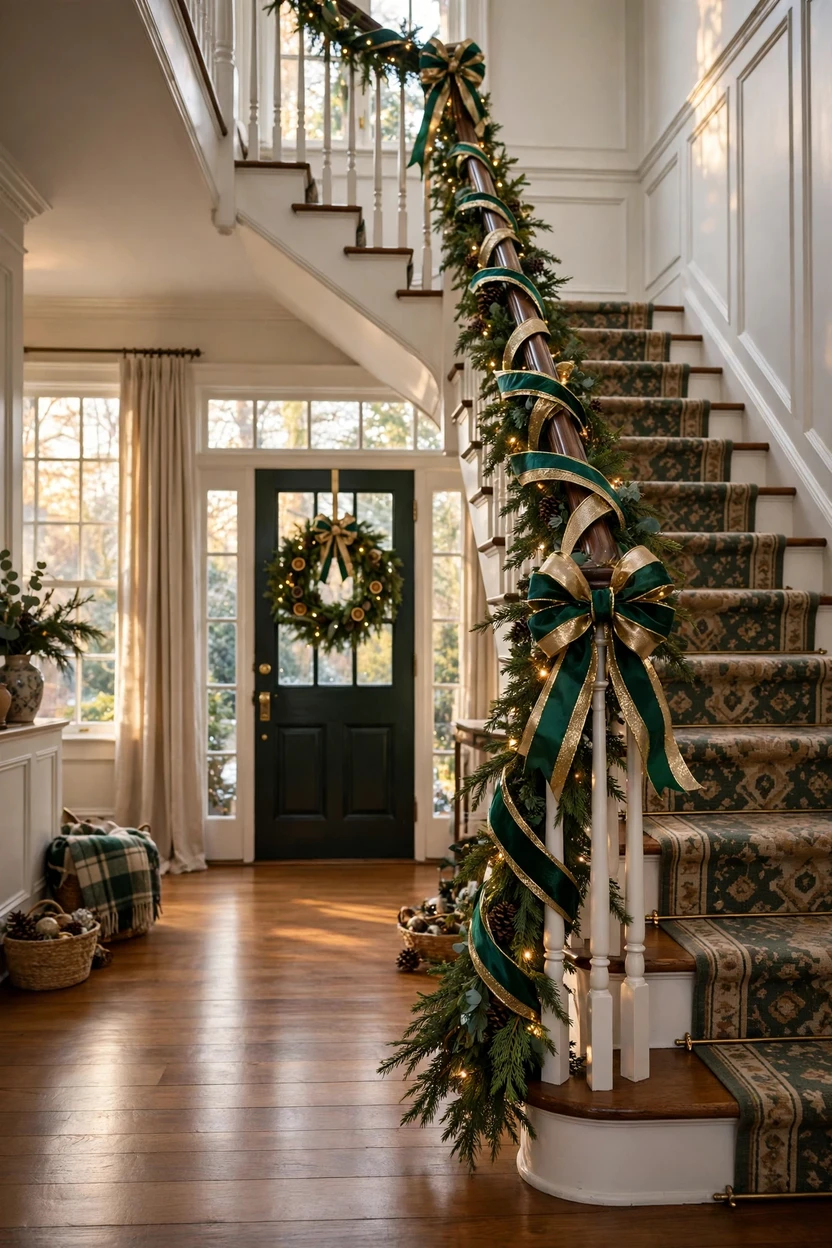
A staircase garland with ribbon looks full and welcoming. Run the garland along the handrail, and attach it to the balusters with floral wire or soft ties, so no nails go into the wood. Add ribbon streamers that fall between balusters, and a large bow every few steps. Keep the garland on the outer side of the rail so there is room to grip. Use a wide ribbon for visual weight, since the staircase is seen from far away. Check that nothing hangs low enough to catch a foot or a pet.
How to do it: Attach the garland to the rail with wire. Weave ribbon through it, and tie large bows every few feet. Let short ribbon tails hang between balusters, and keep the handrail clear.
At a glance: Best for entryways and staircases | Ribbon: wired, 3 to 4 inches | Difficulty: medium | Cost: medium to high
15. Frame a Door or Window With Ribbon Loops

A ribbon garland around a doorway or window frame makes the whole opening look decorated. Drape a greenery garland or a plain cord along the top, and hang ribbon loops or bows at the corners. Let two long tails fall down the sides for a graceful, finished frame. Use removable hooks to avoid damage, and keep the garland away from heating vents. A window swag with a single large bow at the center looks clean and simple. It is a strong choice for a dining room or a kitchen window that needs a little color.
How to do it: Hang the garland across the top with removable hooks. Tie a bow at each corner, and let tails fall down each side. Add one bow at the center if you like.
At a glance: Best for doorways and windows | Ribbon: wired or velvet, 2.5 inches | Difficulty: easy to medium | Cost: low to medium
16. Twist Two Ribbons Into a Rope Garland

A ribbon rope is a garland with no greenery, so it is clean, light, and easy to reuse. Twist two ribbons in contrasting colors together, like burgundy and cream or green and gold, and drape the rope along a shelf, a banister, or a window. Use ribbons about 1.5 to 2.5 inches wide, and cut both pieces a little longer than the space, since twisting shortens them. Tie bows at the ends and at the center for extra detail. Because there are no needles to drop, it is a smart choice for rentals and for small homes that want less mess.
How to do it: Hold two ribbons together at one end and pin them. Twist them around each other along their length. Pin the other end, drape the rope, and tie bows where you like.
At a glance: Best for no-mess, reusable garlands | Ribbon: two ribbons, 1.5 to 2.5 inches | Difficulty: easy | Cost: low
17. Tie a Ribbon-Scrap Garland
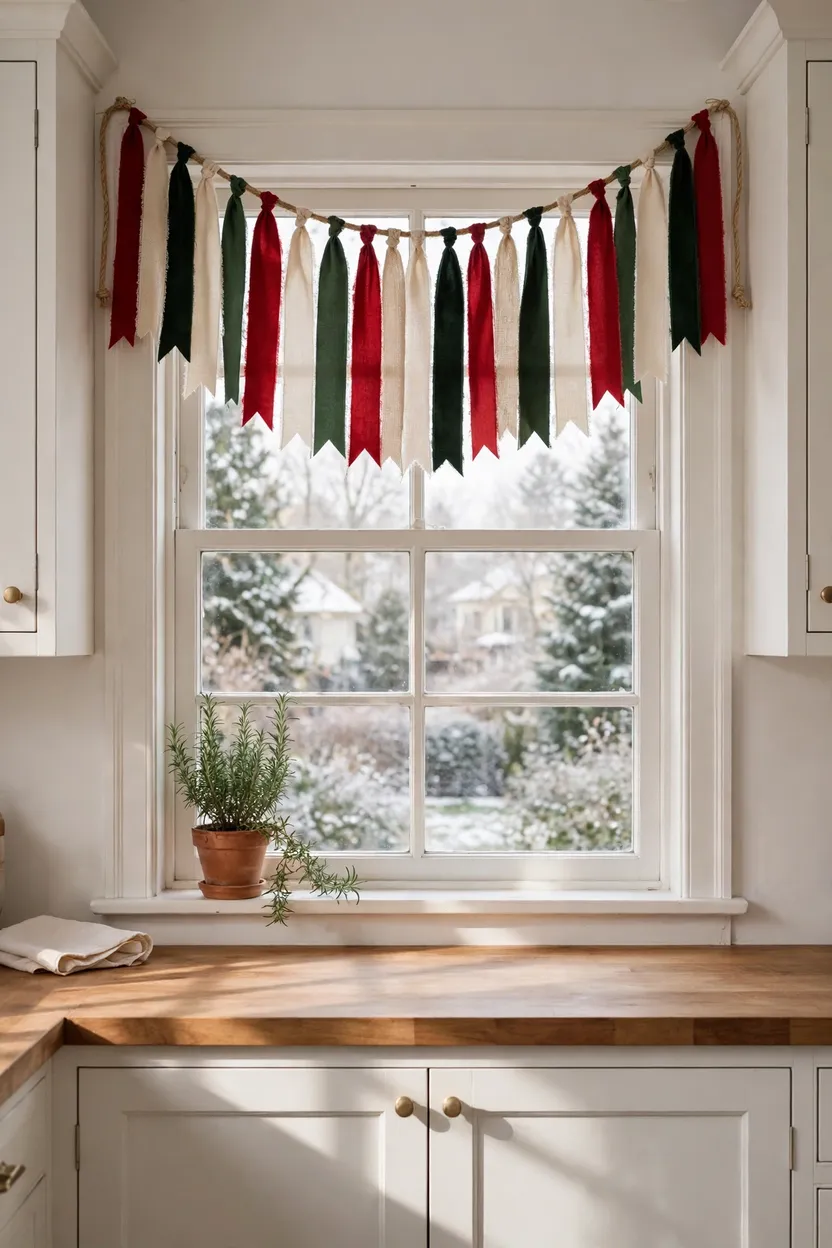
A scrap garland turns leftover ribbon into a soft, fringed strand. Cut ribbon into 8 to 10 inch strips, and knot each strip onto a long piece of twine, about an inch apart. Mix colors in a limited palette, such as red, cream, and green, or stay with one color for a sleek look. Trim each end in a V-notch so it looks neat. Hang it across a mantel, a window, or the back of a chair. It costs almost nothing, and kids can help with the knots.
How to do it: Cut ribbon into 8 to 10 inch strips. Knot each strip onto a length of twine, about an inch apart. Trim the ends in a V and hang the strand.
At a glance: Best for using leftovers and for kids | Ribbon: any scraps | Difficulty: very easy | Cost: very low
18. Repeat One Ribbon Everywhere

The easiest way to make a home look styled is to use one ribbon in many places. Pick a single ribbon, such as burgundy velvet, and use it on the tree, the mantel garland, the wreath, and the gift wrap. Repeating the same ribbon gives the eye a pattern to follow, and the whole house feels calm and matched. Buy all your rolls at the same time, since colors can vary between batches. Keep a spare roll for last-minute gifts and fixes. Leftover ribbon can also tie napkins or wrap a candle.
How to do it: Choose one ribbon and buy enough for the tree, garlands, and gifts. Use it in at least three spots. Keep leftovers in one labeled box.
At a glance: Best for a matching, planned look | Ribbon: one type repeated | Difficulty: easy | Cost: medium
Styling Tips
Ribbon looks best when it feels like part of the whole room.
- Limit the palette. Two ribbon colors and one metallic is enough.
- Match the ribbon to the ornaments. Repeat one ornament color in the ribbon so it blends in.
- Vary the scale. Use one wide ribbon for the cascade and a narrow one for small details.
- Create rhythm. Repeat bows or loops at even spacing, then stop.
- Mix textures with care. Velvet, satin, and plaid look good together if the colors are close.
- Leave some branches bare. A little empty space helps the ribbon stand out.
- Fluff last. Pull loops and billows out at the end to add shape and shadow.
Practical Implementation: A Simple Setup Plan
You can finish a tree and a mantel in an afternoon.
- Measure. Check your tree height and your garland length.
- Calculate the ribbon. Start with about three yards per foot of tree, and add a roll for bows and gifts.
- Buy matching rolls. Get them all at once, so the dye lot matches.
- Light the tree first. Ribbon goes on after the lights and before the ornaments.
- Anchor the ribbon at the top. Use floral wire or a U-pin, hidden behind the topper.
- Cascade, swag, or tuck. Work in small sections, and step back every few minutes.
- Add ornaments. Tuck them near the ribbon so everything looks connected.
- Repeat on the garland. Use the same ribbon on the mantel, stairs, or door.
- Do a safety check. Make sure ribbon is away from heat and tails are short.
How to make a simple tree bow: Cut 1.5 to 2 yards of ribbon. Fold it to make a loop on each side, like a butterfly, and pinch the middle. Twist floral wire tightly around the center. Wrap a small piece of ribbon over the wire to hide it, then trim the tails in a V.
Common Mistakes to Avoid
- Buying ribbon that is too narrow. Thin ribbon gets lost in the branches.
- Choosing unwired ribbon for swags. It droops, so use it for bows and hangers.
- Winding it around like a barber pole. A single spiral flattens the tree.
- Buying too little. Run out halfway, and the colors may not match when you buy more.
- Mixing too many patterns. More than two prints starts to look busy.
- Placing ribbon near heat. Keep it away from hot bulbs, candles, and heaters.
- Leaving long tails. They tempt cats and trip up kids, so trim them.
- Skipping the fluff. Flat ribbon looks cheap, so shape the loops.
- Choosing dark ribbon in a dim room. Add metallic touches so it doesn’t disappear.
Small-Space Alternatives
- Apartment or small room: Use a slim tree with narrow vertical cascades, or a tabletop tree with tiny bows.
- No mantel: Hang a bow garland across a console, a window, or a bookshelf.
- Renting: Attach garlands with removable hooks or floral wire, and avoid nails.
- No tree: Use ribbon bows on a branch in a vase, or a bow garland on the wall.
- Narrow stairs: Skip the full garland, and tie a few bows to the balusters.
- Pets or kids: Use ribbon in short pieces, placed high, and skip long tails.
Budget-Friendly Alternatives
- Start with one roll. One wide wired ribbon can transform a tree, so buy the best one you can afford.
- Shop after the holidays. Ribbon is cheaper in January, so stock up for next year.
- Use scraps. A scrap garland, ribbon hangers, and small bows use leftovers.
- Reuse last year’s ribbon. Iron on low heat, or steam it, to remove creases.
- Check fabric stores. Ribbon by the yard is often cheaper than craft packs.
- Make your own bows. Hand-tied bows cost far less than store-bought ones.
Pro Styling Recommendations
- Think in lines. Ribbon should guide the eye, so choose a direction and stay with it.
- Use wired ribbon for structure. It holds shape against heavy branches.
- Match widths to height. Wider ribbon for taller trees.
- Repeat three times. Use the same ribbon in at least three places.
- Test with a short piece. Hold it against the tree before you cut a long run.
- Store it well. Wrap ribbon around a cardboard tube, and keep it in a dry box.
- Check safety each week. Look at candles, cords, bulbs, and any ribbon tails.
FAQs
Conclusion
Ribbon is the quiet part of Christmas decor, and it does a lot of the work. It fills gaps, adds soft lines, and connects the tree to the rest of the room.
Start with one good ribbon. Measure the tree, buy a little more than you think you need, and pick a style that feels like you. A cascade, a handful of bows, or a bow garland on the mantel is plenty.
Then repeat it. When the same ribbon shows up on the tree, the garland, and the gifts, the house feels finished. Keep the tails short, keep the flames away, and enjoy how the room looks at night, with the lights low and the ribbon catching the glow.