16 DIY Thanksgiving Centerpiece Ideas With Pumpkins and Candles (Easy)
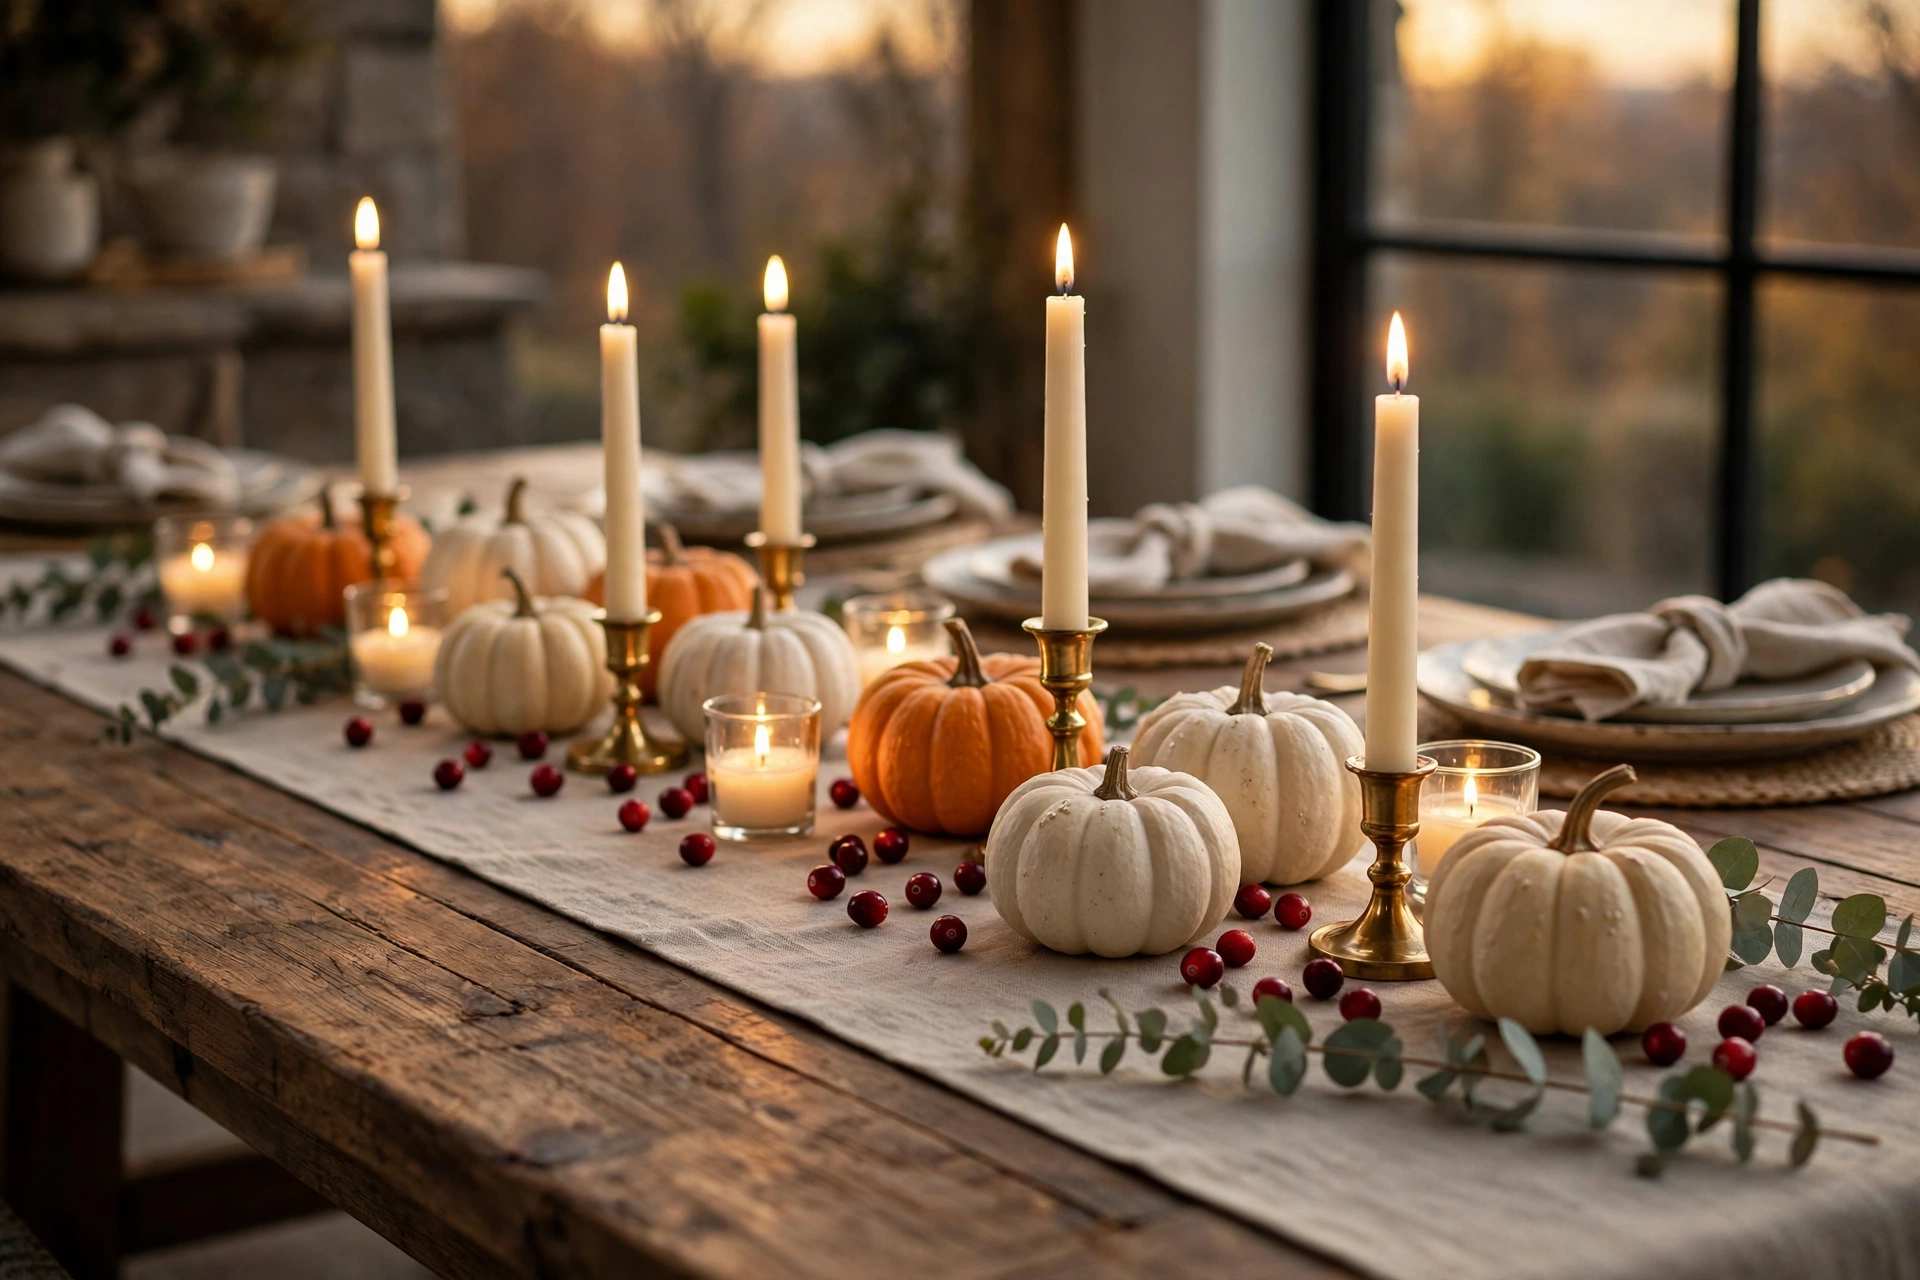
The turkey is resting. The rolls are warm. And the table still looks a little bare.
A good centerpiece fixes that fast. A few pumpkins give it color and shape. A few candles give it glow, the kind that makes people lean in and stay at the table for another hour.
But it is easy to get wrong. Too tall, and guests cannot see each other. Too wide, and there is no room for the gravy. Too scented, and the candles fight with dinner. And real flames need a little care.
Thanksgiving is on Thursday, November 26 this year, so you still have time. Below are 16 DIY centerpiece ideas with pumpkins and candles. Each one explains why it works, plus the sizes, steps, and safety details that make it easy to pull off.
Quick Answer: How Do You Make a Thanksgiving Centerpiece With Pumpkins and Candles?
Group three to five pumpkins in different sizes with two to four candles on a tray, board, or runner. Keep the whole arrangement under about 12 inches tall so guests can see across the table. Use sturdy holders, unscented candles, and enough space between flames and anything that can burn. Add a little greenery or fruit for color, and use flameless candles if you want a dense, leafy look.
Sizing Cheat Sheet
These are general design guidelines, not strict rules. Adjust for your table and serving dishes.
| Table type | Guests | Centerpiece length | Best height | Notes |
|---|---|---|---|---|
| Small round (36 to 48 in) | 4 to 6 | 8 to 12 in cluster | Under 12 in | Keep it compact so plates fit |
| Square or small rectangle | 4 to 6 | 12 to 18 in | Under 12 in | One tray or board works well |
| Standard rectangle (72 to 84 in) | 8 to 10 | 24 to 36 in runner | Under 12 in | Leave room at both ends for dishes |
| Long table (96 in or more) | 10 to 14 | 48 to 60 in, or 2 to 3 clusters | Under 12 in | Repeat the same items in each cluster |
| Kids’ table | 3 to 6 | 6 to 10 in | Under 8 in | Use flameless candles |
Candle Choices at a Glance
| Candle type | Best for | Watch out for |
|---|---|---|
| Taper | Height, formal look | Needs a stable holder and a clear space around the flame |
| Pillar | Strong, steady glow | Needs a heat-safe plate or glass base |
| Votive or tealight | Small gaps, jars, pumpkins | Must sit in glass or metal holders |
| Floating | Water bowls | Use only candles made to float, and keep the water deep enough |
| Flameless (LED) | Dense greenery, kids’ tables, hollow pumpkins | Choose a warm white glow, not a cool white one |
Start-By Schedule
- 2 to 3 weeks out: Buy whole pumpkins, candles, and holders. Whole pumpkins can last for weeks in a cool, dry spot.
- 1 week out: Paint or spray any pumpkins, and test your candle holders.
- 2 days out: Hollow pumpkins, cut greenery, and prep flowers.
- Day of: Build the centerpiece, measure the height, and light candles last, just before guests sit.
1. A Pumpkin Trio With Taper Candles on a Wood Board

Three pumpkins and two or three candles on one wood board make the quickest centerpiece in this list. Use a board about 18 to 24 inches long, and pick pumpkins in different sizes, such as one medium and two mini. Set the taper candles in short brass or ceramic holders, and vary their heights so the eye moves across the board. The board catches wax drips and keeps everything together, so you can lift the whole thing and move it to the counter when it is time to serve. Keep napkins and paper clear of the flames.
2. Hollowed Pumpkin Candle Holders

A small pumpkin with the top cut off makes a natural candle holder. Choose pumpkins with flat bottoms, cut a round opening a little wider than your holder, and scoop out enough seeds and pulp to seat it. Slip a glass votive or a flameless candle inside, so the flame never touches the pumpkin itself. Set the holders in a row down the table or on a tray in a group of three. Hollowed pumpkins only last a few days, so make them one or two days before dinner.
3. White Pumpkins With Ivory Pillars and Eucalyptus

A neutral palette feels calm and works with almost any dishes. Use three white or cream pumpkins of different sizes and group them with two or three ivory pillar candles on a round mirror or a plain plate. Add a few eucalyptus stems in a small bud vase, and place them at the edge of the group, away from the flame. The soft white, gray-green, and warm wood tones keep the table airy. Add a single gold or brass touch, like a small bowl, to warm things up.
4. A Pumpkin Vase With Fall Flowers
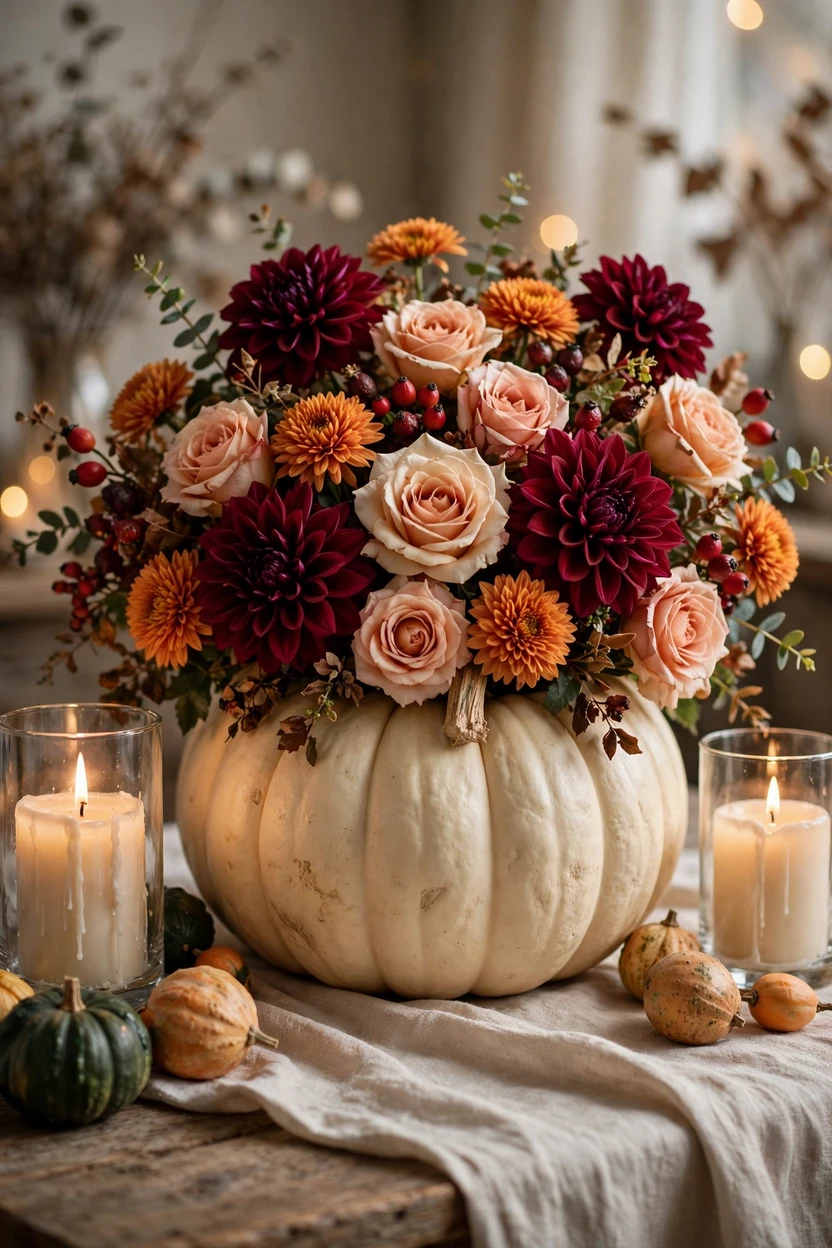
A hollowed pumpkin becomes a vase when you tuck a jar or a plastic cup inside to hold water. Cut a wide opening, scoop out the seeds, and set the liner in so it sits just below the rim. Fill it with mums, roses, dahlias, and a few sprigs of berries in warm oranges, creams, and burgundy, and keep the arrangement under about 12 inches tall. Place a pair of candles in glass cylinders on each side, a bit away from the stems. If the flowers are dry or the arrangement is dense, use flameless candles.
5. A Long Runner With Alternating Pumpkins and Candles

A row of pumpkins and candles down the middle of a long table fills the space without needing one big piece. Lay a linen, burlap, or greenery runner, then alternate mini pumpkins with short glass candle holders about every 10 to 12 inches. Keep the line about 8 to 10 inches wide so dishes still fit on each side. Use one candle style all the way down, like all tapers or all votives, so it looks planned. This is easy to build, easy to adjust, and it works well for 8 to 12 guests.
6. Floating Candles With Cranberries and Mini Pumpkins

Floating candles look like tiny lanterns on water, and they keep flames safely contained. Fill a wide glass bowl or cylinder about two-thirds with water, add fresh cranberries, and set floating candles on top. Place a few mini pumpkins outside the bowl on the table. Use only candles made to float, and make sure the water is deep enough that the candle does not touch the bottom. Keep the bowl in the middle of the table, away from sleeves and napkins.
7. Mason Jar Luminaries With Mini Pumpkins

Mason jars are cheap, sturdy, and easy to dress up. Wrap the neck of each jar with twine or a strip of cream ribbon, then add a tealight or a flameless candle inside. A thin layer of sand or dried beans in the bottom keeps a tealight steady and adds weight. Set three to five jars in a cluster, with mini pumpkins tucked around them. Keep real leaves and paper off the jars, since they can burn, and use faux leaves or flameless candles if you want a leafy look.
8. A Cake Stand Tower

A low cake stand gives a small group of pumpkins and candles a little lift, so the arrangement looks full without taking over the table. Choose a stand about 4 to 6 inches tall, so the total height stays under 12 inches. Stack three small pumpkins in the center, then set glass votives or short pillars around the edge. A white or cream stand makes the colors pop, while a wood stand feels more rustic. The stand also makes cleanup easy, since you can lift it away in one go.
9. Hurricane Lanterns With Pumpkins and Pinecones

A glass hurricane lantern shields the flame from drafts and keeps stray leaves and sleeves away from it. Use two or three lanterns of different heights, with pillar candles inside, and place pumpkins and pinecones around their feet. Fillers like pinecones, acorns, and dried leaves can burn, so keep them outside the glass. If you want to pack the base of a lantern, use cranberries, pebbles, or a flameless candle instead. The glass also adds height without a wide footprint, which is ideal for a narrow table.
10. Gold and Copper Metallic Pumpkins

A coat of metallic paint turns plain pumpkins into glowing pieces that match brass or copper candle holders. Use spray paint in a well-ventilated space, outdoors if you can, and let each pumpkin dry fully. Mix metallic and matte pumpkins in one group, so the sheen does not feel too flashy. Pair them with ivory tapers in brass or copper candlesticks. Use no more than two metal tones in one arrangement, so the table feels polished.
11. Heirloom Pumpkins in Jewel Tones
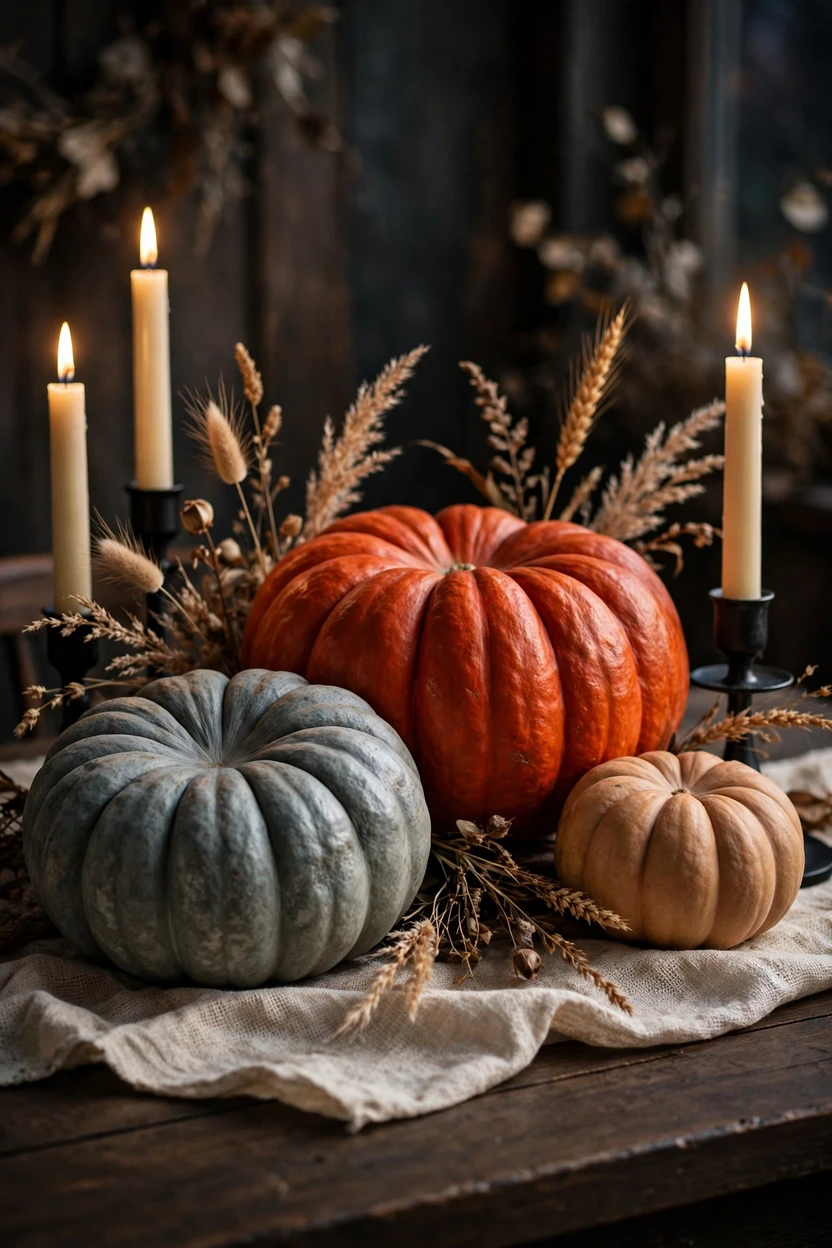
Heirloom pumpkins come in colors beyond orange, like the blue-gray Jarrahdale and the deep red-orange Cinderella. Mix two or three types in different sizes for a rich, collected look. Pair them with cream taper candles in dark candlesticks, such as black or bronze, so the colors stand out. A plain linen runner or a dark wood table lets the pumpkins be the main show. Look for them at farmers’ markets and grocery stores in fall, since they are often sold by the pound.
12. A Wooden Harvest Bowl With Fruit and Candles

A wooden dough bowl holds a big, abundant look in one piece. Fill it with small pumpkins, apples, pears, and a few pomegranates, mixing colors and shapes. Place the candles on either side of the bowl in glass holders, rather than inside it, so the flames stay clear of the fruit and any dry filler. Choose a bowl about 12 to 18 inches wide for most tables. The mix of color and texture makes it feel generous, and the whole thing carries easily to the kitchen when dessert arrives.
13. A Stacked Pumpkin Tower

A stack of two or three pumpkins creates height without a tall vase. Put the largest pumpkin at the bottom and the smallest on top, and keep the total height around 10 to 12 inches. Secure the stack with a short wooden dowel pushed through the center, or a dab of hot glue between layers. Place candles around the base of the tower, not on top of it. Add a few dried leaves or a stem of berries at the foot, away from the flames, to finish the look.
14. A Mirror Tray With Gourds and Votives
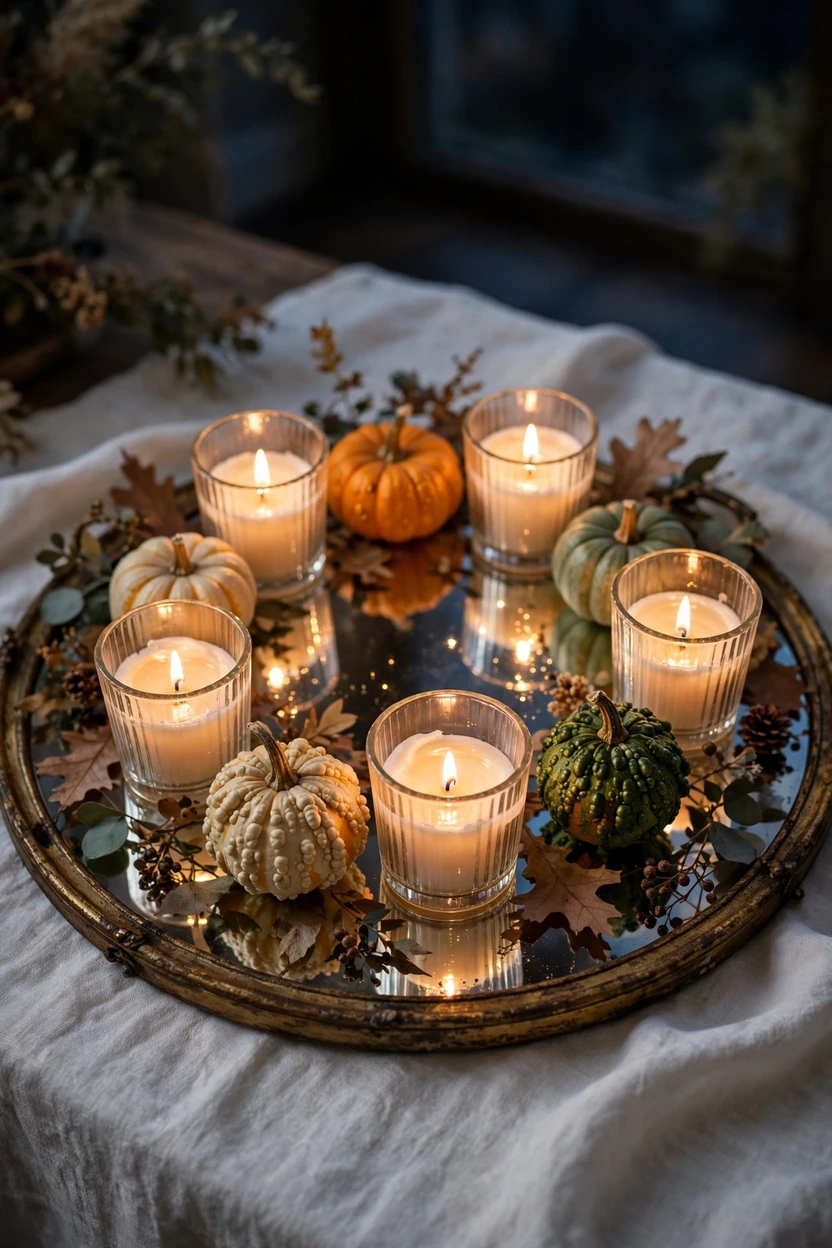
A round mirror under your candles doubles their glow and catches any wax drips. Use a mirror about 12 to 16 inches wide and set three or more glass votives on it, with small gourds and mini pumpkins between them. The reflection adds sparkle without adding height, which keeps sightlines clear. Always set candles in glass holders on the mirror, and use a heatproof base so the glass does not take the flame directly. This works well for a modern table and fits easily in the middle of a round one.
15. Birch Bark Candle Wraps

Birch bark gives candles a woodland look that suits a rustic table. Wrap strips of bark around a glass cylinder, secure it with twine, and put a candle inside, so the flame stays inside the glass. For a worry-free option, wrap it around a flameless pillar. Real bark can burn, so never place bare bark next to an open flame, and use faux bark paper if you prefer. Group two or three wrapped candles with pumpkins in varied sizes for a layered look.
16. Place-Setting Mini Pumpkins With Flameless Candles

A small pumpkin at each place can double as a place card and a party favor. Write each guest’s name on a mini pumpkin with a white paint pen, and set a flameless tealight in a small glass dish beside it. This is a great way to decorate a kids’ table, because flameless candles keep little hands safe. Use the same pumpkin color for every seat so the table looks unified. Guests can take their pumpkins home after dinner.
Styling Tips
- Group in odd numbers. Three pumpkins and three candles look more natural than pairs.
- Vary the heights. Mix tall tapers with short votives and low pumpkins for a layered look.
- Choose three colors. Pick a palette, such as cream, orange, and sage, and stick with it.
- Match your linens. Warm candles suit cream and wood. Cool white candles suit gray-blue linens.
- Choose unscented candles. Strong scents fight with the smell of the food.
- Use a tray or board. It keeps the arrangement together and protects the table from wax and pumpkin juice.
- Limit metals. Use one or two metal tones and keep the rest matte and natural.
- Keep it low. Under about 12 inches tall keeps conversation easy across the table.
Practical Implementation Ideas: How to Build and Light Your Centerpiece
- Measure your table. Note the length, the width, and how many serving dishes you need to fit.
- Pick a palette. Choose two or three colors and one metal or wood tone.
- Build it on a tray first. Arrange everything away from the table, then carry it over in one piece.
- Check the height. Hold a ruler up to the tallest point. Aim for under about 12 inches, including the flame.
- Test sightlines. Sit in a chair at each side and check that you can see across the table.
- Secure the candles. Use sturdy holders that will not tip, and make sure each candle fits snugly.
- Keep a safe zone. Keep candles at least 12 inches away from anything that can burn, such as napkins, paper, dried leaves, and curtains. If your arrangement is too packed for that, use flameless candles.
- Trim wicks. Trim each wick to about 1/4 inch before you light it.
- Light candles last. Light them just before guests sit down, and blow them out before anyone leaves the room or the party ends.
Common Mistakes to Avoid
- Going too tall. Guests cannot see each other, and flames can sit too close to faces.
- Using scented candles. Strong fragrance clashes with the food.
- Placing flames near dry material. Leaves, wheat, paper, and napkins can catch fire. Keep them well away.
- Using unsteady holders. Candles can tip. Use sturdy, heat-safe holders.
- Carving pumpkins too early. Cut pumpkins soften quickly. Hollow them one or two days ahead.
- Skipping the tray. Wax, fruit juice, and pumpkin moisture can mark a wood table or linen.
- Crowding the table. Leave room for plates, dishes, and elbows.
- Leaving flames unattended. Always blow out candles when you leave the room, and keep matches and lighters away from children.
- Forgetting kids and pets. Use flameless candles where small hands or tails can reach.
Small-Space Alternatives
A small table, a studio, or a buffet can still have a full-looking centerpiece.
- Make one cluster. Three mini pumpkins and two votives on a small tray fit a 36-inch round table.
- Go vertical on the side. Put the display on a sideboard or window ledge instead of the table.
- Use bud vases. A few slim vases with single stems take little room and add height.
- Choose small candles. Votives and tealights have a smaller footprint than pillars.
- Use a lazy Susan. Set the centerpiece on a small turntable so people can move it easily.
- Keep it flat. A mirror tray with low items leaves room for plates and glasses.
- Move it at dessert. Build the centerpiece on a tray so you can lift it off the table when you need space.
Budget-Friendly Alternatives
A good centerpiece does not need a big spend. Here is where to save.
- Buy pumpkins at the grocery store. Mini and medium pumpkins are often cheaper than at craft shops.
- Use craft or foam pumpkins. They cost less, last for years, and are safer to use with flameless candles.
- Shop dollar stores for candles and holders. Packs of votives, tealights, and glass cylinders are easy to find.
- Reuse jars. Clean pasta sauce and jam jars make good luminaries.
- Cut greens from the yard. Rosemary, pine, magnolia leaves, and eucalyptus-like stems add color for free.
- Buy flameless candles in sets. One set can be reused for years and for other holidays.
- Repurpose for Christmas. Swap pumpkins for pinecones and ornaments, and keep the same candles and trays.
Pro Styling Recommendations
- Plan the table first. List the dishes, plates, and glasses, then fit the centerpiece around them.
- Repeat one element. Use the same candle holder or pumpkin color in two or three spots, so the table looks designed.
- Layer with texture. Mix smooth glass, rough wood, matte pumpkin skin, and soft linen.
- Vary candle heights. Use at least two heights for visual rhythm.
- Add a foil for contrast. A dark runner makes cream pumpkins stand out. A light runner makes jewel tones glow.
- Mind the light. Dim the overhead light and let the candles do the work, but keep enough light for people to see the food.
- Think about safety first. Keep flames away from dry decor, napkins, and sleeves, and use flameless candles whenever the arrangement is dense.
- Plan the reset. Build on a tray so you can move the piece to a counter after the meal.
FAQs
Conclusion
A good Thanksgiving centerpiece does not need to be fancy. It needs a clear shape, a low height, and a warm glow that makes the table feel like a place to stay.
Pick one idea from this list, build it on a tray a day or two ahead, and test the height and the sightlines. Then light the candles last, just before everyone sits down.
Save this guide, pick up a few mini pumpkins this weekend, and set your table with confidence. Thanksgiving is on November 26, and the table will be ready.