
16 DIY Christmas Stocking Ideas to Sew This Weekend

A row of handmade stockings changes the whole feel of a mantel. Each one carries a bit of the person it belongs to, and that is hard to buy in a shop. A weekend is plenty of time to sew a full set, even if you are new to a sewing machine. Pick one idea, cut your fabric, and let the rest of the weekend take care of itself.
Sewing stockings is one of the friendliest holiday projects out there. The shape is simple, the seams are short, and a small wobble in the stitching just reads as handmade charm. You need basic supplies: fabric, lining, thread, scissors, pins, and a way to hang the finished piece. Most of these ideas use a fat quarter or less, so the cost stays low and the stash of scraps finally gets a job.
Quick Answer
Yes, you can sew a Christmas stocking in about one to two hours, even as a beginner. Start with quilting cotton or felt, cut two matching boot shapes for the outer and two for the lining, sew around the edges with a half-inch seam, clip the curves, turn it right side out, and add a folded cuff and a ribbon loop. A lined stocking hides every raw edge inside, so it looks neat from the front and the back. Choose a fabric that suits your skill level, keep the decorations flat before you sew the pieces together, and press each seam as you go for a smooth finish.
1. Classic Red Plaid Cotton Stocking with a Lined Cuff

Red plaid quilting cotton is the easiest place to start, and it looks right on almost any mantel. Cut two boot shapes from the plaid and two from a plain cream or green lining, keeping the plaid lines matched at the side seams so the pattern flows across the front. Sew the outer pieces right sides together with a half-inch seam, clip small notches around the heel and toe curves, then turn the stocking right side out and press it flat. A cuff cut from a solid red or cream cotton, folded in half and slipped over the top before the lining goes in, gives the opening a clean, finished edge. Stitch a short ribbon loop into the back seam at the same time, and the stocking is ready to hang the moment it comes off the machine.
2. Quilt-As-You-Go Patchwork Stocking from Fabric Scraps
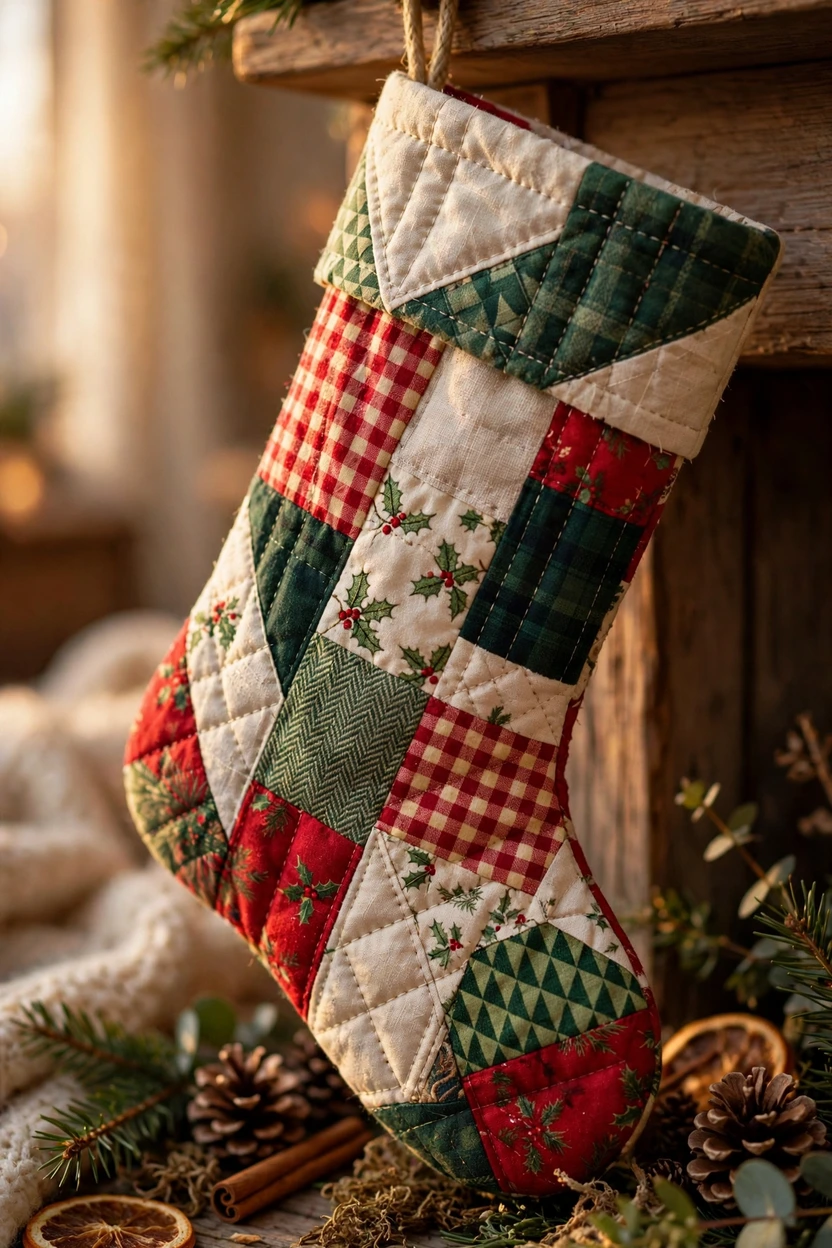
This is the stocking to sew when your scrap bin is full of Christmas prints that are too small for a bigger project. Lay strips of cotton scraps right side up on a piece of thin quilt batting, stitch each strip down with a straight seam, and keep adding strips until the patched cloth is large enough for the stocking shape. Press the patched cloth, trace your boot template on it, and cut two pieces, then sew them to a plain lining the same way you would a plain stocking. The batting gives the stocking body and a soft, padded feel, so it holds its shape on the mantel even when it is empty. Mixing small prints with one or two larger prints keeps the patchwork lively without looking jumbled, and every stocking in a set comes out a little different.
3. Felt Stocking with Hand-Cut Appliqué Shapes

Felt is kind to beginners because its edges do not fray, so you can cut shapes and sew them on without finishing every edge. Choose a deep green or charcoal felt for the stocking body, then cut trees, snowflakes, stars, or candy canes from cream, red, and gold felt scraps. Pin the shapes to the front piece and stitch around each one with a simple straight stitch or a blanket stitch in contrasting thread before you sew the two boot pieces together. A cotton lining keeps the inside smooth and hides the backs of the appliqué stitches, and a folded felt cuff in a contrasting color frames the top. Because felt is thick at the seams, trim the seam allowance close around the toe and heel before turning so the curves sit flat.
4. Upcycled Cable-Knit Sweater Stocking
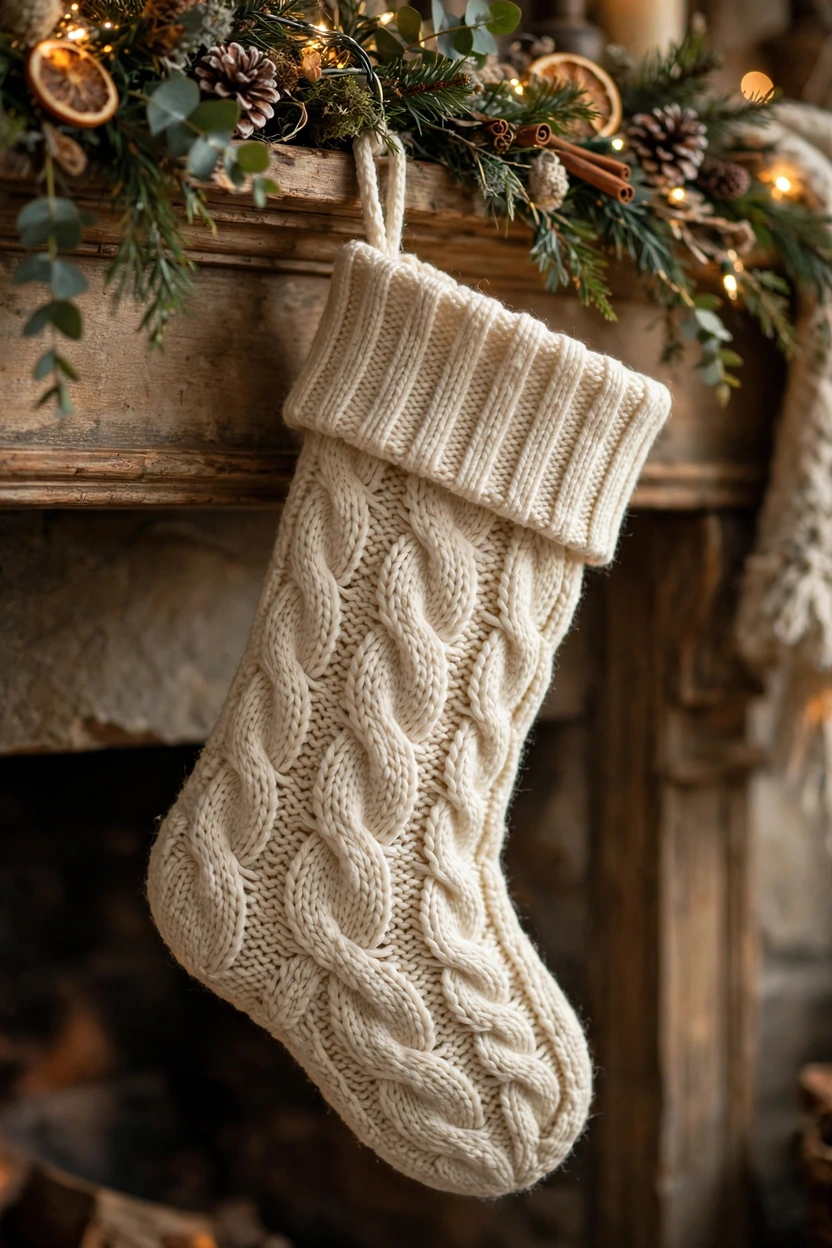
An old cable-knit sweater makes a stocking that looks soft and lived-in, and it costs nothing if the sweater is already in your closet. Lay the sweater flat, place your boot template over the body so the cable pattern runs down the leg of the stocking, and cut two pieces, keeping the ribbed hem of the sweater for the cuff if you can. Knit fabric stretches and frays, so back each piece with a light fusible interfacing and sew with a slightly longer stitch length, using clips instead of pins to hold the layers. A plain cotton lining stops the stocking from stretching out of shape when it is filled, and a narrow ribbon loop stitched into the back seam holds the weight. The finished stocking pairs well with garland and warm white lights, and no two sweater stockings ever look alike.
5. Velvet Stocking with a Faux-Fur Cuff

Velvet brings a soft glow to a mantel, and a wide faux-fur cuff makes the stocking look plush before anything goes inside it. Cut the boot shapes from a medium-weight velvet in deep red, forest green, or navy, and hold the slippery layers with sewing clips rather than pins, which can leave marks in the pile. A walking foot helps feed the velvet evenly under the needle, and a slightly longer stitch keeps the seam from puckering. Sew a simple cotton lining the same size, then attach the faux-fur cuff as a folded ring over the top edge so the fur sits above the velvet like a soft collar. Brush the pile gently with your hand after turning to smooth it out, and stitch the hanging loop through both the outer and the lining at the back seam so it can carry the weight of a filled stocking.
6. Buffalo Check and Burlap Rustic Stocking

Buffalo check and burlap suit a rustic mantel, a woodland tree, or a farmhouse-style living room. Cut the boot from red and black buffalo check cotton, then add a wide band of natural burlap across the middle or as the cuff, topstitching it in place before the stocking pieces are sewn together. Burlap frays easily, so finish its raw edges with a zigzag stitch or fold them under and press before you attach the band. A plain muslin lining keeps the inside tidy and stops loose burlap fibers from catching on small gifts. Finish with a jute twine loop instead of ribbon, and a small sprig of greenery tucked into the cuff ties the whole look together without any extra sewing.
7. Embroidered Heirloom Stocking with a Stitched Name
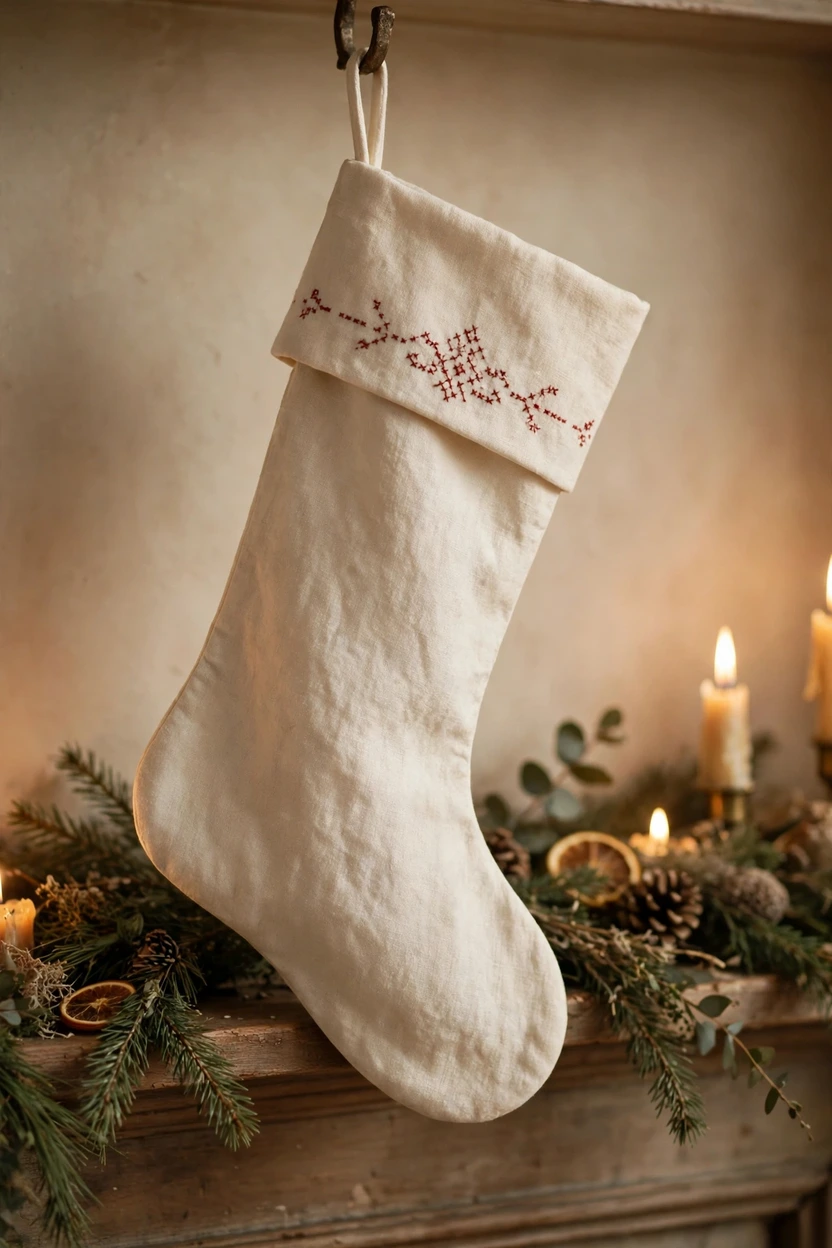
A stitched name turns a stocking into a keepsake that gets pulled out year after year, and the sewing is simpler than it looks. Choose a solid cotton, linen, or velvet for the body so the stitching shows clearly, and mark the name on the cuff or the upper leg with a water-soluble fabric pen before any pieces are joined. Use backstitch for the letters and a French knot or a small star for a dot, working with two strands of embroidery floss so the letters stay fine and neat. Do the embroidery while the cuff is still flat, because stitching through a finished stocking is awkward and the back of the work stays hidden inside the fold. Sew the stocking with a full lining and a folded cuff, press it well, and the name sits front and center every Christmas morning.
8. Mini Stockings for the Tree and Small Gifts

Mini stockings are quick, use up the smallest scraps, and work as tree ornaments, gift-card holders, or place settings at the holiday table. Scale your boot template down to about nine inches tall, and cut the outer and lining from quilting cotton or felt, keeping the seam allowance at a quarter inch so the small curves turn smoothly. Clip the heel and toe curves closely, turn the stocking with the blunt end of a chopstick, and press it before you add a narrow cuff. A thin ribbon loop stitched into the back seam lets the mini stocking hang from a branch, a chair back, or a door handle. Sew a batch in one sitting by cutting all the pieces first, then chain-sewing the seams one after another, and you will have a whole set before lunch.
9. Matching Family Set from One Template
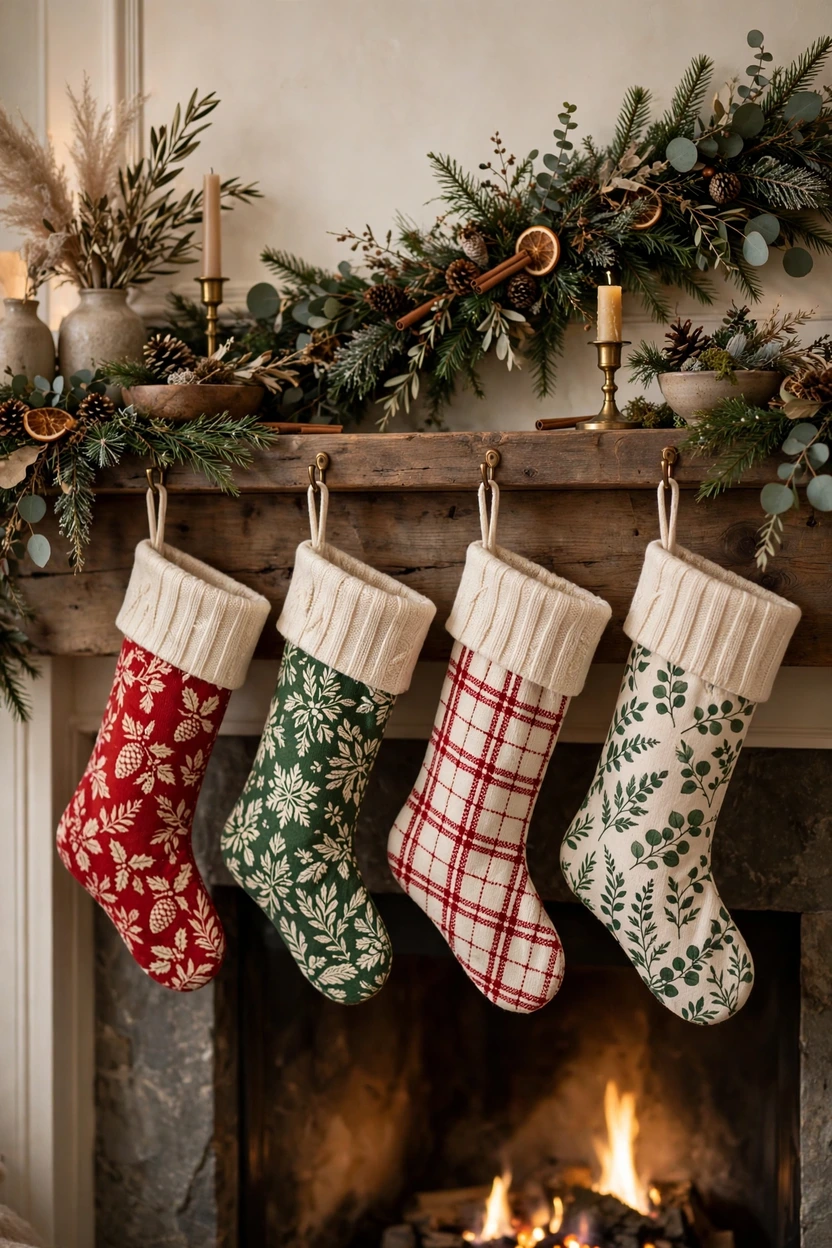
One template and a set of coordinating fabrics is the fastest way to make stockings that look planned instead of random. Trace the same boot shape for every stocking so the sizes match, then give each person a different print from the same color family, such as reds and greens with one cream print to break them up. Use the same lining and the same cuff fabric across the whole set so the row reads as a collection even though each print is different. Add each name to the cuff with iron-on letters, fabric appliqué, or simple embroidery, doing the personalizing while the cuff pieces are still flat. Sew the stockings one at a time or in a batch, pressing each one as you finish, and hang them in the same order every year so the set becomes part of the family routine.
10. Soft Linen Stocking with a Ruffled Cuff
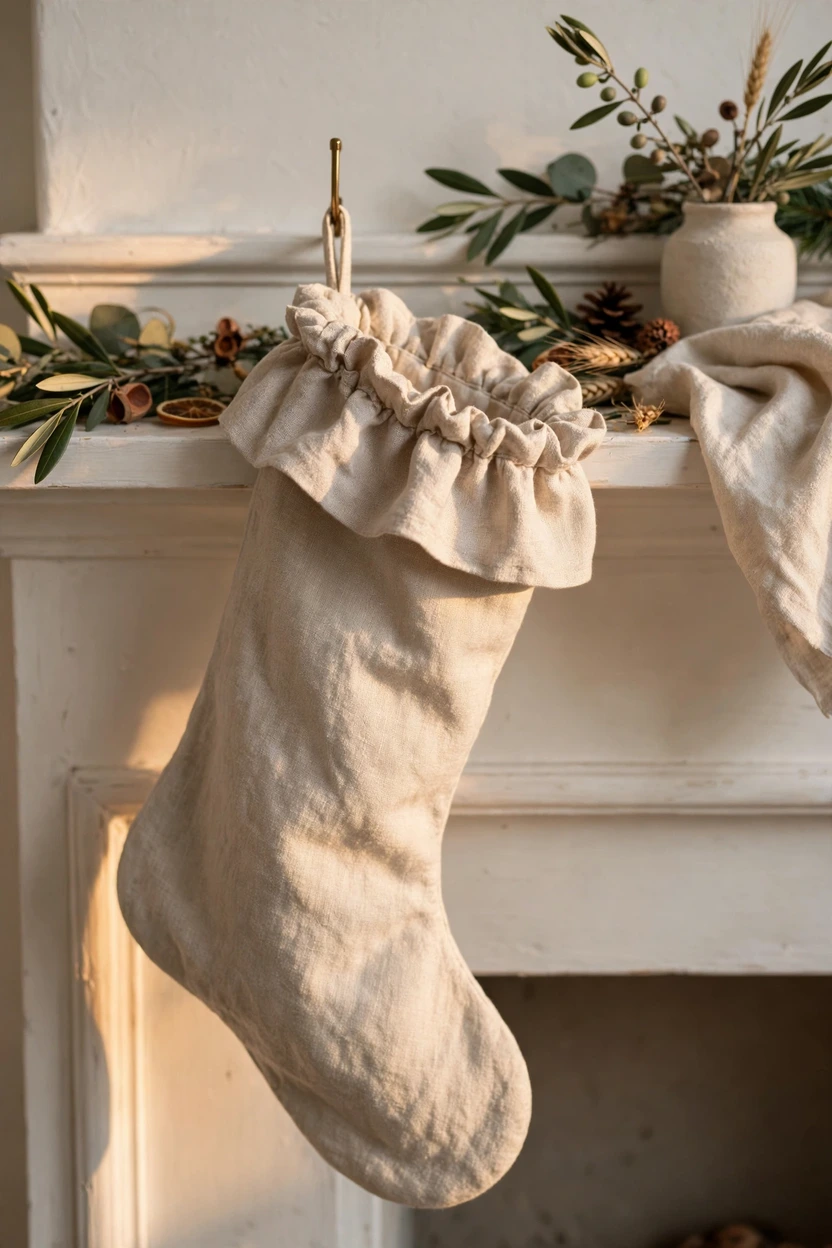
Linen gives a stocking a relaxed, natural look that suits a calm, neutral mantel. Cut the boot from a medium-weight linen in natural, oatmeal, or soft sage, and prewash the fabric first because linen shrinks and softens with washing. A ruffled cuff is easy to make: cut a strip of linen one and a half times the width of the opening, gather it with a long basting stitch, and sew it into a ring before attaching it to the top of the stocking. A cotton lining keeps the linen from stretching and hides the gathered edge inside the top seam. Finish with a linen tape loop or a narrow cotton ribbon, and keep decorations simple, since the texture of the linen and the soft ruffle carry the design on their own.
11. Recycled Denim Stocking from Old Jeans

Old jeans make a sturdy stocking with built-in character, and the denim holds its shape well on the mantel. Cut the boot shapes from the legs of the jeans, keeping a back pocket or a flat-felled seam on the front of one piece if you want a ready-made detail. Denim is thick, so use a heavy-duty needle, a longer stitch length, and clips to hold the layers, and trim the seam allowance close at the toe and heel so the curves turn without bulk. A cotton or flannel lining softens the inside and stops the rough denim from snagging small gifts. Add a cuff from red gingham or plaid flannel for a pop of color, stitch a sturdy twill tape loop into the back seam, and the stocking is strong enough to hold heavier treats.
12. Advent Pocket Stocking with a Front Pocket

A front pocket turns a stocking into a tiny advent calendar, with a small treat or note tucked in each day. Sew the main stocking from quilting cotton or felt with a full lining, then make the pocket from a contrasting print, finishing its top edge with a folded hem before you stitch it to the front of the stocking. The pocket should sit on the leg of the boot, leaving the foot free for the bigger gifts, and a short line of topstitching around its sides and bottom holds it firmly in place. Add a small number, a star, or a simple stitched shape to the pocket so it reads as a special detail rather than an afterthought. Fill the pocket with a note, a candy, or a tiny ornament each morning, and the stocking becomes a daily moment instead of a decoration that waits for Christmas morning.
13. Striped Ticking Stocking with Contrast Heel and Toe

Striped ticking fabric has a clean, old-fashioned feel, and contrast heel and toe patches give it a finished, tailored look. Cut the main boot from red or navy striped ticking, then cut separate heel and toe pieces from a solid fabric in a matching color, adding a seam allowance to each patch. Sew the patches to the front boot piece first, pressing the seams toward the patch, and then treat the pieced front as a single piece when you sew the stocking together. A plain cotton lining keeps the inside smooth, and a cuff from the same solid fabric as the heel and toe pulls the whole design together. Keep the stripes running the same direction on the front and back pieces so the stocking looks neat from every angle.
14. Pet Stocking with a Felt Paw Print

Pets deserve a stocking too, and a felt paw print makes it clear whose it is. Sew the stocking body from quilting cotton or felt in a color that matches your other stockings, then cut a paw print from felt: one large oval for the pad and four small ovals for the toes. Stitch the paw pieces to the front of the stocking with a straight stitch close to the edge, or glue them with fabric glue if you want a no-sew finish on this one detail. A cotton lining keeps the stocking sturdy enough to hold treats and small toys, and a wide cuff gives you space to add the pet’s name in iron-on letters. Reinforce the hanging loop with an extra row of stitching, since a pet stocking often holds heavier treats than the human ones.
15. Deep 3D Gusset Stocking That Stands on Its Own

A gusset stocking has a strip of fabric sewn between the two boot pieces, so it has depth and can stand upright on a shelf instead of lying flat. Cut two boot shapes for the outer and two for the lining, then cut a long strip about three inches wide and long enough to run around the whole boot from the top of the back edge to the top of the front edge. Pin the strip to one boot piece right sides together, easing it around the heel and toe curves, sew it on with a half-inch seam, and repeat with the second boot piece on the other edge of the strip. Build the lining the same way, leaving a gap in one lining seam for turning, then join the outer and lining at the top edge with the cuff and loop sandwiched in between. Felt works well for a first gusset stocking because it holds the flat sole without extra stiffening, while cotton needs a layer of batting or fusible fleece behind the outer pieces to keep its shape.
16. Pom-Pom Trim Stocking with Jingle Bells
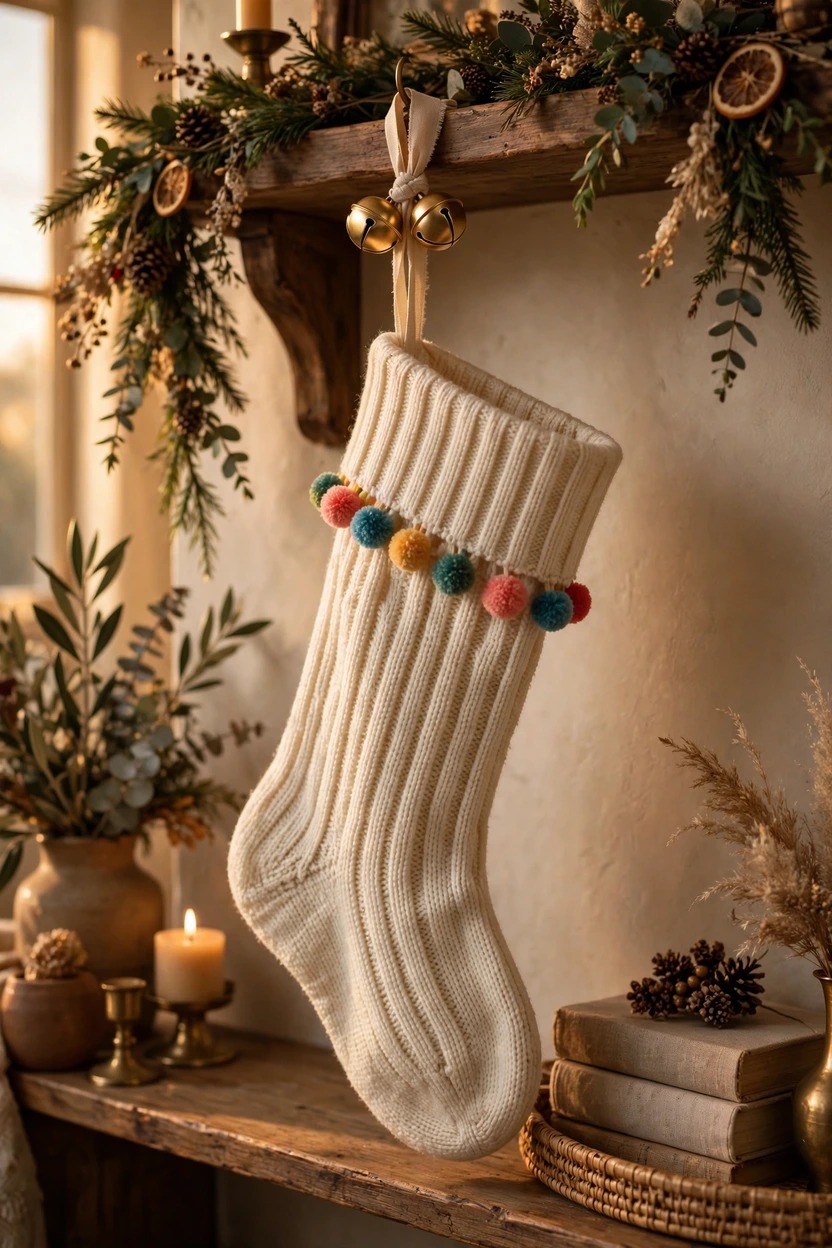
Pom-pom trim and jingle bells give a stocking a cheerful, playful finish that children love. Sew the stocking body from a solid or lightly patterned cotton with a full lining, keeping the design simple so the trim stands out. Stitch a row of pom-pom trim along the top edge of the cuff before the cuff is attached, or sew it into the seam where the cuff meets the body so the little balls peek out. Add two or three small jingle bells to the hanging loop or to the end of a short ribbon tied at the cuff, stitching them on firmly so they stay put through the season. Keep the bells away from the toe so they do not get in the way of filling the stocking, and use a strong thread for the trim so the pom-poms survive being handled and hung year after year.
Styling Tips
Hang stockings at slightly different heights so the row feels relaxed instead of rigid, and keep the spacing even so no two stockings overlap. Match the cuff fabric across the set when the body fabrics are all different, because one shared detail pulls mixed prints together. Place the stocking with the most color in the middle of the mantel and the quieter ones at the ends to balance the row. Add a sprig of greenery, a cinnamon stick, or a small pinecone to each cuff for a natural finish that costs nothing. Step back and look at the whole mantel from across the room before you call it done, since small changes in spacing show up more from a distance.
Practical Implementation Ideas
Cut all the pieces for a set in one session, then sew them in a batch, because cutting and sewing in separate steps saves time and keeps the pieces from getting mixed up. Label each set of pieces with a small piece of tape showing whose stocking it is, especially when several prints look alike. Press every seam as you go, and clip the curves before turning, since those two habits make the biggest difference to how neat the finished stocking looks. Test the hanging loop by filling the stocking with a few small items and hanging it for an hour before Christmas morning, so a weak loop gets fixed in time. Store the finished stockings flat in a clean box with tissue paper between them, and they will come out ready to hang next year.
Common Mistakes to Avoid
Skipping the lining is the most common mistake, because an unlined stocking shows raw edges inside and loses its shape when it is filled. Cutting both boot pieces from the same side of the template gives you two left feet that will not line up, so fold the fabric and cut both pieces at once to get a mirrored pair. Forgetting to clip the curves leaves the toe lumpy and the ankle puckered, so snip small notches around outward curves and straight snips into inward curves, stopping just short of the stitching. Sewing the decorations on after the stocking is assembled makes the work awkward and leaves stitching showing inside, so add appliqué, names, and trim while the pieces are still flat. Using a flimsy ribbon for the loop is another easy miss, since a filled stocking is heavier than it looks and a weak loop will tear at the seam.
Small-Space Alternatives
If you do not have a mantel, hang the stockings from a wall shelf, a stair rail, or a row of adhesive hooks on a blank wall. Mini stockings work well in small rooms because they take up less space and still carry the handmade look, and a single stocking hung from a door handle can stand in for a whole row. A narrow shelf with three small stockings and a short garland gives the same feeling as a full mantel in a fraction of the space. Choose lighter fabrics and smaller cuffs for small rooms so the stockings do not crowd the wall. When floor space is tight, hang the stockings on the side of a bookshelf or a wardrobe door where they are visible but out of the way.
Budget-Friendly Alternatives
Fat quarters and fabric scraps cover most of these stockings, and one fat quarter is enough for a standard stocking outer and lining. Old sweaters, jeans, and linen shirts from the back of the closet cost nothing and make some of the most characterful stockings in this list. Felt sheets are cheap, come in many colors, and need no lining for a simple version, which keeps the cost per stocking very low. Use muslin for linings instead of printed cotton, and save the pretty fabric for the outside where it shows. Buy ribbon, pom-pom trim, and jingle bells in small amounts from a craft shop rather than in large packs, and share the supplies across the whole set.
Pro Styling Recommendations
Choose a palette of three colors and repeat it across every stocking, even when the fabrics are different, because a limited palette is what makes a mixed set look styled. Keep the cuff depth the same on every stocking in a set, since matching cuffs make different body fabrics look intentional. Add one textured stocking, such as velvet or cable knit, to a set of flat cotton stockings so the row has depth without becoming busy. Place the stockings so the toes point in the same direction, and keep the hanging loops the same length so the tops sit in a straight line. Finish the mantel with a simple garland and warm white lights, and let the stockings be the main focus rather than adding more decorations around them.
Conclusion
Sixteen stockings, one weekend, and a mantel that feels made rather than bought. Start with the simplest idea on this list, sew one stocking, and see how it turns out before you cut the rest of the set. The small details are what make these stockings special: a matched plaid, a stitched name, a cuff in the same fabric across the whole row. Hang them up, fill them with small treats, and enjoy the quiet satisfaction of a holiday decoration you made with your own hands.