19 DIY Teen Room Decor Ideas for Small Bedrooms

The door shuts. Music starts. And a 10-by-10 bedroom suddenly has to be a study hall, a hangout spot, a closet, a movie theater and a quiet place to breathe after a rough day.
That’s a lot to ask from a small room. The good news is that you don’t need a bigger room or a big budget. You need a plan that uses the walls, hides the clutter and lets your teen put their own stamp on the space.
Teen bedroom trends this year lean toward rooms that feel personal, calm and flexible, with layered lighting, smart storage and a real spot to study. DIY is the best way to get there, because every project can match your teen’s colors and your room’s exact measurements.
Below are 19 DIY teen room decor ideas made for small bedrooms. Each one comes with time, cost and skill level, plus the practical reason it works and a safety tip where it matters.
Quick Answers First
What are the best DIY decor ideas for a small teen bedroom? Go up, not out. Use the walls for shelves, art and a desk, light the room in layers, and hide storage under the bed and behind the door. Keep the floor as open as you can so the room feels bigger.
How much floor space should I leave open? Aim for a clear walking path of about 24 to 30 inches from the door to the bed and the desk. If you can’t get that, move or remove one piece before you add decor.
What is the fastest DIY to try first? A string photo wall, new pillow covers and warm lights take under an hour each and change the mood right away.
Before You Start: A Simple Teen-and-Parent Plan
Let your teen choose three colors and one mood word. For example, sage, cream and rust with the word cozy. Every project below gets easier when the palette is settled.
Set the budget together. Decide what each project can cost before you shop. Thrift stores and craft stores go a long way.
Check wall rules. If you rent, read the lease and test any adhesive on a hidden spot first.
Find the studs. A cheap stud finder tells you where heavy shelves and desks can safely go.
Keep safety on the list. Use UL-listed electrical items, keep cords tidy, don’t hang heavy things right above the pillow, and anchor tall furniture to the wall.
Table of Contents
19 DIY Teen Room Decor Ideas for Small Bedrooms
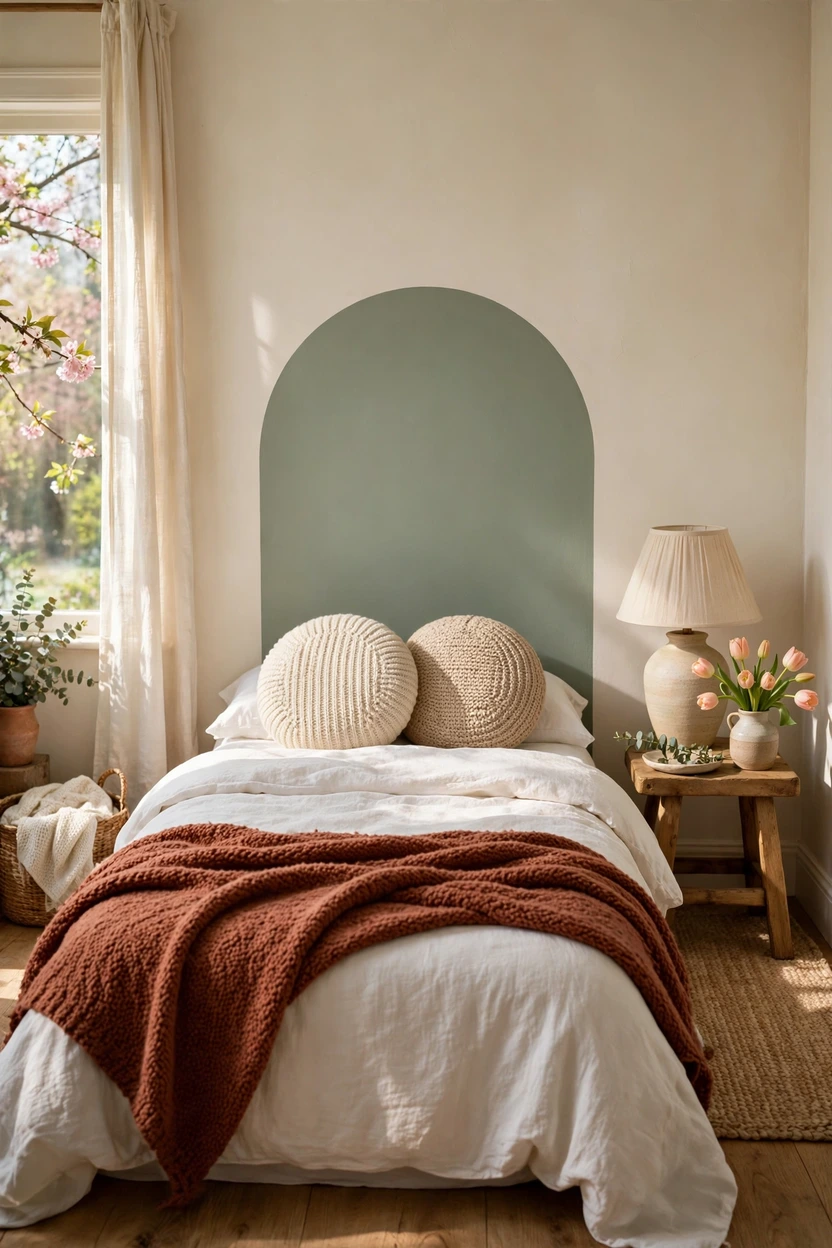
Paint an Arch Headboard on the Wall
Time: 2–3 hours | Cost: Low | Skill: Beginner | Renter-friendly: Ask first (paint)
A painted arch gives the bed a headboard without taking up an inch of floor. Tie a string to a pencil, pin the other end at the center point, and swing a clean curve across the wall. A twin mattress is about 38 inches wide, so an arch around 42 to 44 inches wide looks balanced behind it. Pick a color two shades deeper than the wall, like sage on cream, so the shape feels soft and not loud. Pull the painter’s tape while the paint is still slightly damp for crisp edges. If your home was built before 1978, test old paint for lead before you sand anything.
String Up a Polaroid Photo Wall
Time: 45 minutes | Cost: Low | Skill: Beginner | Renter-friendly: Yes
A photo wall turns a blank corner into a place that tells your teen’s story. Hang clear removable hooks at each end, run two or three strands of twine in a gentle zigzag, and clip on photos with mini wooden clothespins. Keep the strands about 8 to 10 inches apart so the wall looks full but not crowded. Mix in ticket stubs, postcards and drawings so it feels like a collection, not a school display. Swap the photos every month, which keeps the wall fresh without any new spending.

Paint Your Own Abstract Canvas Art
Time: 1–2 hours | Cost: Low | Skill: Beginner | Renter-friendly: Yes
One large piece of art looks calmer in a small room than a crowd of tiny frames. Buy a big blank canvas from a craft store, tape off shapes with painter’s tape, and fill them with acrylic paint in your teen’s three chosen colors. Soft arches, wavy lines and color blocks all look polished even if no one has painted before. Hang it above the bed or desk, since that is where the eye lands first. Use removable strips rated for the canvas weight so the wall stays clean.

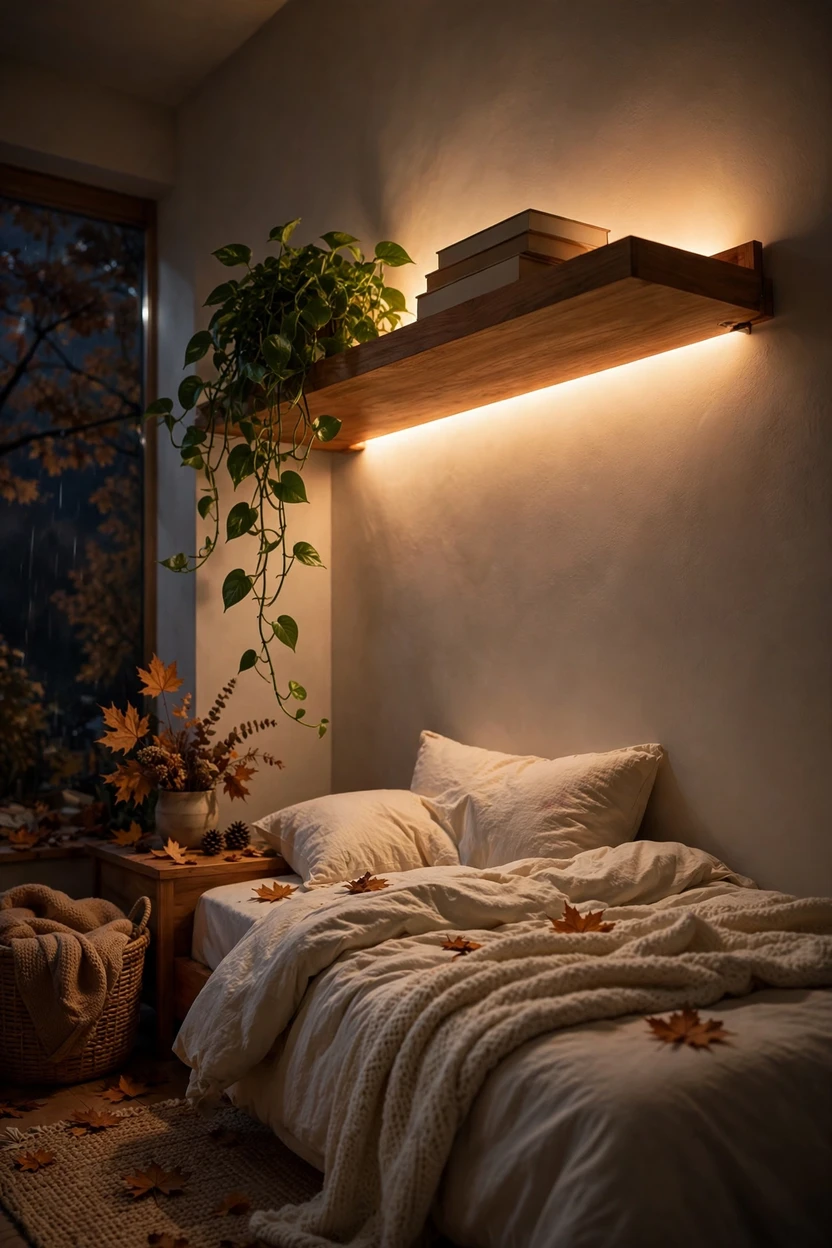
Hide LED Strip Lights Behind a Shelf or Bed Frame
Time: 30 minutes | Cost: Low | Skill: Beginner | Renter-friendly: Yes, with channels
Hidden LED strips give a room that soft glow teens love, and they make a small space feel layered and cozy. Tuck the strip behind a floating shelf or under the bed frame so you see the light but not the dots. Pick warm white around 2700K for evenings, since cool blue light can feel harsh before bed. Mount the strip inside a slim aluminum channel held with removable adhesive, which protects the paint when you take it down. Choose UL-listed power adapters, keep the adapter in an open spot with airflow, and never coil or bundle the strip while it is on.
Build Simple Floating Shelves
Time: 2 hours | Cost: Low to medium | Skill: Beginner to intermediate | Renter-friendly: Needs screws
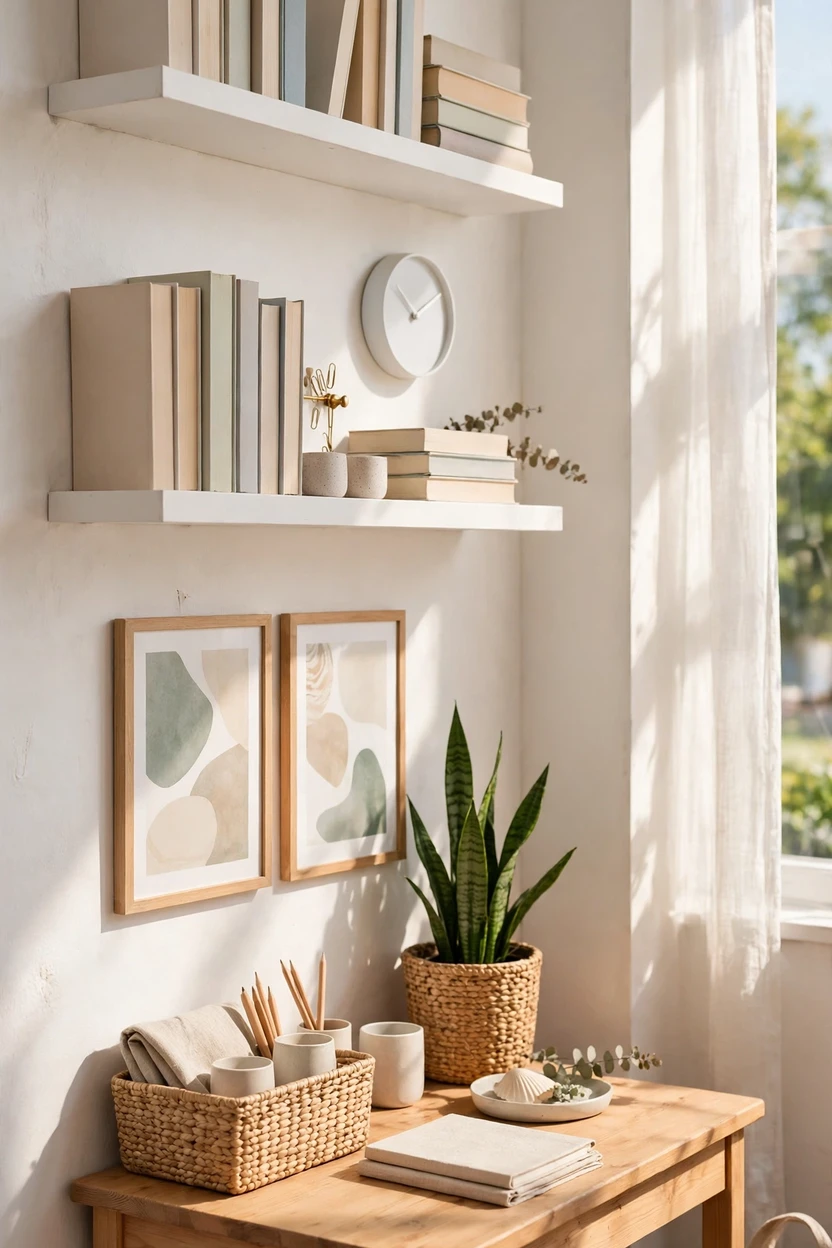
Floating shelves pull books, plants and keepsakes off the floor and off the desk. Cut a pine board to length, sand it, paint it the same color as the wall for a calm look, and mount it on sturdy brackets. Screw into studs or use anchors rated well above the weight you plan to store. Put heavy books on the lowest shelf and light frames or plants higher. Place shelves beside or above the desk, not right over the pillow, and add a small front lip so items can’t slide off.
Make Rolling Under-Bed Crates
Time: 1 hour | Cost: Low | Skill: Beginner | Renter-friendly: Yes
The space under the bed is the biggest unused storage spot in a small room. Build or buy simple wooden crates, sand the edges smooth and screw a caster into each bottom corner. Measure the gap between the floor and the bed frame first, because the crate plus wheels must fit with an inch to spare. Use chalkboard tape or a small tag to label what goes where: off-season sweaters, shoes, craft supplies. On carpet, choose larger wheels so the crates glide without sticking.

Build a Fold-Down Wall Desk
Time: 3–4 hours | Cost: Medium | Skill: Intermediate | Renter-friendly: Needs screws
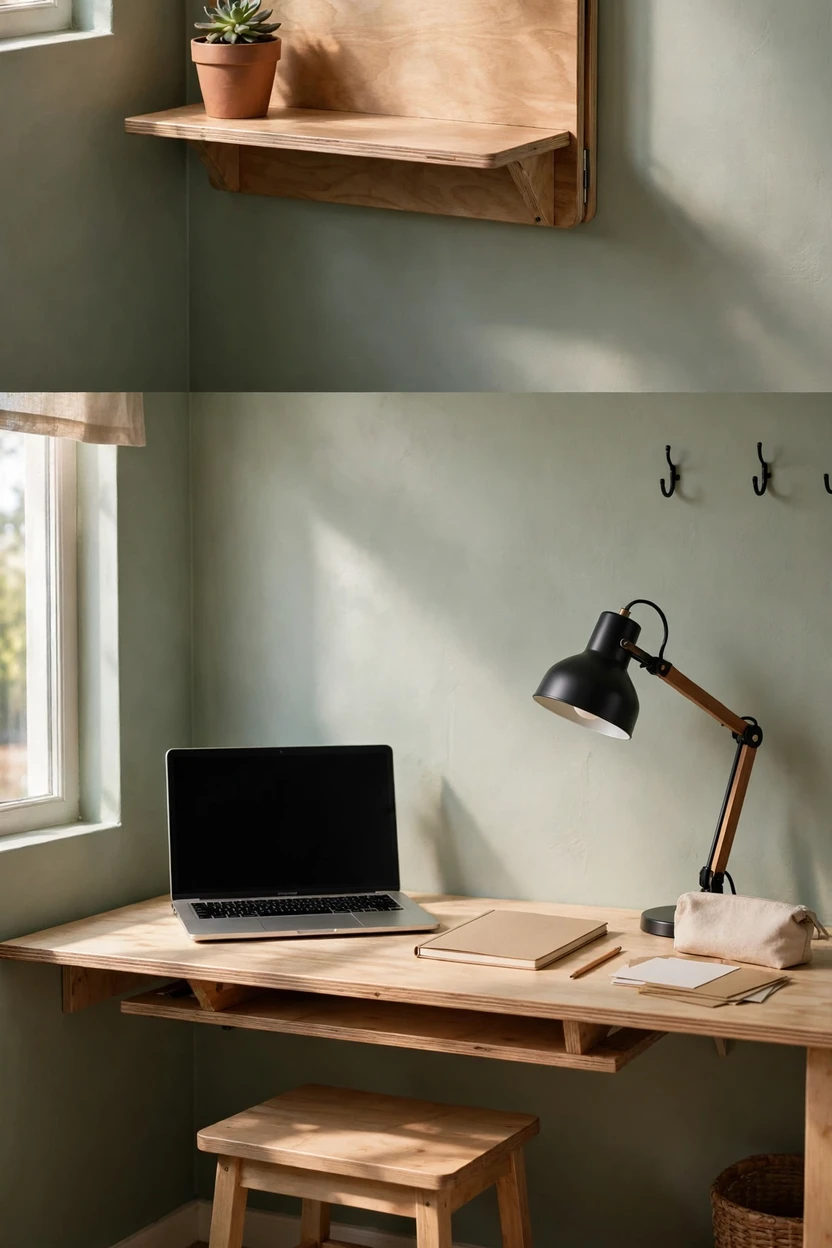
A fold-down desk gives your teen a real study spot, then disappears to leave floor space for yoga, hanging out or sleepovers. Attach a hinged plywood board to the wall with folding brackets rated for laptops and books, and screw them into studs. A depth of 18 to 22 inches and a top height around 28 to 30 inches suit most teens. Paint or stain the board to match the shelves so it looks like part of the wall when it’s closed. Add a small lamp on an arm and a stool that tucks away, and the corner works hard without feeling heavy.
Paint a Pegboard Organizer
Time: 2 hours | Cost: Low to medium | Skill: Beginner | Renter-friendly: Needs screws
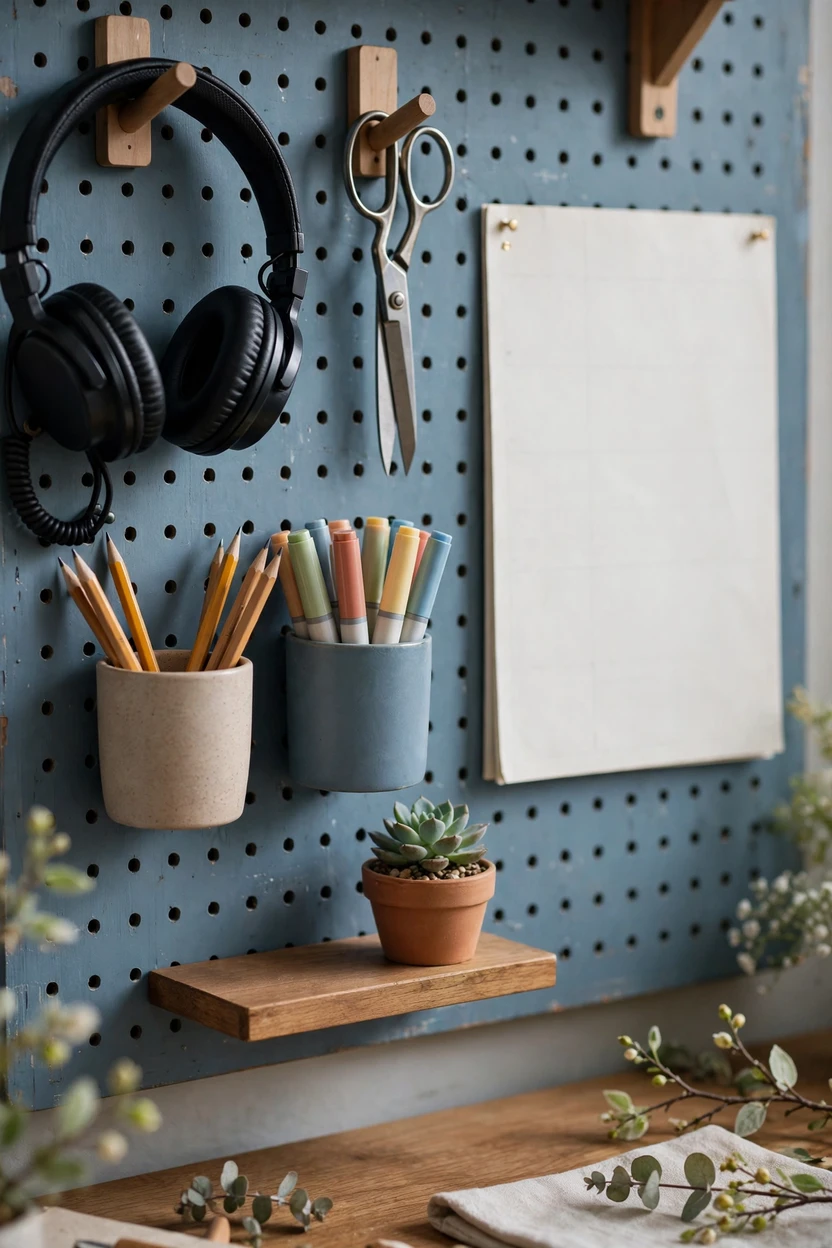
A pegboard turns one patch of wall into a desk organizer that holds headphones, scissors, notes and small shelves. Paint the board in dusty blue, sage or warm white before you hang it, and let it dry fully so hooks don’t stick to tacky paint. Mount it with small spacers behind the board, because hooks need a gap to slide into the holes. A board around 2 by 4 feet suits a small desk without overwhelming the wall. Group items by use and keep the palette to three colors so it looks neat, not busy.
Sew Up No-Sew Pillow Covers
Time: 30 minutes per cover | Cost: Low | Skill: Beginner | Renter-friendly: Yes
New pillow covers are the fastest way to change a room’s color story, and you don’t need a needle. Cut fabric to wrap around an old pillow insert with a few inches of overlap, then close the seams with iron-on hem tape or fabric glue. Corduroy, linen, faux fur remnants and chunky knits add touch and depth, which keeps a small room from looking flat. Use one big square, one lumbar and one round pillow so the bed looks styled, not stacked. Wash the covers cold and let them dry flat to keep the seams strong.

Hang a Curtain-Rod Fabric Headboard
Time: 30 minutes | Cost: Low | Skill: Beginner | Renter-friendly: Yes (two small holes or removable hooks)
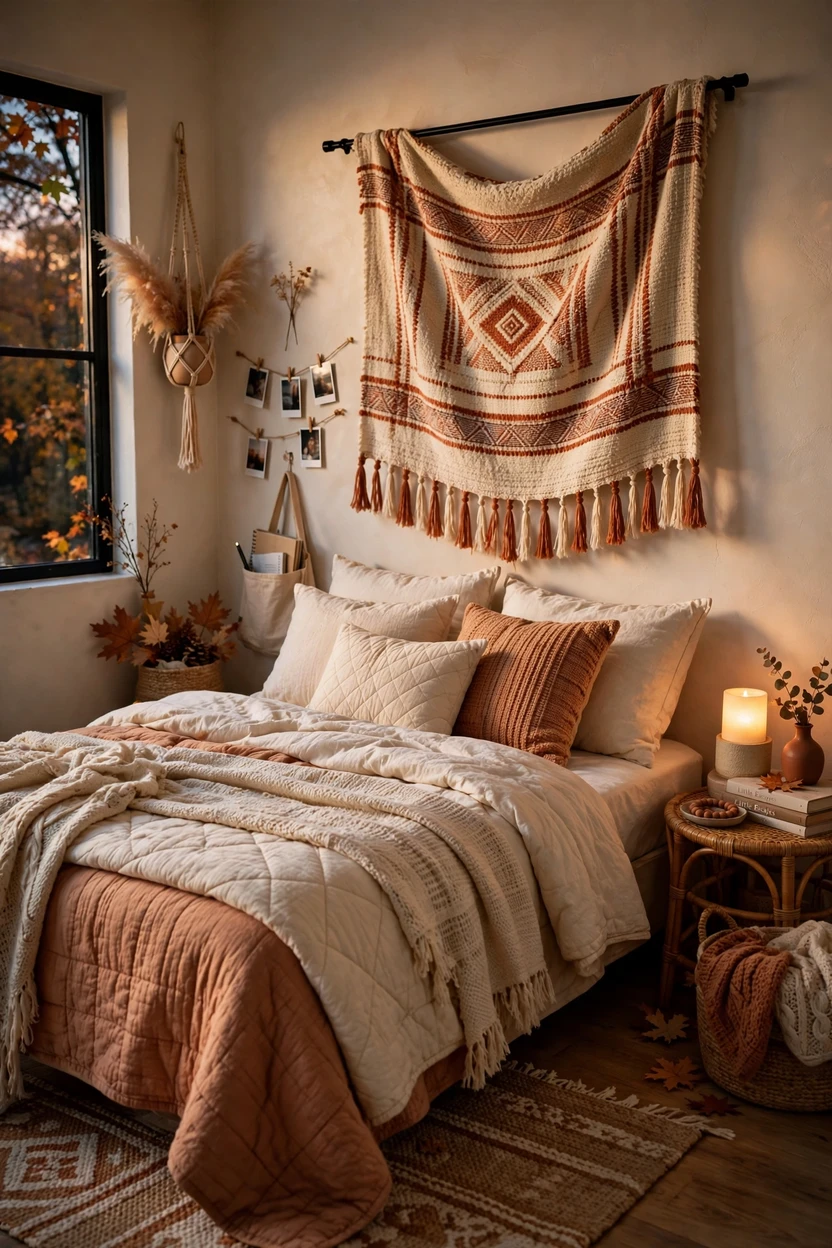
A fabric headboard adds softness above the bed and costs far less than a real one. Mount a lightweight curtain rod a little wider than the mattress, then drape a tapestry, quilt or woven blanket over it. Pick a muted pattern in your teen’s palette, since a busy print can swallow a small room. The fabric hangs flat against the wall, so it takes almost no floor space and adds sound-softening texture. Keep it away from lamps and heaters, and choose a firm rod or hooks rated for the fabric weight.
Wrap Closet Doors or Dresser Fronts in Peel-and-Stick Paper
Time: 1–2 hours | Cost: Low to medium | Skill: Beginner | Renter-friendly: Yes, if you remove it carefully
Peel-and-stick paper gives flat doors and drawer fronts a fresh pattern without a single drop of paint. It works best on smooth, clean surfaces, so wipe the door well and let it dry first. Measure each panel, cut the paper one inch bigger, press from the center out with a smoothing card, then trim the edges with a sharp blade. In a small room, pick a quiet pattern like pinstripe, soft botanicals or a pale geometric, or use one bold print on a single piece so it stays the star. The paper can be repositioned while you work, which helps beginners fix mistakes.

Flip a Thrifted Dresser
Time: A weekend | Cost: Medium | Skill: Beginner to intermediate | Renter-friendly: Yes
A narrow three-drawer dresser can work as storage, a nightstand and a display top all at once. Clean the piece, sand it lightly, apply a bonding primer, then brush on two thin coats of low-VOC paint, and open the windows while you work. Deep green, warm white or soft clay all look fresh with new brass or ceramic knobs. Line the drawers with patterned paper so every pull shows a little surprise. Old painted furniture can contain lead, so test it first if the piece is very old.

Frame a Floor Mirror With Painted Trim
Time: 2 hours | Cost: Medium | Skill: Beginner | Renter-friendly: Yes
A big mirror bounces light around and makes a small bedroom feel wider. Take a plain full-length mirror and glue on wood trim or half-round molding around the edge, then paint it in a color from your palette. Place the mirror across from the window so it doubles the daylight. Lean it in a corner for a relaxed look, but secure it to the wall with an anti-tip strap, since tall mirrors can fall. Add a small plant or basket at the base so the corner feels finished.

Make a Cork Board Wall With Painted Frames
Time: 1 hour | Cost: Low | Skill: Beginner | Renter-friendly: Yes, with hooks
A cork board grid keeps photos, notes and jewelry on display without crowding the desk. Buy cheap wooden frames, remove the glass and glue cork tile inside, then paint the frames in two or three palette colors. Hang four or six in a tidy grid with even gaps, which looks more planned than random squares. Use small tacks for earrings and necklaces, and pins for photos, tickets and to-do lists. The cork absorbs sound too, so the corner feels quieter and softer.

Knot a Beginner Wall Hanging
Time: 1–2 hours | Cost: Low | Skill: Beginner | Renter-friendly: Yes
A soft cord wall hanging adds texture and calm above a desk or bed. Cut lengths of cotton cord, attach them to a wooden dowel with simple loop knots, then tie rows of square knots to make a diamond or wave pattern. Trim the fringe straight or at an angle and brush it out so it looks fluffy. Cream and natural tones suit most palettes, and a few wooden beads add small details. Hang it on a removable hook or a single nail, and keep it at least a foot away from lamps.

Add Picture Ledge Shelves
Time: 1 hour | Cost: Low to medium | Skill: Beginner | Renter-friendly: Needs screws
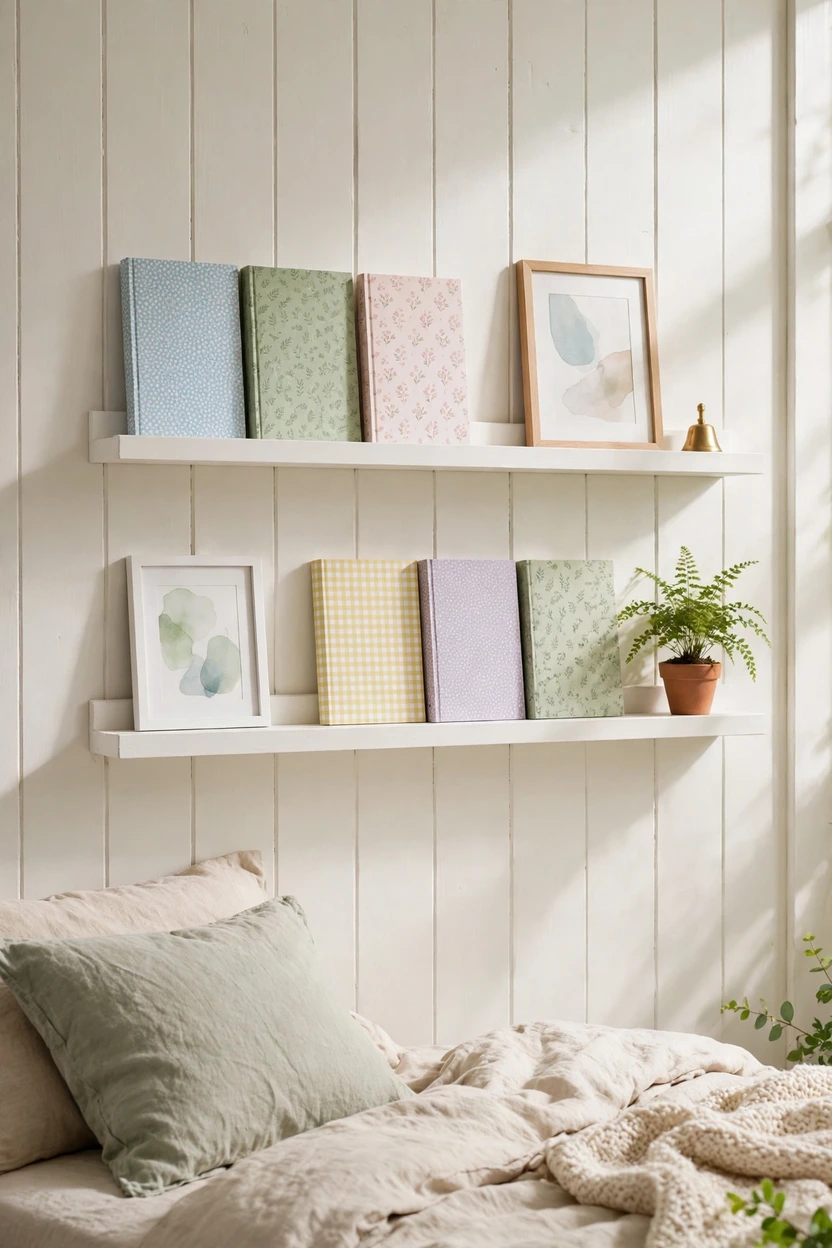
Picture ledges are slim shelves, about 3 to 5 inches deep, that let you lean books face-out and frames in front. They cost less floor space than a bookcase and turn favorite covers into art. Build one from a pine board with a thin strip glued along the front edge to hold items in place. Space two or three ledges about 10 to 12 inches apart and paint them to blend with the wall. Keep the heaviest stack on the lowest ledge, and save the top ledge for light frames and a small plant.
Build a Window Propagation Shelf
Time: 1 hour | Cost: Low | Skill: Beginner | Renter-friendly: Yes
A narrow shelf in the window turns plant cuttings into living decor and gives the room fresh color. Mount a slim board on brackets just below the sill, or hang one from a curtain rod with rope, then line it with small glass jars. Pothos, philodendron and spider plant cuttings grow roots in water and are easy for beginners. Give them bright, indirect light and change the water every week. Some houseplants are toxic to pets, so check each plant before you bring it home.

Make an Over-the-Door Canvas Organizer
Time: 1 hour | Cost: Low | Skill: Beginner | Renter-friendly: Yes
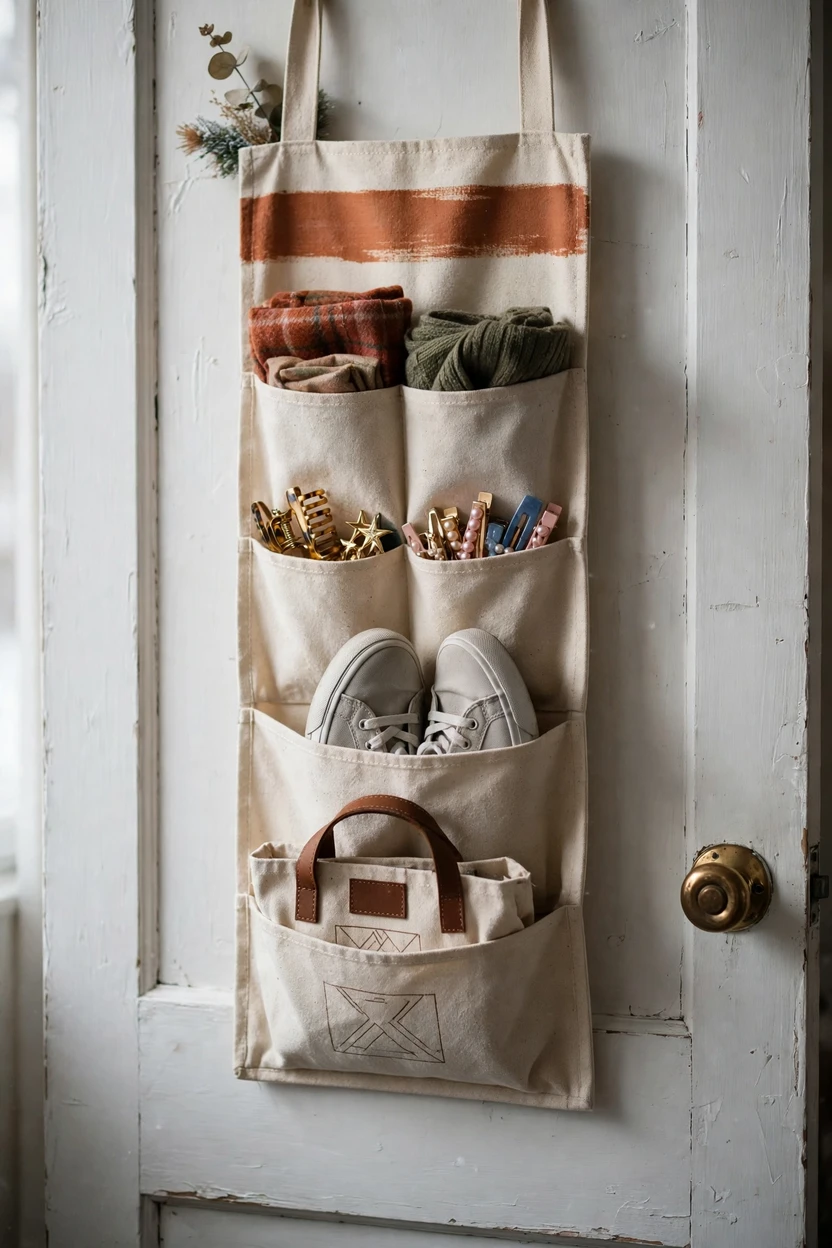
The back of the door is free storage most rooms ignore. Cut a canvas drop cloth into a long panel, fold up pockets, glue or iron-on hem them closed and attach the top to an over-the-door hanger rod. Use the pockets for scarves, hair accessories, small bags and slim shoes, so none of it lands on the floor. Pick neutral canvas and add a painted stripe or stenciled pattern to match the room. Always let hot styling tools cool completely before they go into a pocket.
Build a Floating Nightstand
Time: 1 hour | Cost: Low to medium | Skill: Beginner to intermediate | Renter-friendly: Needs screws
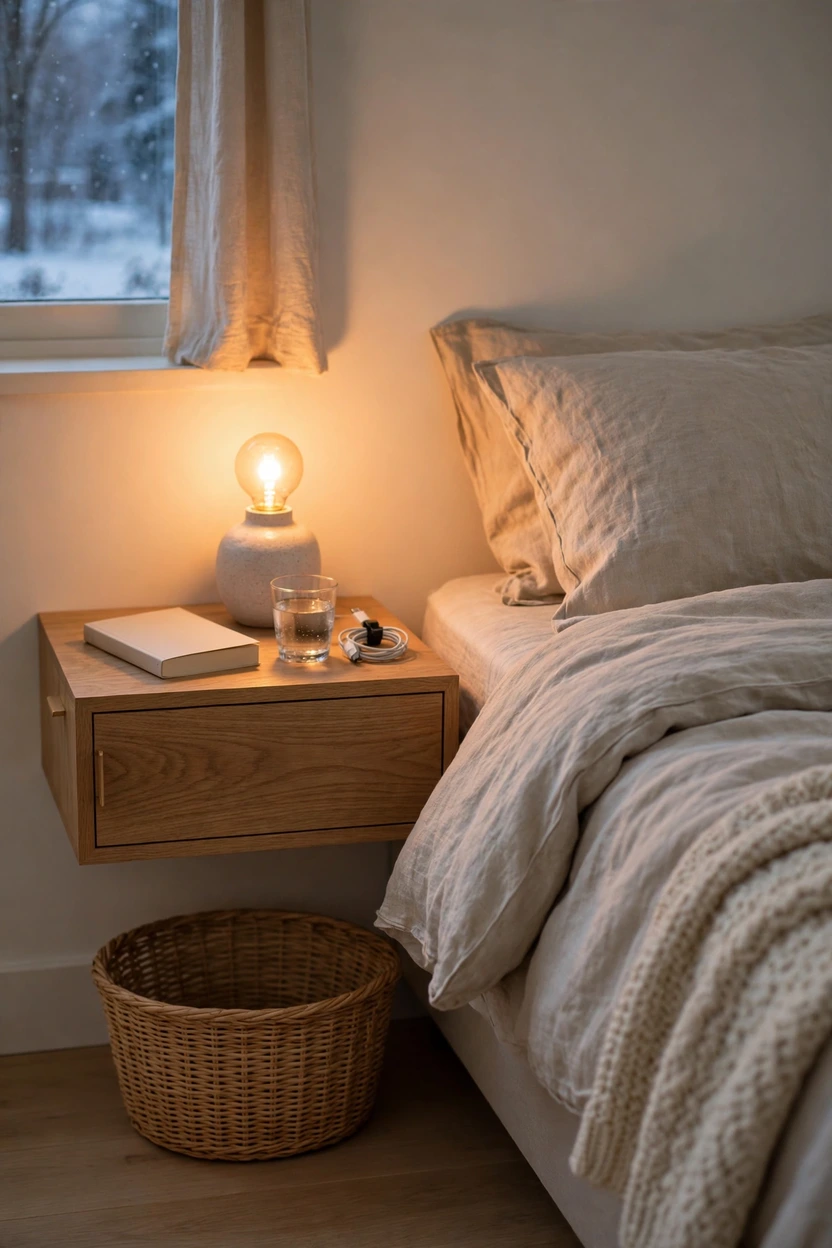
A floating nightstand keeps the floor clear, which makes a small room look bigger and easier to clean. Build a small box shelf with one drawer, or mount a simple board on strong brackets, at about mattress height or just above. Fasten it into a stud or use anchors rated for the load. A 10 to 12 inch width and a depth near 8 inches hold a lamp, a book and a glass of water. Run charging cords through a small notch or clips so no wires dangle, and use an LED bulb in the lamp to keep things cool.
Styling Tips
Stick to three colors. One main shade, one partner and one small accent keep a tiny room calm. Cream, white or pale wood can act as the quiet backdrop.
Go big with art, small with clutter. One large piece reads cleaner than ten tiny ones.
Layer the light. Combine a ceiling light, a desk lamp and a soft glow from LED strips or a bedside lamp, so the room works for homework and for winding down.
Mix textures. Knit, linen, cork, wood and glass add depth, so a simple palette never looks flat.
Repeat shapes. If you paint an arch, echo it with a round mirror or round pillows.
Leave breathing room. Empty wall space is part of the design, especially in a small room.
Let your teen have one “this is me” corner. A hobby shelf, a poster wall or a reading spot makes the room feel personal.
Practical Implementation Ideas
Working in the right order saves money and stops you from redoing things.
Declutter first. Donate or store anything your teen no longer uses before you add a single new item.
Settle the layout. Place the bed, desk and dresser so you keep a 24 to 30 inch walking path. Mark wall spots with painter’s tape.
Do paint and big wall projects. Painted arches, pegboards and peel-and-stick paper go first, since they’re messy.
Add the storage builds. Shelves, ledges, under-bed crates and the nightstand come next.
Layer lighting and fabric. LED glow, pillow covers, tapestries and mirrors give the room its mood.
Finish with personal touches. Photos, art, plants and keepsakes go up last, because they’re the easiest to move around.
Pick a project by time:
About 30–45 minutes: hidden LED glow (4), curtain-rod fabric headboard (10), polaroid photo wall (2), one no-sew pillow cover (9)
About 1 hour: rolling crates (6), cork board wall (14), picture ledges (16), propagation shelf (17), over-the-door organizer (18), floating nightstand (19)
1–2 hours: abstract canvas art (3), peel-and-stick closet doors (11), wall hanging (15)
About 2 hours: floating shelves (5), pegboard (8), framed floor mirror (13)
Half a day: painted arch (1), fold-down desk (7)
A full weekend: thrifted dresser flip (12)
Common Mistakes to Avoid
Buying before measuring. Measure the wall, the bed gap and the door swing before you shop or cut anything.
Hanging heavy things on weak wall spots. Shelves and desks need studs or rated anchors, and small adhesive hooks only suit light items.
Putting shelves right above the pillow. Heavy or hard items above a sleeping head are a risk. Move them to a side wall or the desk area.
Skipping surface prep. Dirty walls, glossy paint and new paint all weaken adhesive. Clean and dry the surface, and wait for fresh paint to cure.
Stacking every trend at once. A room with an arch, wallpaper, a tapestry and neon looks busy. Pick two or three hero projects.
Ignoring cords and electrics. Keep power strips off the floor, avoid overloading outlets, and choose UL-listed lights and adapters.
Leaving your teen out. If they don’t like it, they won’t use it. Let them choose colors and at least a few of the projects.
Covering the whole floor in stuff. The more floor you can see, the bigger the room feels.
Small-Space Alternatives
Very narrow room: Push the bed’s long side against a wall and use a fold-down desk (7) so the middle stays clear.
Shared room: Hang a curtain-rod fabric panel (10) between beds for privacy, and give each person a pegboard (8) or cork wall (14).
Sloped or attic ceiling: Use low picture ledges (16) and a floating nightstand (19) where headroom is limited.
No closet: Add an over-the-door organizer (18), rolling crates (6) and a painted dresser (12) for clothing and accessories.
No wall changes allowed: Choose the string photo wall (2), pillow covers (9), mirror (13), plants (17) and peel-and-stick paper (11).
Tiny windowless corner: Use hidden LED glow (4), a large mirror and light colors to bring brightness in.
Budget-Friendly Alternatives
Low spend (under an hour or a few hours):
String photo wall, no-sew pillow covers, LED glow, wall hanging, cork board frames
Thrifted frames, baskets and glass jars
Medium spend (a weekend):
Painted arch, abstract canvas, floating shelves, picture ledges, pegboard
A thrifted dresser with paint and new knobs
Higher spend (worth saving for):
Fold-down desk with good brackets
Quality full-length mirror
Peel-and-stick paper in a bold mural
Start in the first group, see how the room feels, then add one bigger project at a time.
Pro Styling Recommendations
Anchor the bed wall first. What sits behind the bed sets the mood for the whole room, so finish that wall before you touch the others.
Work in odd numbers. Groups of three or five items look relaxed on shelves and ledges.
Match your metals. Use brass, black or chrome as the repeating detail on knobs, brackets and lamps.
Test colors in the room’s real light. Paint a big sample, check it in the morning and the evening, and look at it with the lamps on.
Use mirrors on purpose. Put the mirror across from a window or lamp, not in front of a dark wall.
Take a quick black and white photo. If everything looks the same gray, add something lighter or darker for contrast.
Shoot your own Pinterest photos. Take vertical shots in morning light, clear the desk and leave empty space at the top for text.
FAQs
1. What are the best DIY room decor ideas for a small teen bedroom? The best ideas use the walls and hidden storage: a painted arch headboard, floating shelves, a fold-down desk, a pegboard and under-bed crates. Add warm LED lighting and a photo wall for personality. These projects keep the floor open and make the room feel bigger.
2. How do I make a small teen bedroom look bigger? Use light and mid-tone colors, place a mirror across from the window and mount storage on the walls. Keep the floor clear and choose a few large decor pieces instead of many small ones. Layered warm lighting also stops corners from feeling dark and tight.
3. How can I decorate a teen room on a budget? Shop thrift stores for frames and dressers, paint instead of buying new, and make pillow covers, art and organizers yourself. Many projects in this list use low-cost materials like twine, canvas and pine boards. Do one project at a time so you can spread the cost.
4. What are renter-friendly teen room decor ideas? Try a string photo wall, clear removable hooks, peel-and-stick paper, a curtain-rod fabric headboard, no-sew pillows and a leaning mirror. Use LED strips inside channels held with removable adhesive. Always read your lease and test adhesives on a hidden spot first.
5. What colors work best in a small teen bedroom? Light and soft mid-tones such as sage, cream, dusty blue and clay keep a small room open and calm. Add one deeper accent, like rust or forest green, on a single item or wall. The best palette is the one your teen picks, within a range of three colors.
6. How do I fit a desk in a small teen bedroom? Choose a fold-down wall desk or a slim floating desk, around 18 to 22 inches deep. Add shelves or a pegboard above it so supplies stay off the surface. Fix it into wall studs so it can safely hold a laptop and books.
7. Are LED strip lights safe in a teen bedroom? Quality LED strips are generally safe when used correctly. Choose UL-listed products with the right power adapter, keep the adapter ventilated, don’t coil or bundle the strip while it’s on, and check for frayed or exposed wires from time to time. Warm white light around 2700K feels better in the evening than cool white.
8. How do I add storage without a bigger room? Use the spaces you can’t see: under the bed, behind the door, on the walls and inside a dresser that also acts as a nightstand. Rolling crates, over-the-door organizers and floating shelves add storage without taking floor space.
9. How do I get my teen involved without losing control of the budget? Set the budget first, then let your teen pick three colors and two or three favorite projects from the list. Give each project a spending limit before you shop. Teens stay more excited when they own the choices.
10. What is the best bed layout for a small teen bedroom? Push the bed’s long side against a wall to free up the floor, or tuck the head into a corner. Keep a walking path of about 24 to 30 inches and don’t block the door or window. A floating nightstand keeps the bedside clear.
11. How do I hang things without damaging the walls? Use removable hooks and strips rated for the weight, clean the wall first and follow the product directions. To remove a strip, pull the tab slowly and parallel to the wall so the paint stays put. For anything heavy, like shelves or a desk, use screws in studs or proper anchors instead.
Conclusion
A small teen room doesn’t need to feel small. It needs a clear plan, a few smart builds and enough personality that the person living in it feels at home.
Start with one wall and one color. Maybe it’s a sage arch behind the bed, or a string of photos above the desk. Live with it for a few days, then add storage, then light, then the small touches that make it feel lived in.
Save this post to your teen room board and let your teen pick the first project. The best rooms grow one weekend at a time.