17 Winter Window Box Ideas That Feel Like Pure Magic

It’s 4:45 p.m. and the sky already looks like dishwater. You pull into the driveway, and every window on the street is flat and gray.
Then you spot yours. A deep green box under the glass, spilling fir and cedar over the edge. Red twigs fanning out like tiny fireworks. One string of warm light glowing in the dusk. The house suddenly looks lived in and loved, and you haven’t even gone inside yet.
That’s what a good winter window box does. It turns a cold, bare sill into a small scene from a snow globe.
And you don’t need a green thumb. Most of these ideas use cut evergreens, twigs, and berries pushed into the soil already sitting in your box. No planting. No daily watering. Many take 20 minutes or less.
Below are 17 winter window box ideas, from classic cedar and pine to a white and silver frost box, a glowing lantern box, and even a bird-friendly feast. After the ideas, you’ll get the step-by-step method, the mistakes to skip, small-space fixes, and budget tricks.
Quick answer: what goes in a winter window box? Cut evergreen boughs (fir, cedar, pine, juniper), colorful stems like red twig dogwood, berries like winterberry or holly, and a few pinecones or ornaments. Push them into the soil already in the box, tall in the back and short in front. In freezing climates, the soil freezes solid and holds everything in place. In milder climates, you can also plant pansies, ornamental kale, or cold-hardy cyclamen.
What is a winter window box? A planter on the outside of a window, dressed for the cold months with evergreen cuttings, twigs, berries, or frost-tolerant plants instead of summer flowers.
Table of Contents
17 Winter Window Box Ideas
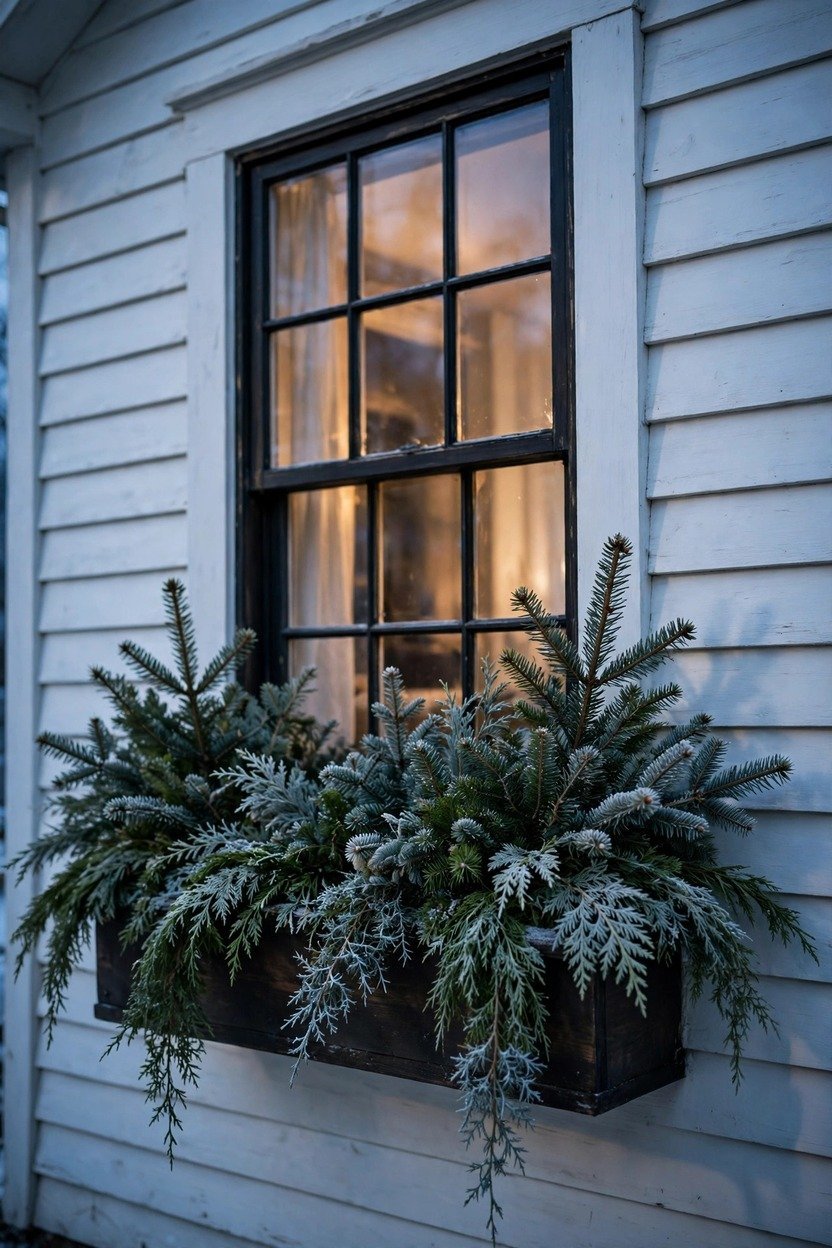
1. The Three-Evergreen Overflow
Start with the simplest recipe on this list: three kinds of evergreen packed in tight. Use sturdy Fraser fir or balsam for the back row, then add soft cedar and feathery juniper in front so the edges look loose and natural. Cut each stem long enough to push about 6 inches into the soil, and let the front pieces droop over the lip of the box. Different needle shapes catch light in different ways, which is why this looks like a tiny forest instead of a flat green block. It suits almost any house, from red brick to white farmhouse, because green goes with everything.
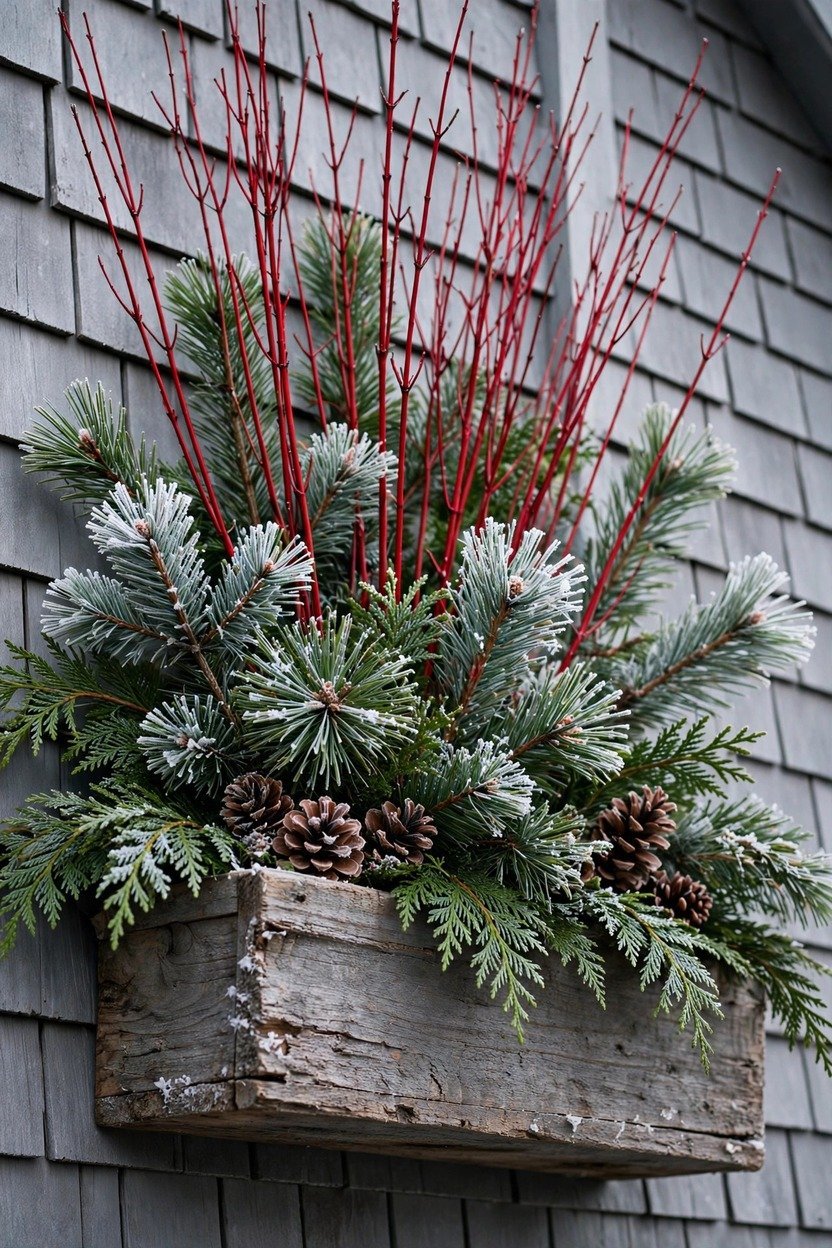
2. Red Twig Dogwood and Pine
Red twig dogwood is the easiest way to add real color to a winter box. The bark turns bright coral and cherry red in cold weather, and it looks brightest against deep green pine. Push a handful of stems into the back of the box and angle them outward like a loose fan. Fill the front with white pine and cedar so the red feels like a pop, not a pile. Red and green sit opposite each other on the color wheel, so the contrast reads clearly even from the sidewalk.
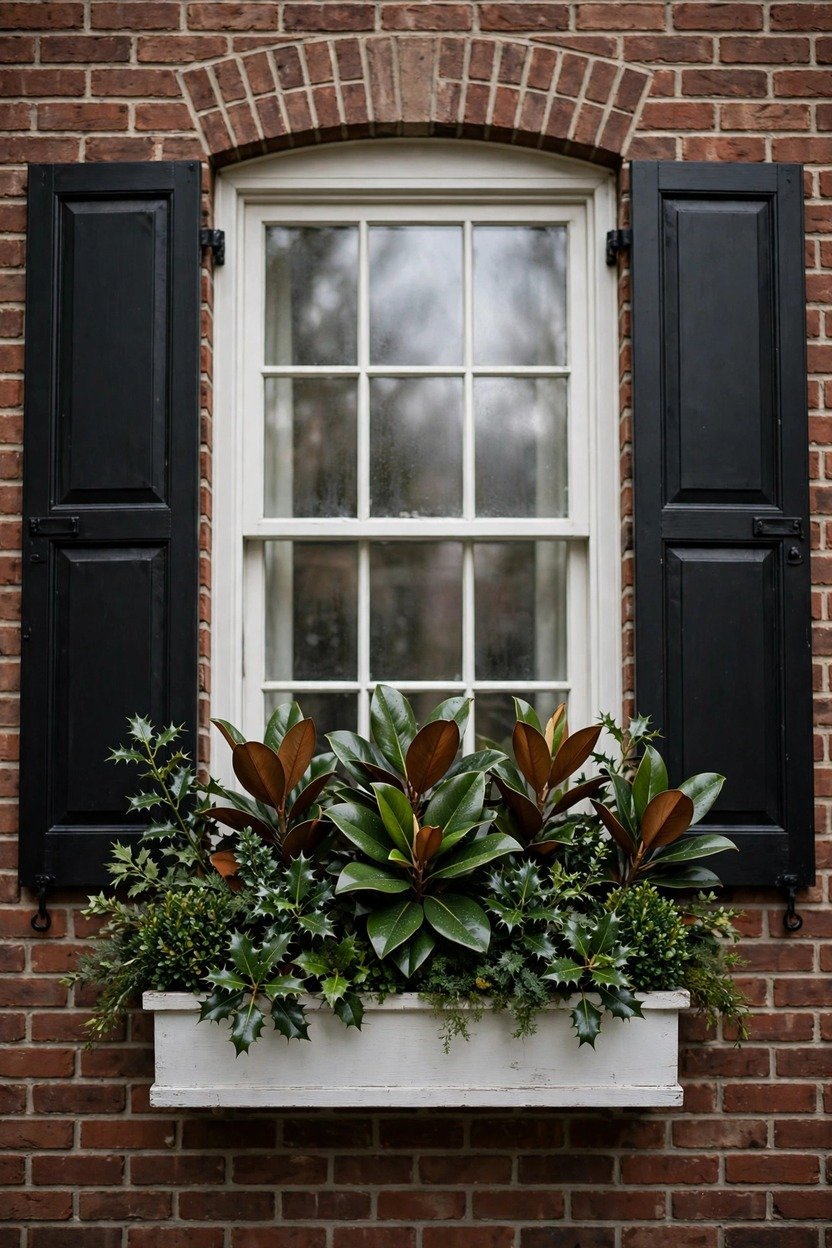
3. Magnolia Leaf and Boxwood
If you like a calm, traditional look, go all green and play with shades. Glossy magnolia leaves have a copper, suede-like underside, and when you tuck some leaves face-down you get warm brown flashes in all that green. Add boxwood sprigs for small, round texture and a few cuttings of holly for sharp edges. Magnolia is a broadleaf evergreen, so it holds its shape in the cold better than many soft greens. The result feels like an old Southern porch, quiet and polished.
Related: 20 Winter Porch Decor Ideas That Stop People in Their Tracks (Cozy, Easy & Cold-Proof)
4. White and Silver Frost
This is the look for people who want snow without waiting for it. Use fresh greens as the base, then tuck in silver dollar eucalyptus, flocked faux branches, white pinecones, and a few sprigs of dusty miller. The pale silver and white pieces bounce back dusk light, so the box seems to glow even without a bulb. Keep the palette to green, white, and silver, with no extra colors, or the frosty effect gets muddy. It looks especially good against gray, navy, and black siding.

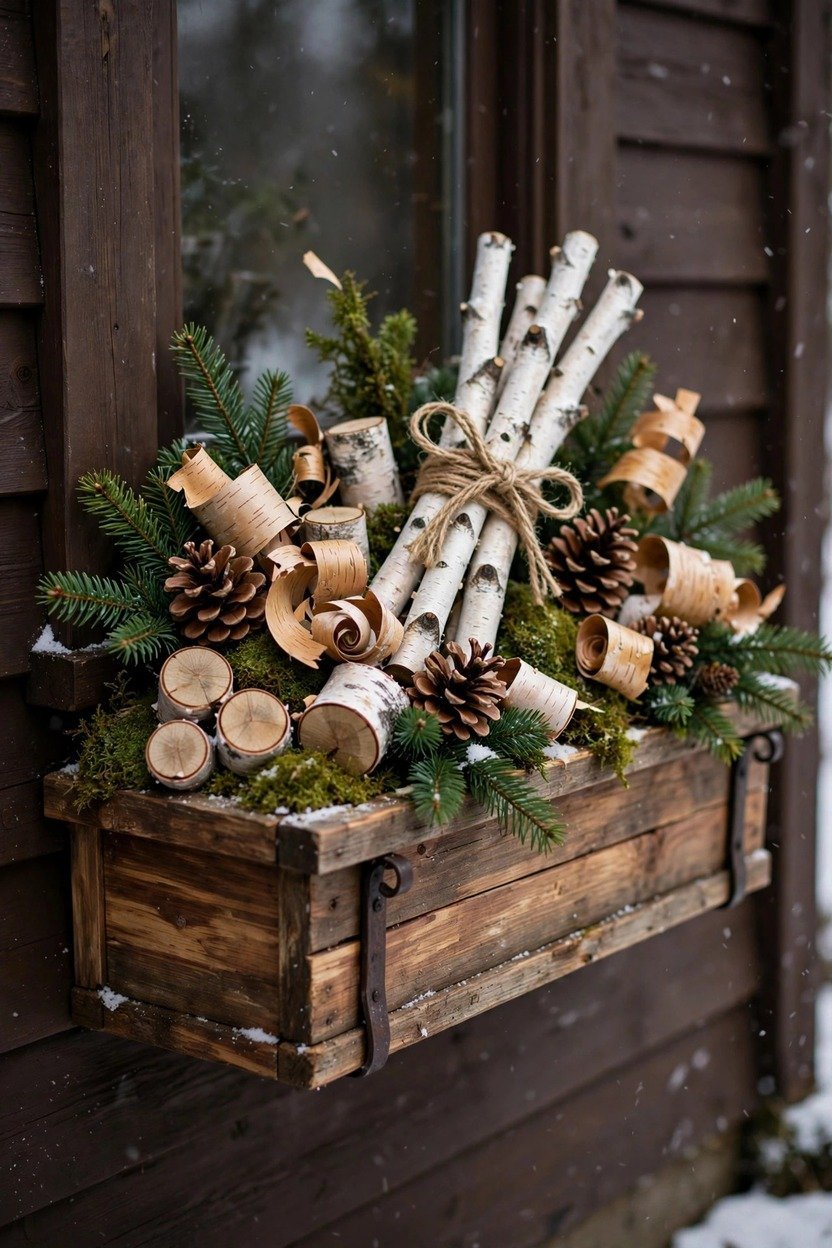
5. Birch Branch Woodland Box
Bring the forest to your windowsill with white birch. Bundle a few slim birch branches with twine and push them in as tall back stems. Add small stacked log rounds or a few chunks of bark at the front, then tuck in pinecones, a bit of moss, and fir tips. The pale, papery bark stands out against a dark house like snow on a branch. It’s a great pick for cabins, craftsman homes, and any house with wood trim.
6. Mini Flocked Trees in a Row
Three little faux Christmas trees lined up in a window box look like a tiny village. Choose trees 12 to 18 inches tall and set them in weighted pots or wire them to the box so wind can’t tip them. Surround the bases with real fir boughs, and tuck a few white lights around the trunks. Faux trees don’t drop needles or brown, so they hold up even if the greens around them fade. This is a smart pick when you want height without hunting for tall stems.

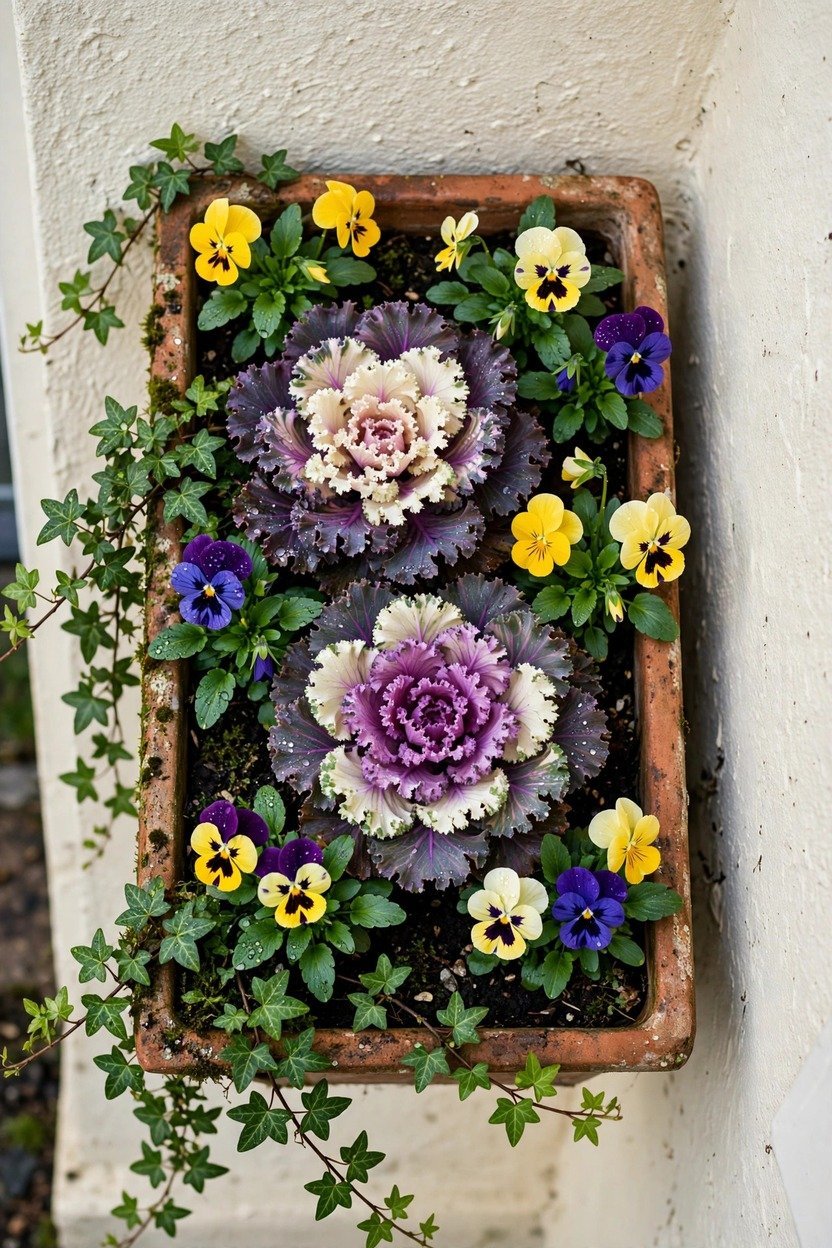
7. Ornamental Kale and Pansy Box
In milder winters, a living box is a lovely choice. Ornamental kale gets deeper purple, cream, and pink as nights turn cold, and pansies and violas bloom on warmer days. Plant two or three kale heads in the center of a 30 to 36 inch box, then add pansies along the front and a little trailing ivy to spill over the edge. Water on days above freezing, and check your plant tags for your hardiness zone. In places with hard, long freezes, treat this as an early-winter look and add cut greens later.
8. Plum and Burgundy Winter Blooms
This moody mix is for gardeners in milder zones who want actual flowers in January. Deep purple heuchera gives leafy color, hardy hellebores bring nodding blooms in late winter, and hardy cyclamen adds pink and white petals. Be careful here, because florist cyclamen sold as indoor plants are not frost-hardy, while garden types like Cyclamen hederifolium and coum are. Snowdrop bulbs tucked in the front pop up as an early surprise. Check each plant tag for your zone before buying.

9. Winterberry, Holly, and Rose Hip Box
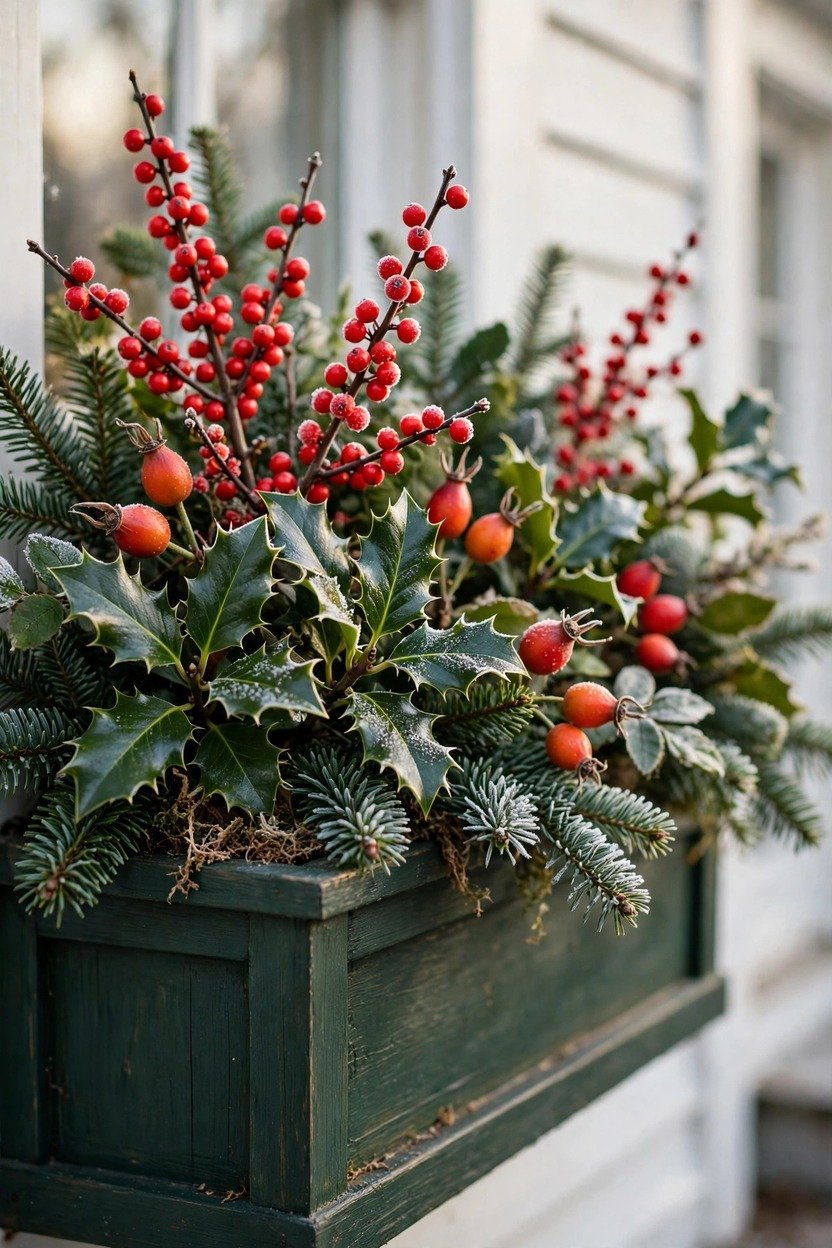
Berry stems give you color that lasts when flowers are long gone. Winterberry branches carry bright red berries on bare wood, holly adds shiny leaves, and rose hips bring in a softer orange-red. Place the berry stems near the front and middle of the box so they sit at eye level. Real berries fade over a few weeks, so keep a few faux berry picks on hand to refresh the look and wire them in place. Pair this with deep green fir and a plaid or velvet bow for a classic holiday window.
10. The Fairy-Lit Glow Box
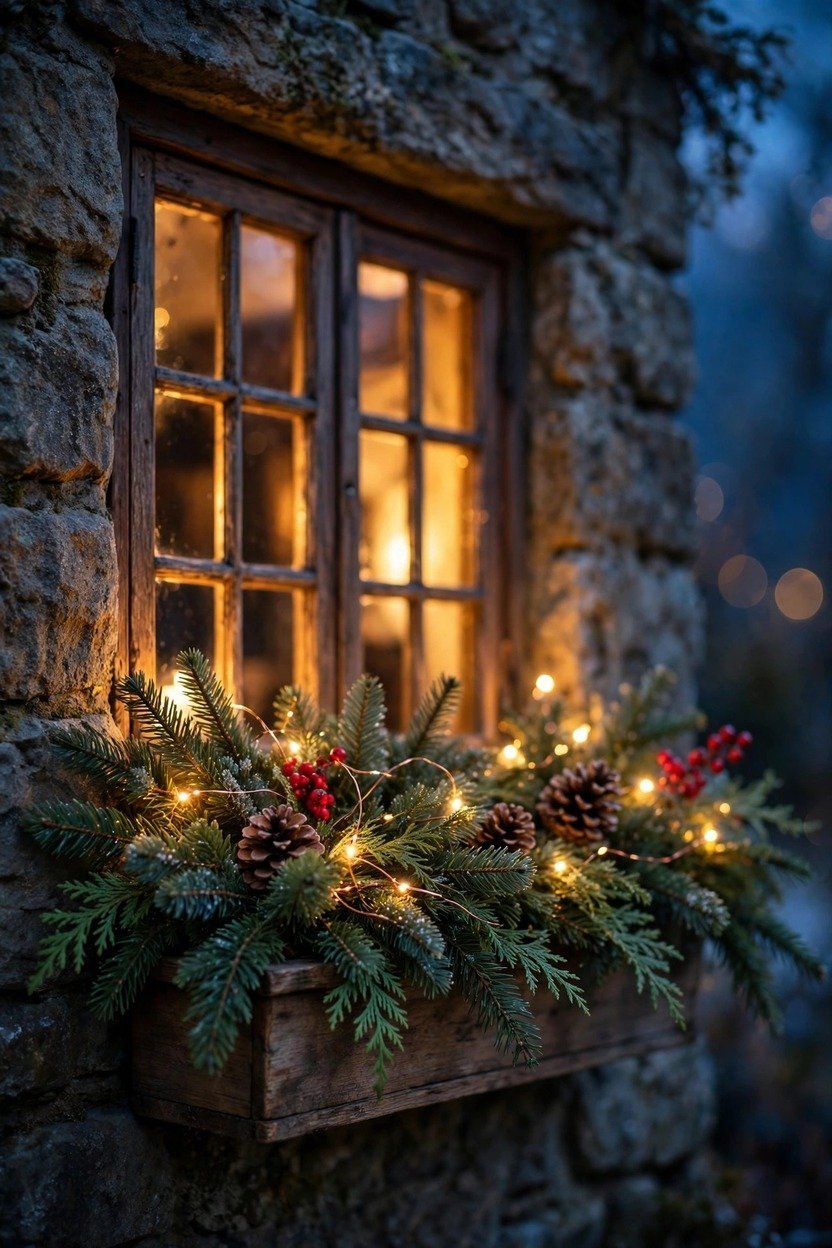
A string of warm lights turns an ordinary box into the brightest spot on the street at dusk. Choose battery-powered LED lights with copper wire, an outdoor rating, a timer, and a warm white glow. Weave the wire loosely through the greens, never tight, so the lights seem to peek out. Hide the battery pack in a zip-top bag tucked at the back of the box to keep it dry. LEDs stay cool, which matters because dry evergreens and hot bulbs are a bad mix.
11. Dried Orange, Pinecone, and Cinnamon
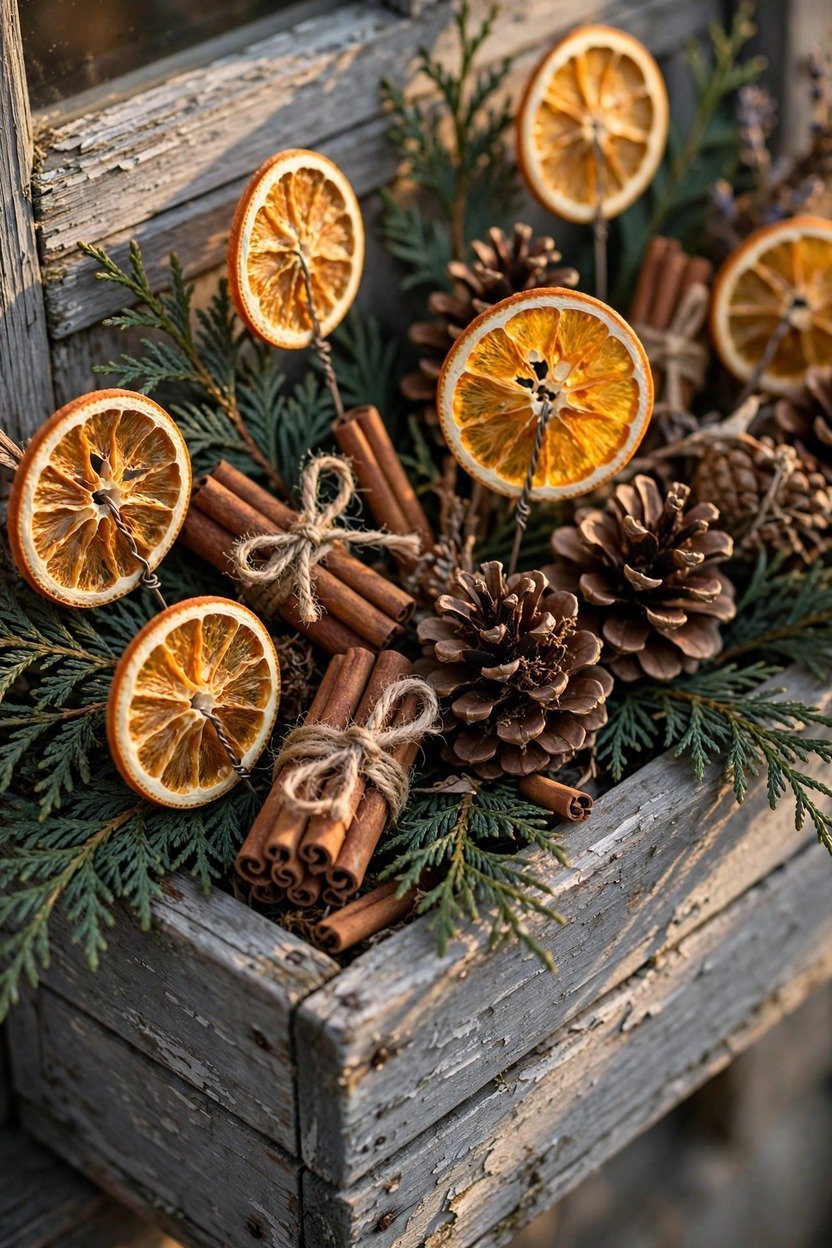
Warm neutrals feel cozy on a gray or white house. Slice oranges about a quarter inch thick, dry them in a 200°F oven for roughly 3 hours, flip them once, and wire each slice to a floral pick. Add pinecones, small bundles of cinnamon sticks tied with twine, and a few cedar boughs behind them. The amber slices glow against dark green like tiny stained-glass windows. Wire everything down, because wind and squirrels both love to steal small pieces.
12. Plaid Ribbon and Galvanized Farmhouse
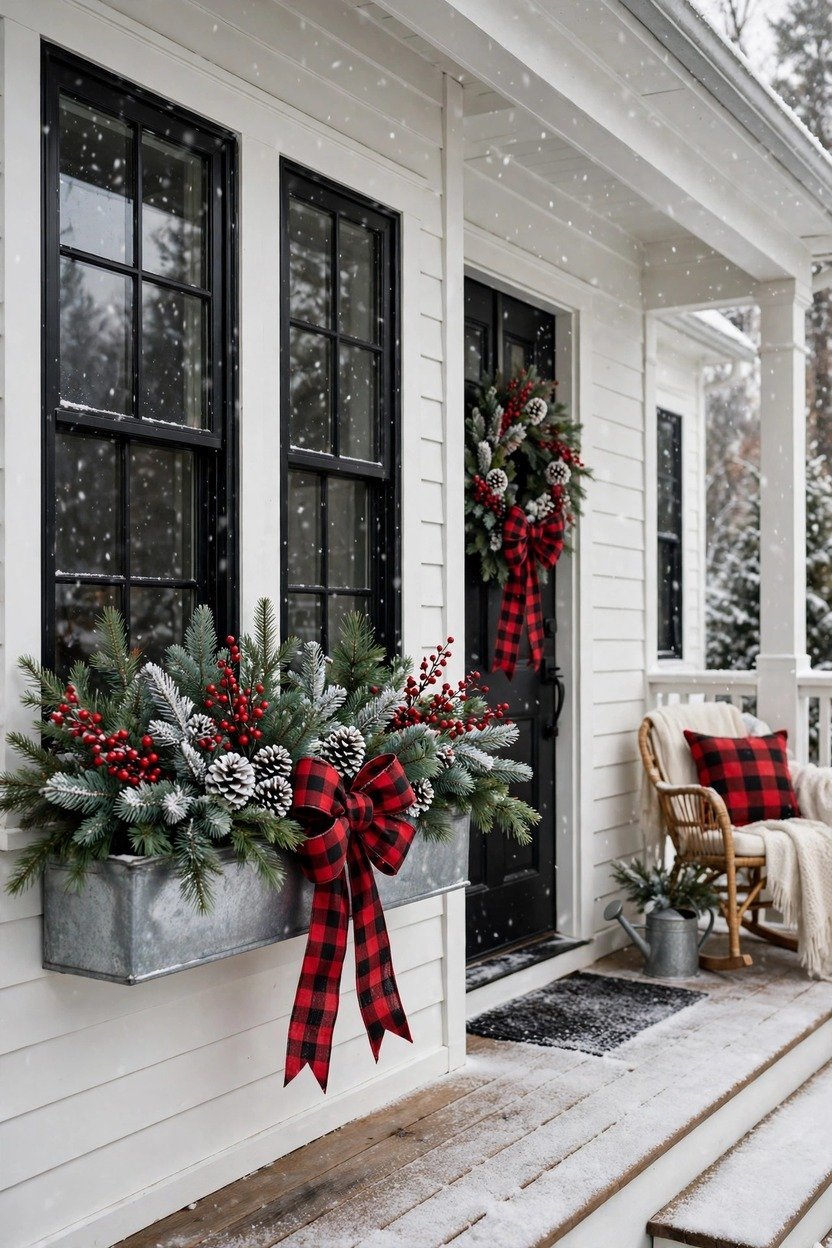
Set a galvanized metal trough inside a wooden box, or use the metal trough on its own, for an instant farmhouse look. Fill it with fir and pine, then add one big bow made from outdoor-rated wired ribbon in red and black buffalo check. Wired ribbon holds its loops in wet snow, while velvet goes limp in the damp. Tuck in white pinecones and a few faux berry picks for a touch of shine. Repeat the same bow on your front door wreath so the whole front of the house feels tied together.
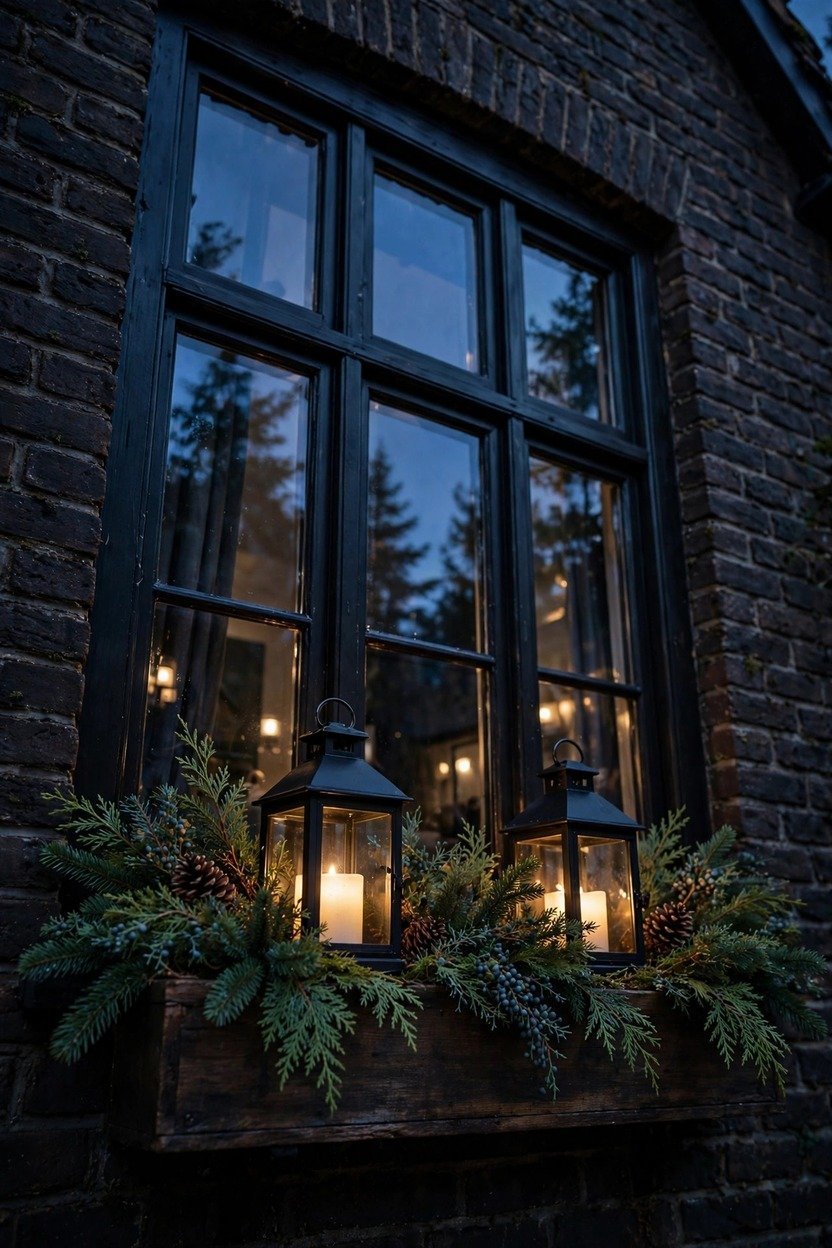
13. Lantern and Flameless Candle Box
Small lanterns bring a soft, flickering look right up to the glass. Choose two or three lanterns about 8 to 10 inches tall and set them on a flat stone or brick so they sit level. Pack greens tightly around the base so the lanterns look planted, not placed. Use flameless LED candles with timers, and skip real flames, since dry needles burn fast. At night the lanterns reflect in the window, so the glow seems to double.
14. Jewel-Tone Bauble Cluster
Think of baubles as jewelry for your greens. Cluster shatterproof ornaments in odd numbers, like three or five, in deep burgundy, emerald, and burnished copper. Wire each one to a floral pick and tuck the picks deep so the ornaments seem to nestle in the boughs. Stick to two sizes, one large and one small, so the cluster looks planned. Shatterproof plastic holds up outdoors better than glass, which can crack in a hard freeze.

15. Winter Herb and Evergreen Kitchen Box
A kitchen window box can look pretty and earn its keep. Thyme and sage handle cold in many zones, while rosemary usually needs milder winters, often zone 7 or warmer. Plant the herbs toward the front so you can snip them easily, then fill the back with cut cedar and pine for height. In the coldest climates, bring tender herbs inside and use evergreen cuttings alone outdoors. Check each plant tag for hardiness, since varieties differ.

16. The Bird-Friendly Feast Box
Birds work hard to find food in winter, and a feast box lets you watch them from your kitchen. Fill the box with fir boughs for shelter, then add millet sprays, a seed wreath or sealed seed cake, dried sunflower heads, and a few berry stems. Place it close to the glass, about 3 feet or less, because birds that take off from farther away hit windows harder. Sealed seed cakes make less mess than loose seed and attract fewer mice. Put this box on a window you actually look at, since half the joy is the little visitors.

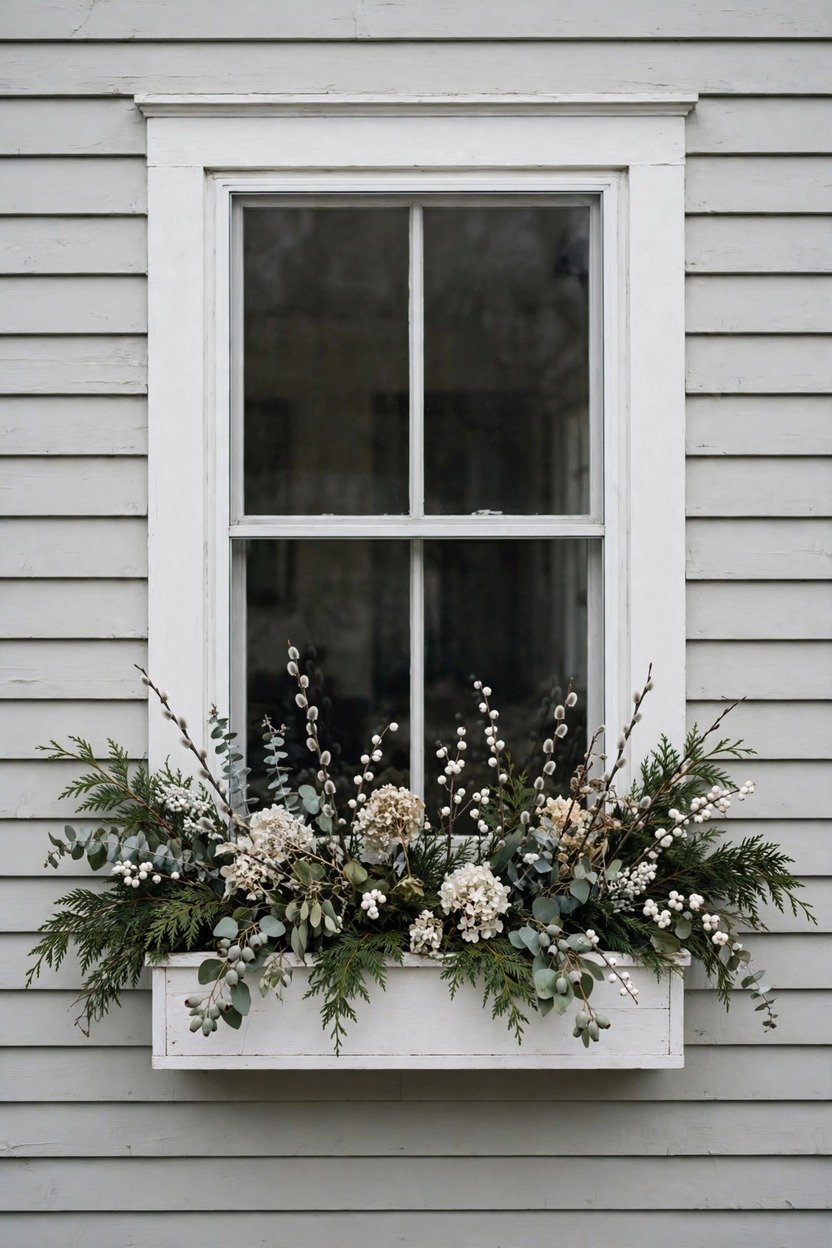
17. The January Reset: Seeded Eucalyptus and Pussy Willow
In early January, pull out the red bows and ornaments, but keep the greens. Add seeded eucalyptus, pussy willow stems, dried white hydrangea heads, and a few sprigs of white snowberry for a soft, silvery look. With the holiday colors gone, the box reads as winter, so it still looks right in February. Pussy willow stems show fuzzy gray catkins, which add a hint of spring without rushing the season. Save this idea if you want a box that works from New Year’s Day until the first daffodils.
Styling Tips That Make Any Winter Window Box Look Full
Build in three heights. Put tall stems at the back (dogwood, birch, fir), medium fullness in the middle (cedar, pine, magnolia), and short or trailing pieces at the front (juniper, ivy, boxwood). Layers add depth, and depth is what makes a box look designed instead of stuffed.
Stick to two or three colors. Green plus one accent, like red, silver, or copper, reads as planned. A third color is fine. A fifth turns the box into clutter.
Match your house color. Red and green pop on white, gray, and cream siding. On red brick, red can clash, so try cream, silver, or burnt orange instead. On navy or black, white and silver stand out. On wood and cabin styles, birch, pinecones, and plaid feel at home.
Go bigger than you think. People see your box from the street, not from two feet away. Overfill it until it looks like a small hedge, and cut stems long so they fan out.
Repeat one detail. Use the same ribbon, berry, or pinecone in the box, on the wreath, and on the porch pots. Repetition makes the whole front of the house feel like one story.
Mix textures. Pair needles with glossy leaves, bark with berries, and matte with shiny. Texture keeps a mostly green box from looking flat.
Think about dusk. Winter days are short, so most people will see your box in low light. Pale pieces (silver, white, birch) and a warm string of lights show up best.
How to Make a Winter Window Box, Step by Step
When to do it: Aim to finish by mid to late November, or before your first hard freeze. Greens that go into moist soil before it freezes settle in and stay put.
Related: 20 Mid-Century Modern Living Room Ideas That Feel Warm
What you need: Your window box with open drainage holes, potting mix, a bucket or tub, pruners, floral wire or zip ties, an anti-desiccant spray (such as Wilt-Pruf), and 3 to 5 kinds of greens, stems, and berries.
Time: 20 to 30 minutes.
Clear and refresh. Pull out spent summer plants. Keep the soil, and top it up with fresh potting mix to about 2 inches below the rim. Make sure the drainage holes are open so melting snow can escape and won’t crack the box.
Cut stems long. Cut or buy stems 8 to 12 inches long so you can push 5 to 6 inches into the soil and still have height above the rim. Make fresh cuts at an angle.
Soak your greens. Stand the cut stems in a bucket of cool water for a few hours, or overnight. This gives them a drink before they face cold, dry air.
Seal the moisture in. Spray the greens with an anti-desiccant on a mild day, following the label, and let them dry for a few hours. This coats the needles and slows moisture loss in wind and cold.
Water the soil. Dampen the soil, but don’t soak it. Evergreens stuck in moist soil will freeze in place when it gets cold, which holds them steady.
Build the back row. Push tall stems in first, angled slightly outward.
Add the middle layer. Fill the center with fuller greens, rotating your pieces so no gaps show.
Finish the front. Tuck short, trailing greens along the front edge so they spill over the lip.
Add accents. Wire in pinecones, berries, ribbon, or baubles. Attach each piece to a floral pick or tie it to a sturdy stem.
Anchor for wind. In breezy spots, bundle a few stems together with wire. Loop wire or a zip tie through the drainage holes or around the box so the whole arrangement can’t lift out.
Add lights. Weave in battery-powered, outdoor-rated LEDs last.
Step back and squint. Look from across the street. Fill any dark gaps with extra greens.
Keep it fresh all winter. Every week or two, pull out brown or brittle pieces and tuck in fresh ones. Brush off heavy, wet snow, but leave a light dusting, since it looks great. If you used live plants in a mild climate, check the soil on warmer days and water when the top inch feels dry.
Common Winter Window Box Mistakes to Avoid
Making it too small. A thin row of greens looks sad from the street. Pack stems in until you can’t see soil.
Cutting stems too short. Short stems wobble, flop, and show dirt. Longer stems go deeper and stay steady.
Skipping the soak. Dry cut greens brown fast. A few hours in water first buys you weeks.
Using too many colors. Red, gold, blue, purple, and silver all at once looks messy. Pick one accent.
Forgetting the wind. Loose stems blow out in the first storm. Wire bundles and anchor the whole arrangement.
Blocking the drainage holes. Trapped water freezes and can crack a box. Keep the holes clear.
Using tender plants in a hard freeze. Florist cyclamen and most summer annuals won’t survive. Look for hardy tags.
Choosing the wrong lights. Use outdoor-rated LEDs. Skip hot bulbs near dry greens.
Going too holiday-specific. Big Santa figures look odd in February. Keep the base neutral and add Christmas bits you can pull later.
Cutting greens from places you shouldn’t. Use your own yard, tree lot trimmings, or branches you have permission to take, not public parks or other people’s property.
Small-Space Alternatives
Narrow sill (4 to 6 inches deep): Use a slim box and cut stems shorter. Choose fewer, bolder pieces, like three dogwood stems, one big pinecone cluster, and a draping branch of cedar.
No sill at all: Hang a rail planter on a balcony or porch railing, or place a trough on the ground below the window. Rail planters need to be anchored firmly so wind can’t tip them.
Tiny windows: Skip the fullness and go for one strong move, like a single bundle of birch tied with ribbon, or a lantern with greens.
Windows you open often: Keep the box low, and avoid tall stems that block the sash.
Apartment or rental: Check your lease first. Use clip-on or railing planters that don’t need drilling, and choose faux greens if you can’t water or refresh stems.
Budget-Friendly Alternatives
Shop tree lots. Lots often sell trimmed fir and pine branches for much less than florist bundles, and sometimes give them away at the end of the season.
Cut from your own yard. Pine, cedar, juniper, boxwood, and holly branches from your own shrubs also help with pruning.
Reuse the Christmas tree. After the holiday, clip the branches off and tuck them into your box.
Mix real and faux. Use real greens for bulk and a few faux berries or picks that you can store and reuse next year.
Make your own accents. Dried oranges, painted pinecones, and twine bows cost very little.
Buy once, reuse. Quality outdoor ribbon, picks, and battery lights last several winters.
Use what you have. An old crate, a wooden trough, or a metal bucket works as a liner.
Pro Styling Recommendations
Use faux for the long-lasting parts. Berries, picks, and ornaments last for years, while fresh greens give the natural fullness.
Choose a dark box. Black, charcoal, and deep green boxes recede, so the plants steal the show.
Related: 17 Black and White Bathroom Ideas That Look Great on Camera
Check at dusk. Stand across the street an hour before sunset. If it reads well in dim light, it works.
Work in odd numbers. Three pinecone clusters beat four. Five baubles beat six.
Echo your front door. Use one material from the wreath or porch pots in the window box.
Add a stem that breaks the line. One tall twig or a branch that arcs out keeps the box from looking like a hedge trimmed with scissors.
Refresh once mid-winter. Replace tired pieces in late January. A quick refresh keeps the box looking just-made.
Winter Window Box FAQs
The Last Look Before You Go Inside
Pick one idea, not all seventeen. Choose the one that fits your house color, grab an armload of greens, and give yourself 20 minutes before dark.
Tomorrow evening, pull into the driveway and look at the window first. That small, bright, green square is the whole point. It tells everyone passing by that someone here cares about the cold months, too.
Save your favorites for next week’s tree lot trip, and tag me if you make one. I’d love to see it.